This month we’re talking about web browsers, probably the most-used app on your device (Mac, iPhone or iPad). Specifically, we’re covering Apple’s Safari web browser.
You can use your iPhone to scan paper documents into the Preview App on your Mac. This is a really convenient way to get documents into a PDF file so that you can email them, etc.
You can scan either into a new, blank document, or an existing PDF document, in which case your scans become new pages in that document.
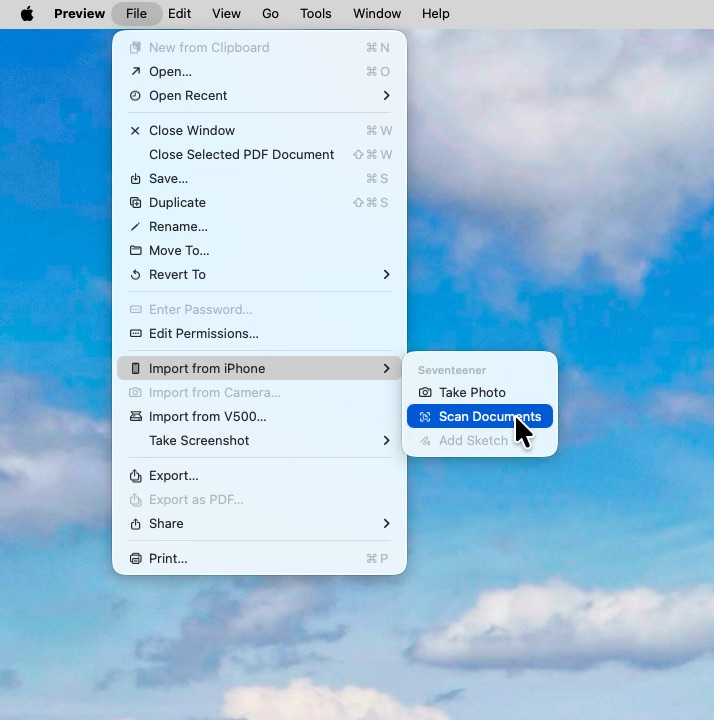
In the Preview App, select File->Import from Phone->Scan Documents.
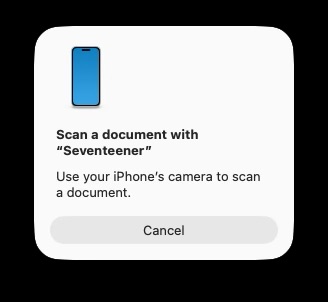
You’ll then see this prompt on the Mac.
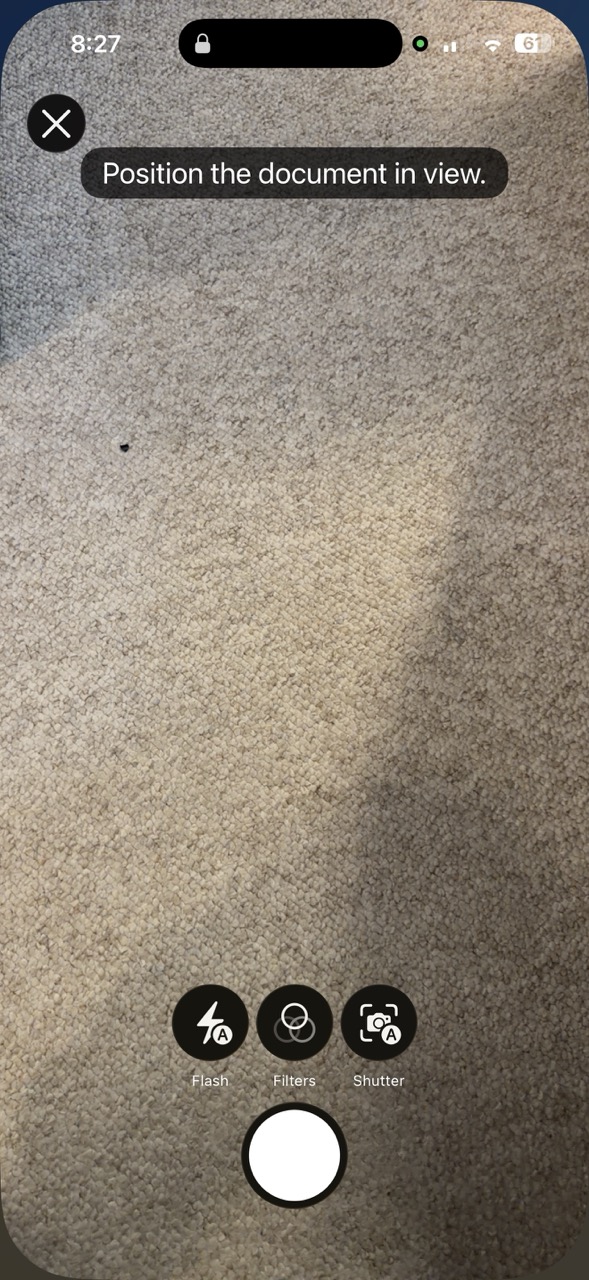
Your iPhone will automatically open the camera app as show below.
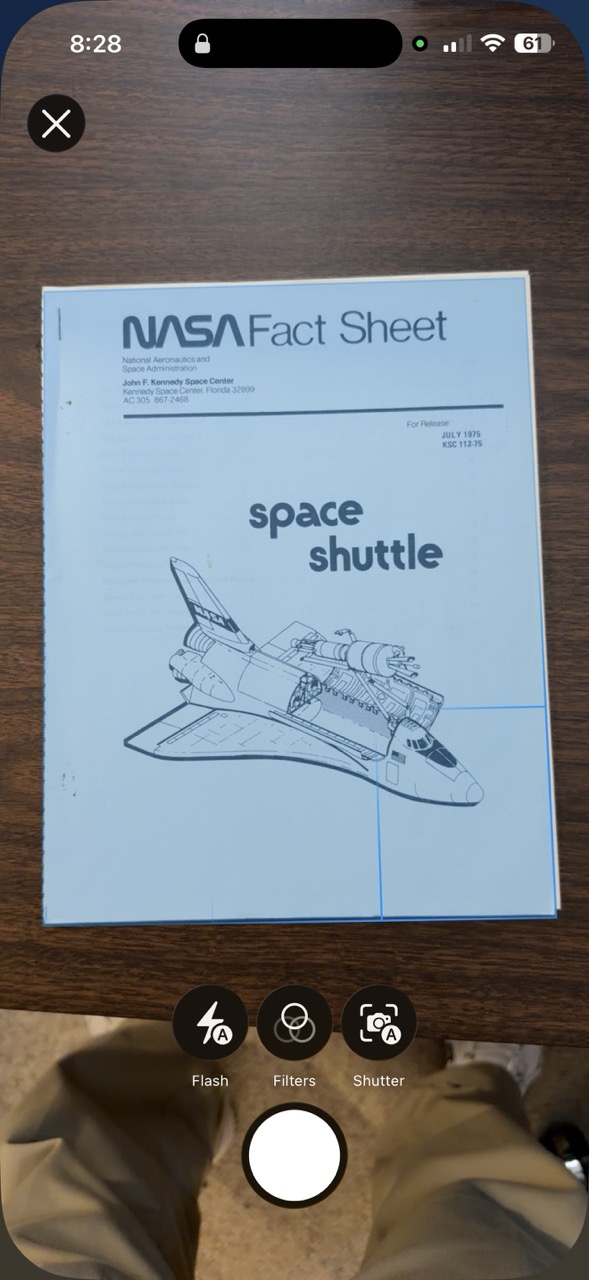
The iPhone automatically finds the document in the camera view and captures the scan when the image is in view and stable. You don’t need to press the shutter button. The automatic shutter can be a bit disconcerting if you are not used to it. If you want to turn it off, the button marked “shutter” will disable the auto-shutter, and you can then take each scan manually.
You will have the option to scan multiple pages. There will be a check mark at the upper right. Tap that when you have scanned the last page.
The pages will then automatically appear in Preview on your Mac.
This is very easy and nearly foolproof. Your devices need to be on the same iCloud account, and up-to-date with software, iOS 18 or greater, and MacOS 18 or greater.
Screen sharing with FaceTime can be a great tool for helping or collaborating over the Internet. It allows two-way (or multi-way) audio and/or video chats. It also allows you to view or control someone else’s screen (with permission). If you ever need to help someone who doesn’t live with you this is a great tool.
Prerequisites
FaceTime itself works on Macs, iPhones and iPads. You can do a FaceTime call to a Windows user also, but that mode doesn’t support screen sharing.
On Apple devices, both parties must have an Apple ID and be signed into that on those devices. Most Apple users do have an Apple ID, and their devices are usually signed in.
Your device must have a microphone. A camera is helpful. All iPhones, iPads, iMacs and Mac laptops have a camera and a microphone, but some desktop Macs do not have those built in. You can use FaceTime audio and screen sharing on a Mac with a microphone only but no camera. This is despite a message that says “To use FaceTime, connect a camera.“
It seems weird that to do screen sharing (in either direction), you must have a microphone, but that’s the way it works at present.
If you try a FaceTime call without having a microphone, it may appear to work at first, but when the other party answers, you’ll get “Call Failed“.
FaceTime screen sharing requires iOS 18 or newer on iPhone, and iPad OS 18 or newer on iPads.
Messages and FaceTime
You can launch a FaceTime call from within the Messages app. This is probably the most reliable way to get started with screen sharing.
By exchanging text messages with the other party, you are greasing the skids by making sure that you have their correct Apple ID contact information. You can also ask them if this is a good time for a FaceTime call, and ask them to start using their Mac instead of their iPhone, if you want to share the Mac screen. It’s usually easier to deal with screen sharing on a larger screen. But if you want to share an iPhone or iPad screen, that works too.
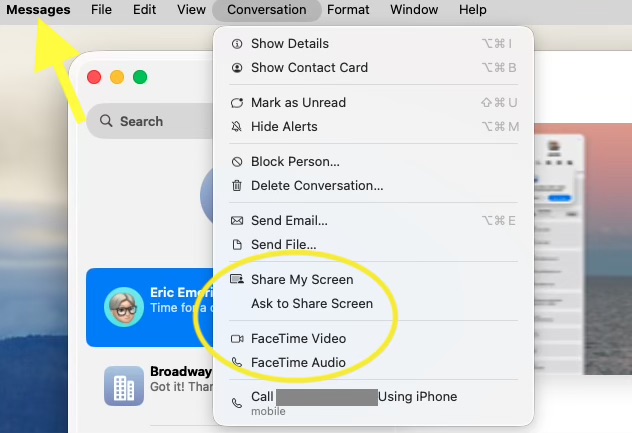
Once everybody is ready, and using the devices you want, you can start a FaceTime Audio or Video call from the Conversation menu in the Messages App.
When you screen share from Messages, it actually begins a FaceTime call. The recipient than has to answer that call before the system will ask for screen sharing permission. If asked to share your screen, you can accept, decline, or choose to share only a particular window.
In the example below, screen sharing is in progress. You see a FaceTime window above, and a shared Safari window below. The local user is sharing their screen with the remote user. Screen Sharing controls are visible at the top of the screen, and at the top of the shared window.
When screen sharing on the Mac, you can choose to share your entire screen or a specific window. Sharing only a specific window is good for privacy, but also as a practical matter, reduces the screen real estate occupied on the receivers screen, showing only the relevant information. This is especially important when the sending system has a larger screen than the receiving system. There’s little point sharing your 4K Mac screen to an iPhone. It would appear tiny.
FaceTime on iPad/iPhone
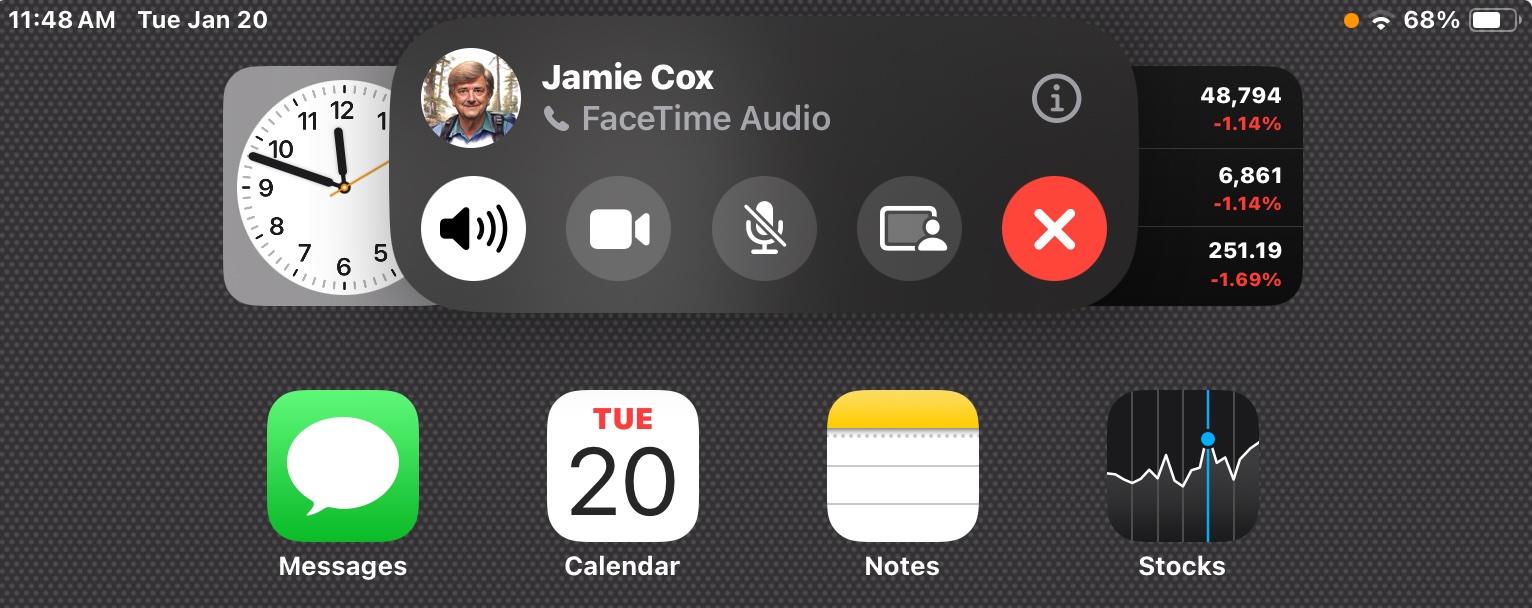
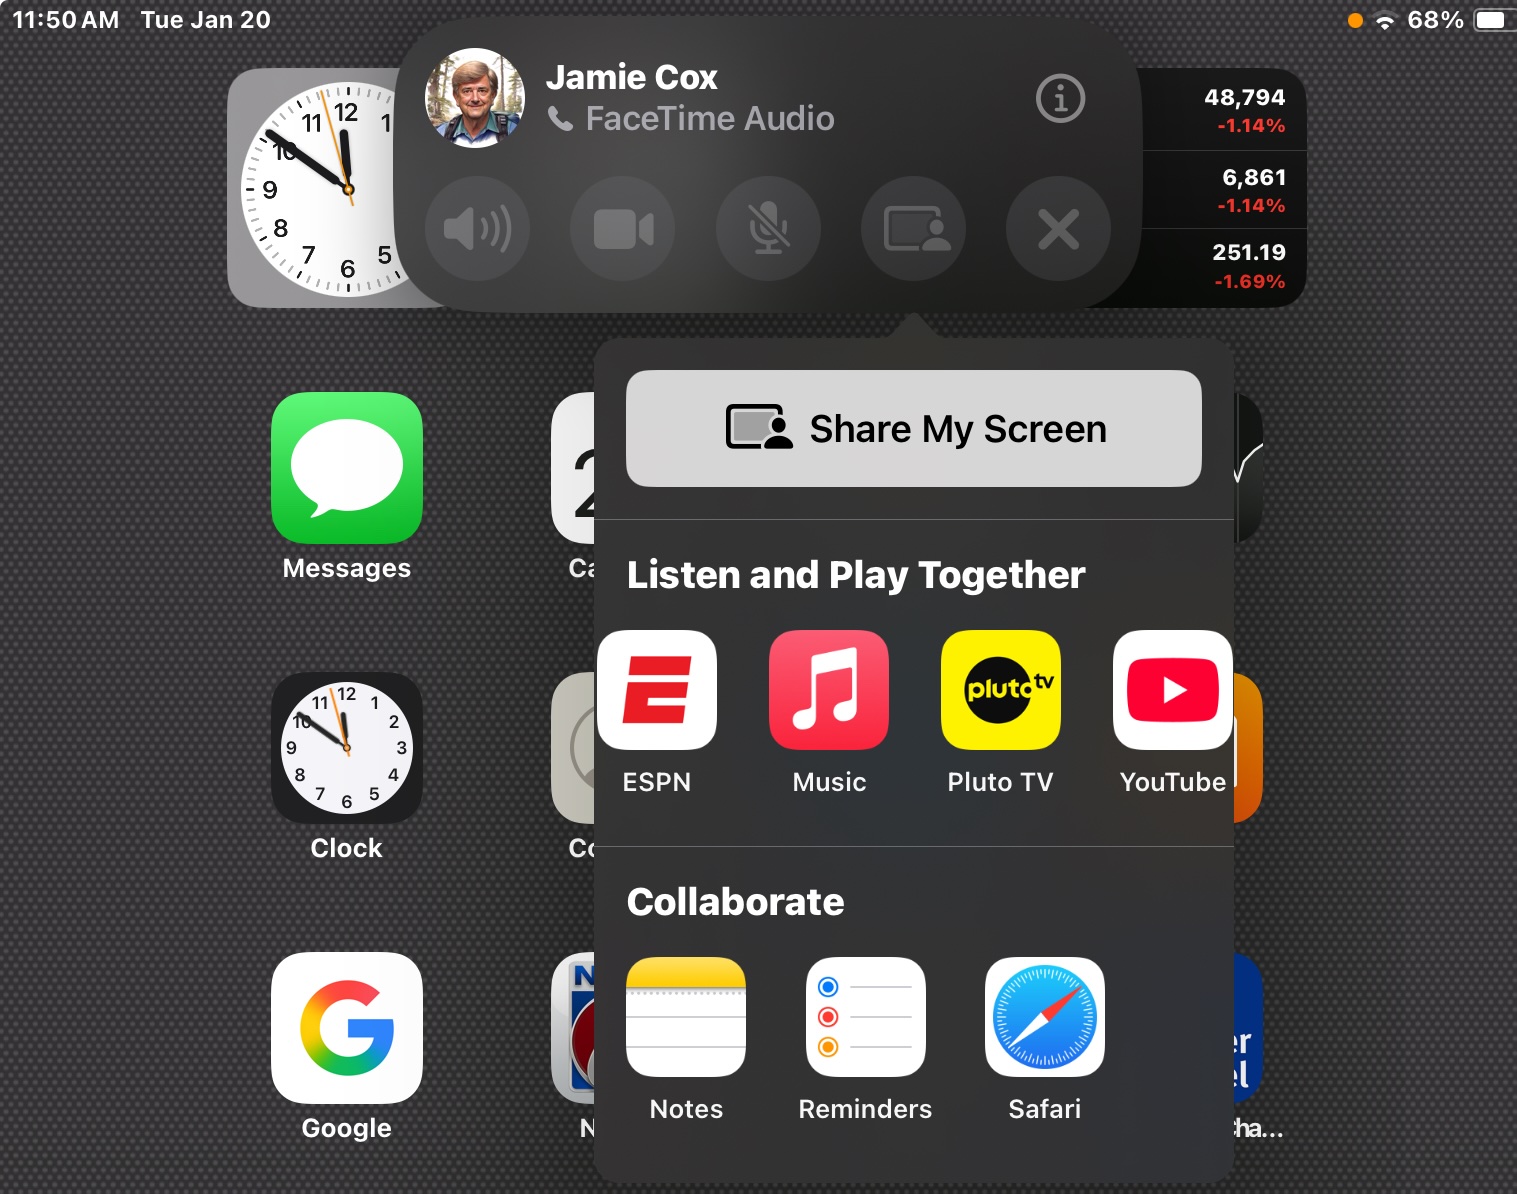
Here’s the FaceTime controls on an iPad. The red X hangs up the call. To the left of that is the screen sharing icon. Pressing that brings up the menu below, where you will want to press Share My Screen.
If you don’t see the screen sharing icon, try switching to a video call, even if both parties don’t have cameras. This sometimes makes the sharing icon appear.
Here’s what a FaceTime Video call looks like on an iPad. In this case, the other device did not have a camera. Note the small green dot at upper right. This is the universal indicator that some App is using your camera. If it appears yellow, that means an App is using your microphone. The region at lower right contains your own camera feed. (from this iPad)
Note that for iOS/iPadOS version 17, Screen Sharing is supported, but not remote control.
Microphones for Macs
If your Mac doesn’t have a microphone, you can use just about any USB microphone. Many are available. If you have a Mac Mini, be aware that it does have built-in speakers, although they are pretty weak. You will want your microphone cord long enough to get it away from the speakers and closer to you.
A great substitute for a USB microphone is a Bluetooth headset or Air Pods. That is recognized as a microphone for FaceTime purposes, and works really well, providing noise isolation.
Air Pods are a great choice for a video or audio call even if your device has a built-in microphone.
Share Your Screen
So, now you are happily sharing your screen, or your caller’s screen. You can converse back and forth discussing and explaining what you both see on screen. This is what you came for. Enjoy!
This topic is for the September, 2025 MacMAD General Meeting.
The answers range from “turn it off and back on”, to Accessibility Settings, to bad cables. 90% of iPhone and Mac Problems addressed in a few simple steps.
We’ve already gotten an important question on Assistive Access: How do I turn it off, and get out of Assistive Access? You can exit Assistive access by triple-clicking the side button (power button). This brings up the option to exit. You’ll need to enter the 4-digit assistive access code that you originally setup to exit back to your usual user interface.
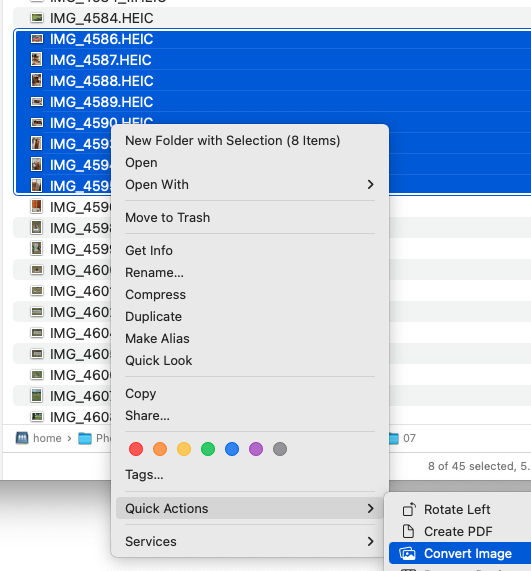
Also, a question came up about converting a lot of photos. Here is the solution we showed in the meeting:
Also, the macOS Finder has a convenient way to convert multiple images at once. Select some files, then right-click, or Ctrl-click to bring up the contextual menu. Then go down to Quick Actions and select Convert Image. You will see options to convert to JPEG, etc.
Several people asked questions about photo albums in Photos on the iPhone. One tip that might help you make albums appear more prominantly for you:
In Photos, scroll all the way to the bottom where you will eventually see Customize & Reorder.
On that screen, you can select which views of your photos you want to appear in Photos, and drag them into the order you prefer. I have put Albums at the top here, and turned off Memories and Featured Photos. It’s entirely personal preference, and you can adjust this as you like.
As always, here’s the complete iPhone User’s Guide from Apple. On that page, either use the search, or click Table of Contents to get started. If you read that, you’ll be ahead of everybody in understanding the iPhone. Note that the User’s Guide is always for the latest version of iOS. If you are using an older version, it won’t be exactly applicable.
This is the MacMAD Meeting topic for March, 2025, as of iOS 18.3.2.
Settings is a big topic. I’m going to mostly talk about iOS (iPhone) settings. There are literally thousands of separate items in the Settings app for iPhone.
Terminology
Settings for iOS are located in the Settings app. Settings for MacOS are in System Settings, formerly known as System Preferences.
Expect it: There’s a Setting for That
Settings affect everything you do with your device. Many behaviors we know and expect from iOS are optional and can be turned on, off, or adjusted.
One of my favorite rules of thumb for working with computers and smart phones is: It probably already does what you want and if not, it can be adjusted to do that. If you are wishing for a feature every time you use your device, you are probably not the first. The designers and developers also have to use these devices and they have included many of the features that they want as users.
Expect a lot, and you’ll get a lot.
How Settings are Organized
Search is at the top. That’s good because Search is often the easiest way to find the setting you want.
Next comes the Apple Account / Apple ID / iCloud settings. I think of this as being first because it’s important to Apple’s bottom line. Encouraging people to use their Apple account ultimately contributes to Apple’s income, so they put that right at the top.
Take a look at the Subscriptions section to find everything you are subscribed to, not only from Apple, but from any Apps in the App Store. You might find you are subscribed to something you no longer need.
After the Apple Account settings come about 27 system settings that seem randomly organized. They are divided into sections which each seem to mostly be in alphabetic order, but not always. This disorder is one of the reason many users throw their hands up and despair of ever finding anything in Settings.
At the end of the list comes the Apps section. Inside the Apps settings, everything is strictly in alphabetic order, which is good, because you may have dozens or hundreds of Apps installed, each with their own settings. The exception is hidden apps, which appear in a special section at the end of the list.
A Few Favorite Settings
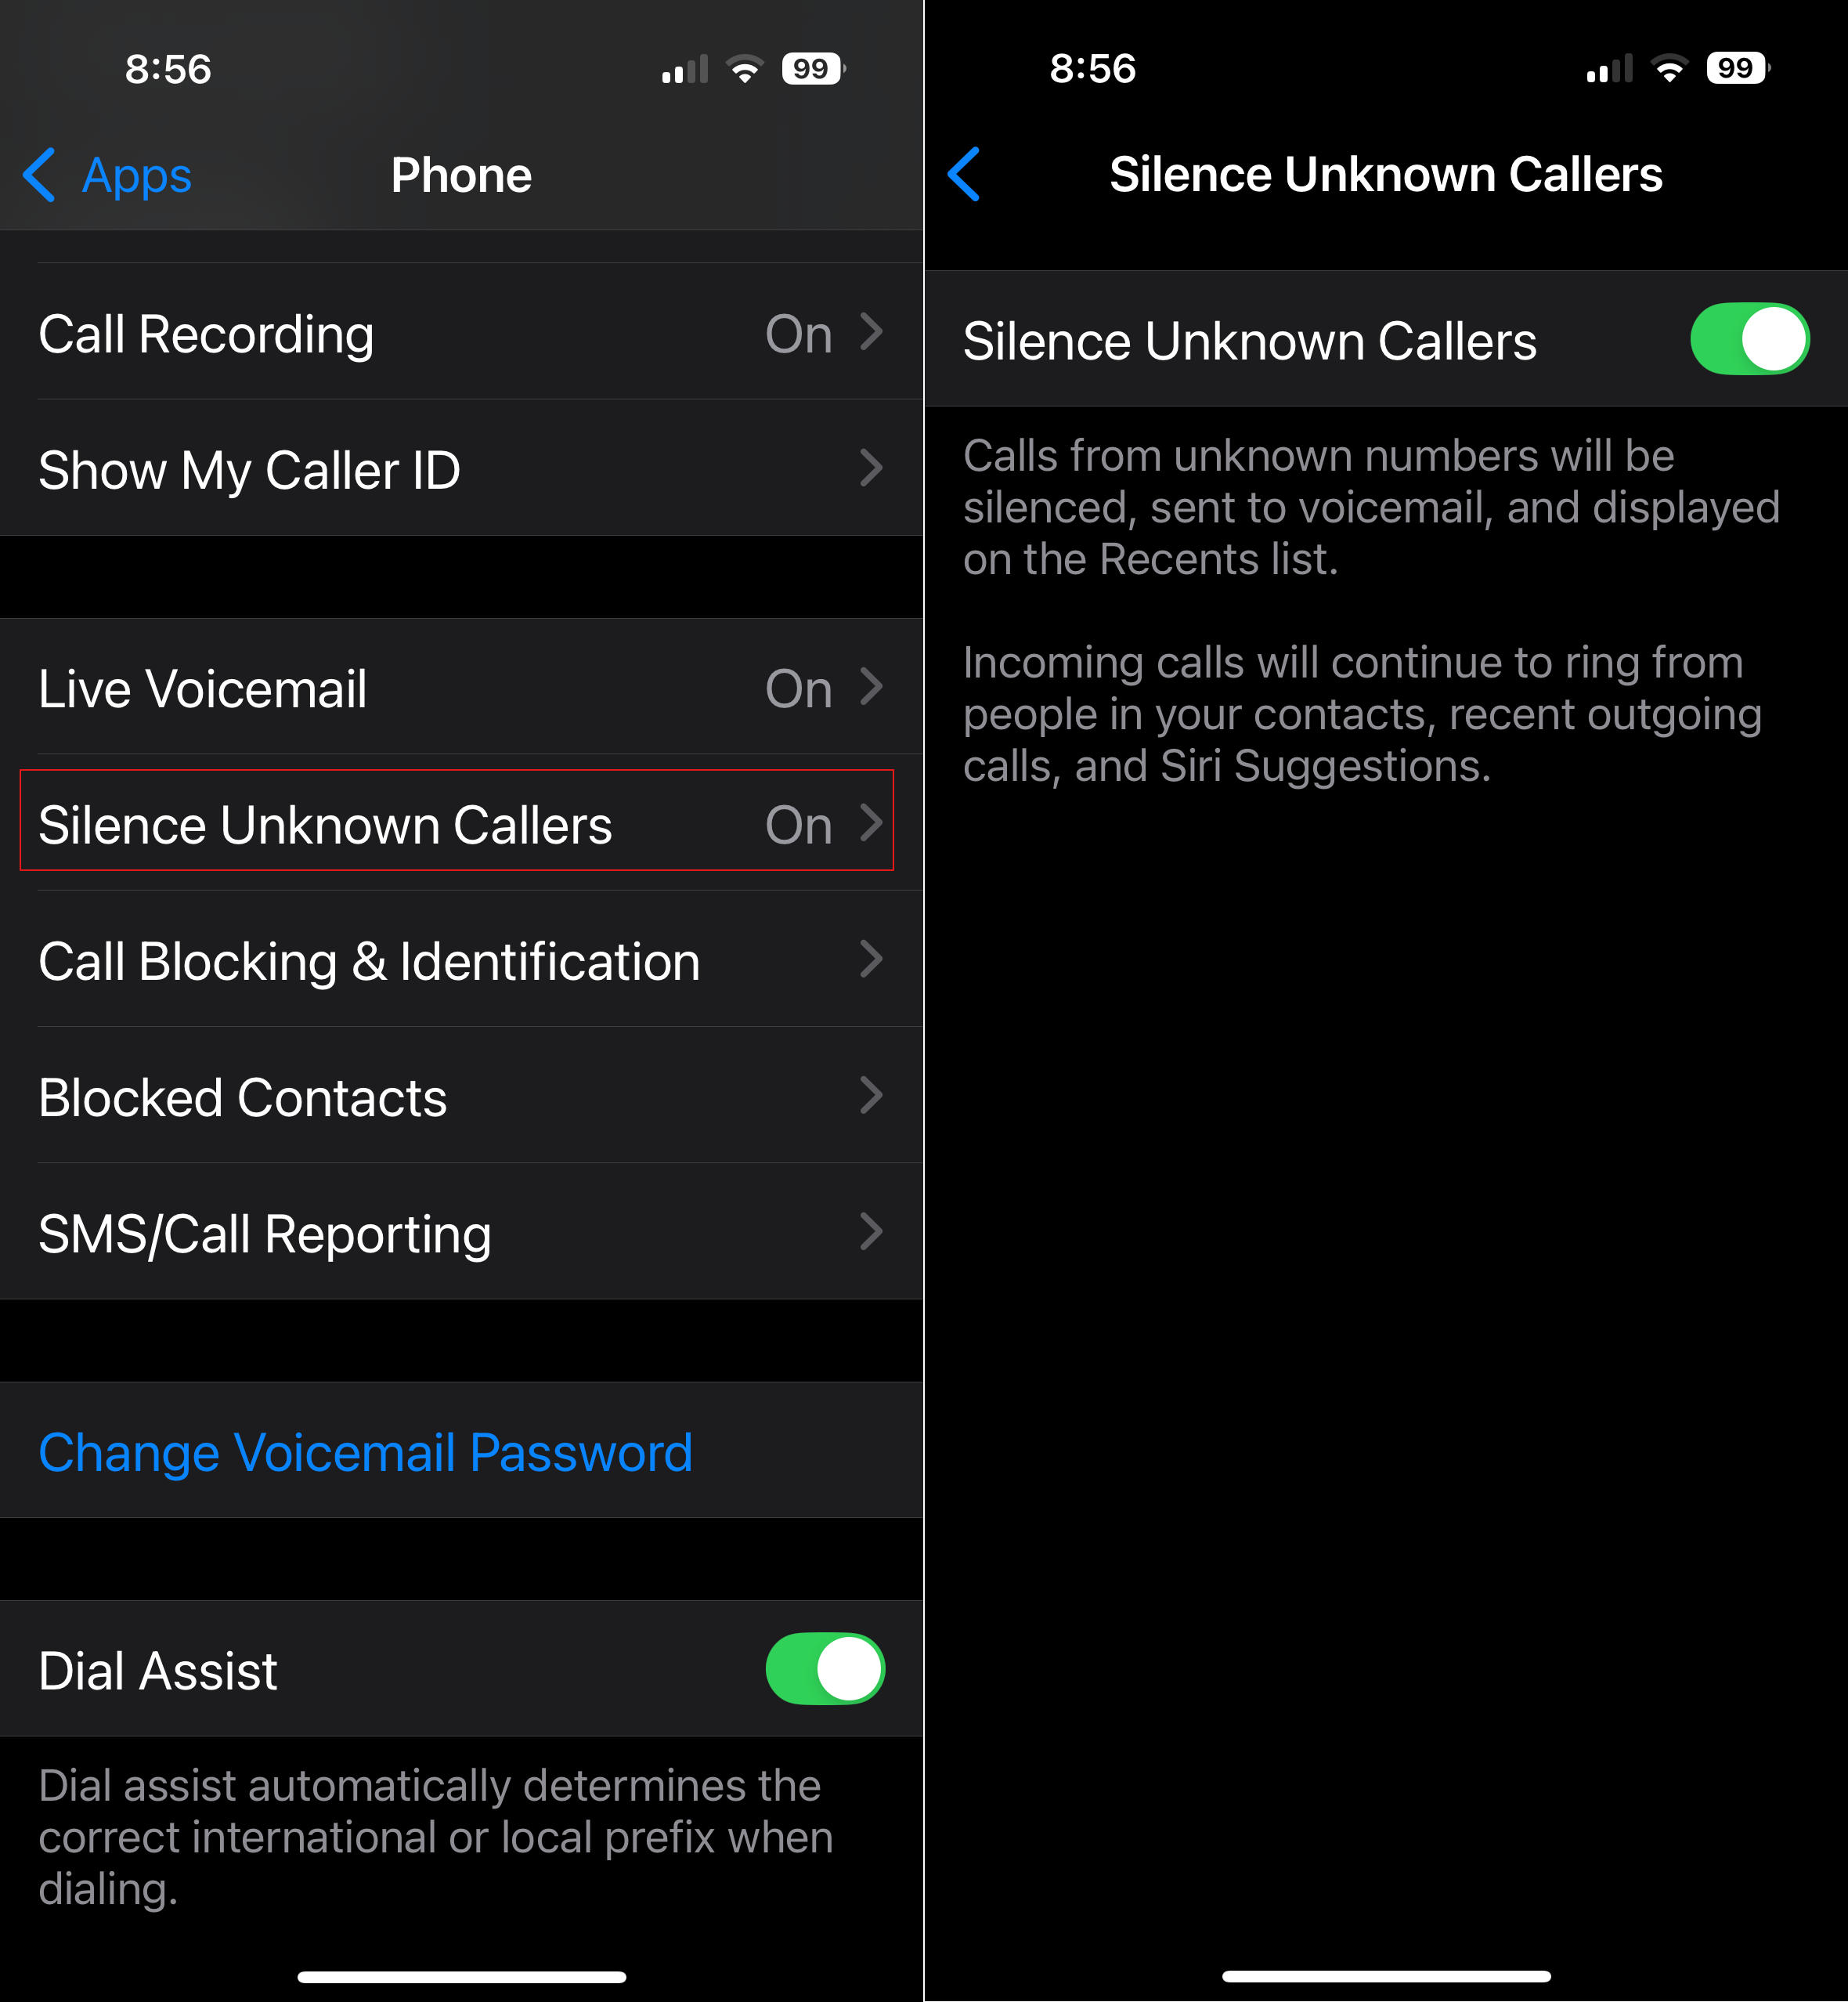
Silence Unknown Callers – This is in Apps ->Phone->Silence Unknown Callers. If you turn this on, it sends calls from numbers which are not in your contacts straight to voicemail. Your phone won’t ring. Also, notice Apps->FaceTime->Silence Unknown Callers. This one is lesser known, and spammers have started using FaceTime lately.
Screenshot
General -> About This often-overlooked section has lots of useful information and controls. What model of phone do I have? It’s in there. When does my Apple warranty expire? It’s in there. How full is my phone’s storage?
Accessibility – This (large) section is mostly for people with some sort of disability of sight, hearing, motor control, etc. But there are some gems in here that might be useful to everyone. Accessibility -> Face ID & Attention -> Require Attention for Face ID. This seems more like a security feature. I have this turned on which makes it less likely my phone will be unlocked without me knowing it.
Accessibility -> Side Button -> PRESS AND HOLD TO SPEAK (Siri). I have Siri selected here. When I hold the side button, the Siri Icon appears, and I’m speaking directly to her without having to say her name first.
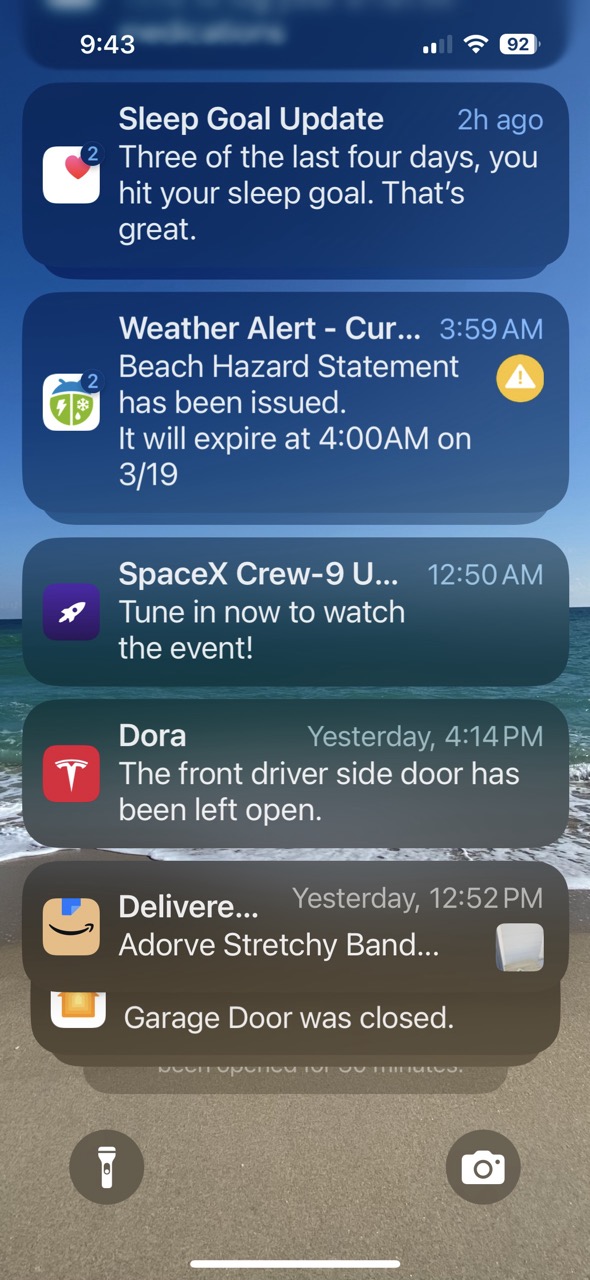
Settings -> Notifications – Here’s the answer to those frequent questions like “How do I get rid of those red numbers on my App icons?” and “How can I get rid of all these popups on my screen from Facebook?”
Those numbers on App icons are called badges. They are a form of notification. You can turn those on or off for each App individually in the Notifications section of Settings.
App Icons with Badges
We live in a marketplace of attention. Companies with Apps typically want you to pay attention to their app. Your attention is worth money to them. So they often try to capture your attention with lots of notifications. Of course, this becomes overwhelming when you have dozens or hundreds of Apps clamoring for your attention. iOS allows you to selectively enable or disable notifications from Apps.
Notifications in Notification Center
For many of the worst offenders, like Facebook or other social media apps, your best option is to turn off notifications for those Apps altogether.
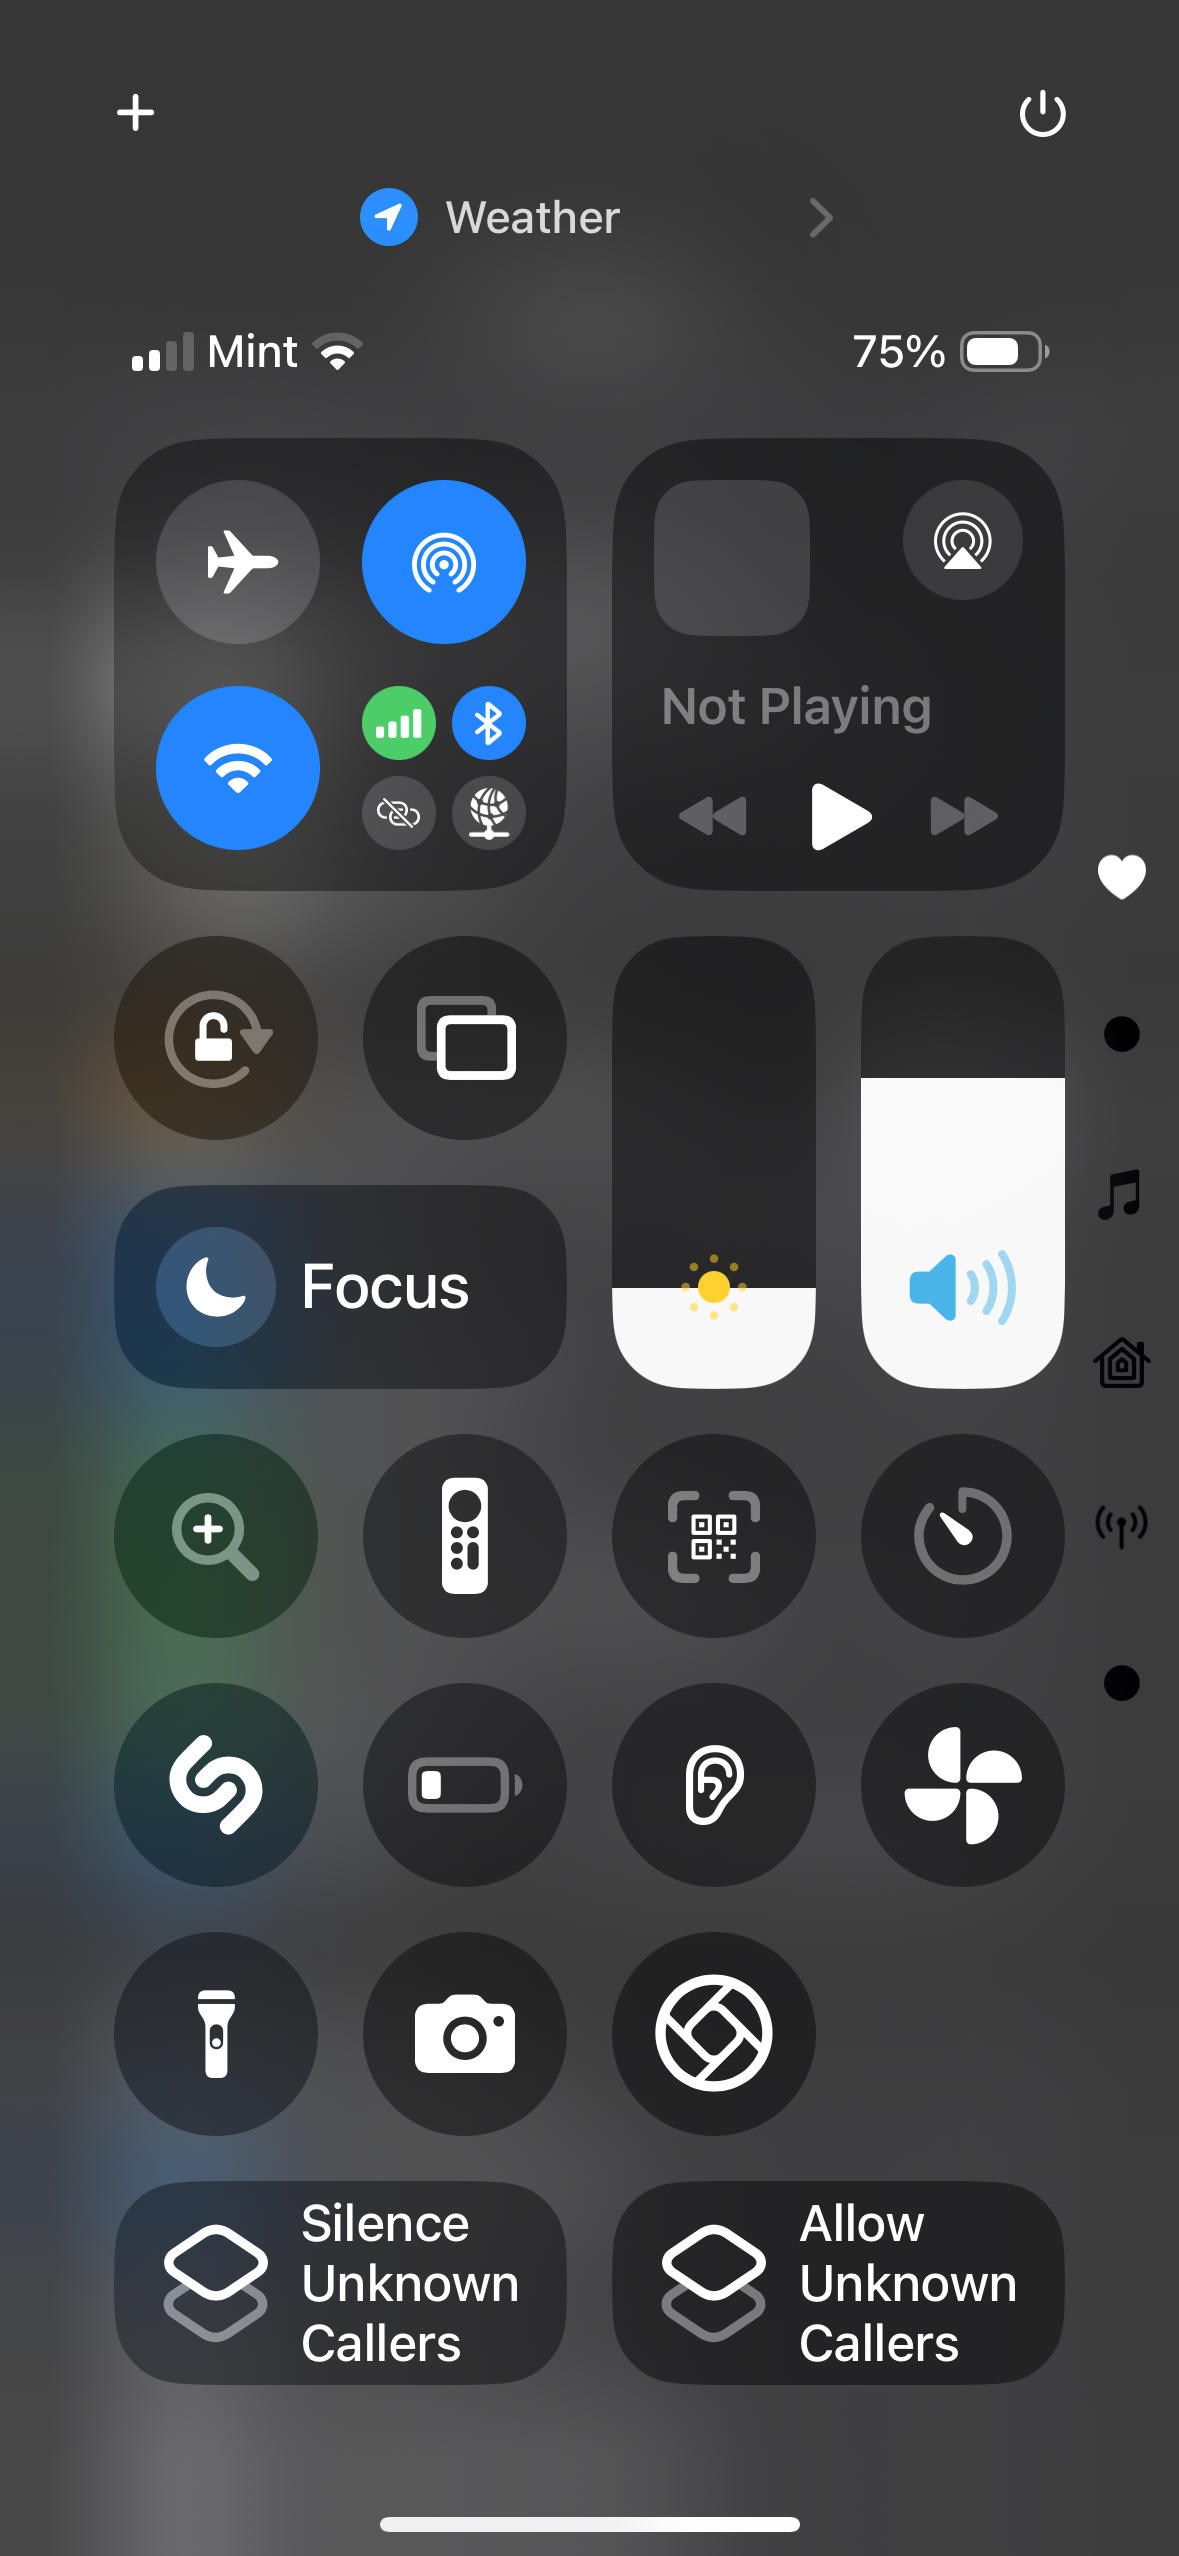
Control Center
Control Center is a quick way to access settings and other features of your phone.
Control Center “Favorites” Screen
Pull down from upper right to open Control Center on iPhones with Face ID. Swipe up from the bottom of the screen on iPhones with a home button.
Some of my favorites here are the Magnifier, Apple TV Remote and QR Code Scanner.
Screenshot
You can customize Control Center with your preferences, including controls to launch your favorite Apps, and controls that use Shortcuts to accomplish other tasks, like the “Silence/Allow Unknown Callers” buttons above.
Artificial Intelligence (AI) has meant different things at different times to different people. It is a moving target. In the 1970s, it meant a machine playing chess. Today, no one would call that artificial intelligence. Now it might be a machine generating an essay, drawing or photograph from a short prompt.
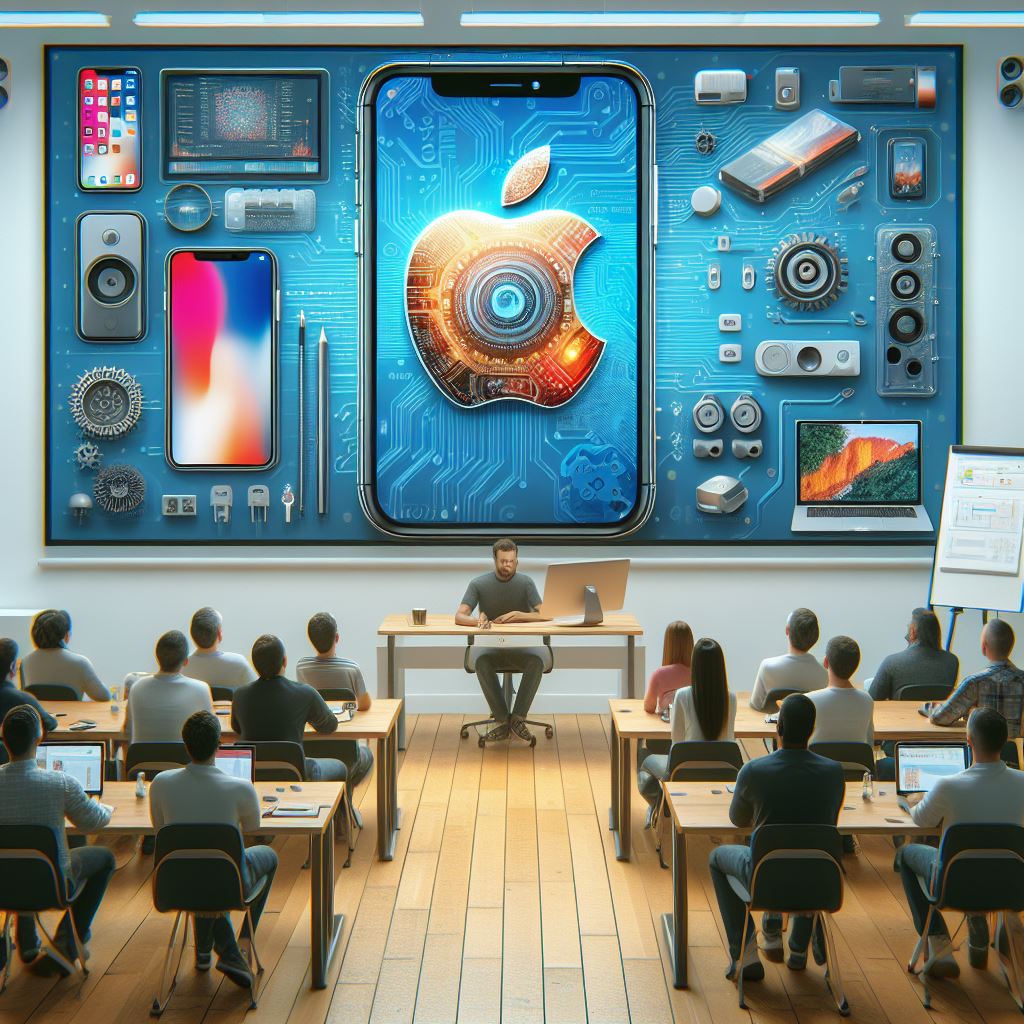
This image of an Apple User Group meeting was generated by AI.
Artificial Intelligence has become vastly more powerful, and it will only continue to get better.
Whether you realize it or not, you are already using Artificial Intelligence in several forms:
Facial Recognition – “Face ID”, Photos
Recognition of Objects: cat, dog, building, The Eiffel Tower, vehicles, humans
Voice and Speech Recognition, e.g. Siri commands
Siri Suggestions – AI forecasts what App/Destination/Search you might want now
Sound Recognition, e.g. Siri can recognize smoke detector sounds
Navigation Apps, driver assist, “self-driving”
Language Translation, Apple & Google Translate Apps
Speech Generation – Personal Voice, Live Speech, in Accessibility Settings
Recognition of facial expressions and gestures – Used in Face Time and the Vision Pro
Face ID is an example of very unobtrusive AI, probably the best kind. You are usually unaware of Face ID unlocking your phone except in the rare situation where your face is obstructed for some reason and it doesn’t unlock.
Apple has dedicated about 1/4 of the on-chip real estate in their new processors to the Neural Engine. This shows a commitment to AI going forward at Apple. The Neural Engine does on-device machine learning.
Much of what you see when you browse the internet is determined by AI.
Search Engine Rankings
YouTube Recommendation Engine
Amazon “Inspired by your Shopping Trends”
Video recommendations for Apple TV, Netflix and Amazon Prime
When you do those captchas (“I am not a robot”, “click all images containing a bus”), you are providing training data for AI algorithms.
Generative AI
The new type of AI getting a lot of attention in 2024 is Generative AI, so called because it generates something, whether text or an image.
When you hear about ChatGPT, GPT stands for Generative Pre-trained Transformer. This is a large language model trained on a large amount of text.
This type of AI tool can be used to generate documents like reports, emails, ad copy, blog posts and computer code. The generated text usually looks very good, but you must check it for accuracy.
How Can I Try Out These AI Tools?
It’s early days in this phase of the AI revolution, and things are changing rapidly. Web sites appear and disappear. Companies are bought and sold. Tools change hands and change names. Here is a list of generative AI tools that work as of March 2024.
Claude.ai – Account required. Free and paid tiers.
The Microsoft Copilot App – May require Microsoft 365 subscription? Includes Designer (for images), Vacation Planner, Cooking Assistant and Fitness Trainer.
Sora – from OpenAI, generates videos from prompts – only pre-recorded demos now
Artificial General Intelligence
Artificial General Intelligence (AGI) doesn’t exist yet. Existing AI software is powerful in certain domains, but it is helpless outside those domains. ChatGPT can write a passable paragraph for a PhD thesis, but it’s not as smart about the world as a five year old. True AGI would have intelligence equal to or better than human intelligence in at least all the domains where humans are knowledgeable.
Here’s Copilot Designer’s response to a request for three yellow ducks and a green goose. It totally failed to include a green goose, or any green bird. It’s really not too bright yet. It draws better than a five year old, but lacks understanding.
One theory is that in order to develop AGI, AI will have to be embodied in a robot where it can gain the experience of the world that a child has.
Is AI a Threat to Humanity?
Scary Robot Drawn by Microsoft Designer / DALL-E 3
There have been a number of topical headlines recently suggesting that AI is a serious threat to the human race. Caution is warranted, as with any new technology, but I believe that the threat isn’t Artificial Intelligence itself, but our own lack of wisdom in deploying it.
Most of our fear of alien or artificial intelligences is that they will be too much like us. We know all too well the human capacity for fear, greed and desire for power.
Artificial Intelligence is likely to lack those things unless we are stupid enough to design them in. Without an equivalent to the more primitive parts of the human brain, robots or AI will lack lust, greed and even an instinct for self-preservation.2
We obviously shouldn’t give an AI control of nuclear weapons, but that has more to do with the danger of such weapons than of AI.
A more realistic concern in the near term is that AI may threaten many people’s jobs. If you write ad copy or blog posts for a living, AI is already coming for your job. If you are an illustrator or photographer, AI can already accomplish many of your tasks in a fraction of the time. Lawyers and computer programmers are probably next, and I am sure there are many other job categories at risk.
Like any other tool, AI can be used by bad people to do bad things. Since it is a powerful tool, it can have a big effect. It could be a propaganda tool without precedent, and will no doubt be used to spread misinformation, fear, uncertainty and doubt on a massive scale.
These are serious social problems. We have already experienced social problems from other aspects of technology such as automation and social media. As a society we need to figure out how to fairly distribute the wealth and other benefits derived from AI and similar technologies and how to protect society from misuse of AI.
Computer users are frequently asked to enter passwords. They are often confused by these requests. Their two most common questions are:
Which of my many passwords does it want?
Is it legitimate and safe to enter my password here?
The MacOS System Permission Dialog can help you with the answers.
Which Password does it want?
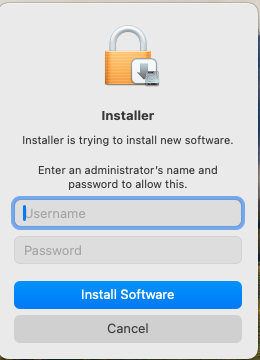
When you see a dialog similar to this, you know it is from your own Mac. It wants either the username and password that you use to sign onto your Mac at startup, or the credentials of an administrator account on the computer.
So, don’t enter your iCloud password, or the password to any of your other on-line accounts. You should use a username and password for the Mac that you are sitting in front of at the moment.
The details of this dialog may vary. It might say Installer, or some other program, and the wording may vary depending on the situation.
Is it safe?
How do you know it is safe to enter your account password in this dialog? With MacOS, Apple controls the type of dialog boxes and windows that programs are allowed to display. Programs are not allowed to display windows without title bars. That is reserved for system dialogs. Apps can ask the system to display dialogs on their behalf, and text from the App may be included in the dialog, but the overall dialog is controlled by MacOS. You will notice that these system permission dialogs do not have title bars at the top. The usual red, yellow and green dots are not present.
This could still be spoofed to an extent. After all, you are looking at such a dialog box right now, displayed on a web page. Would it be safe to enter your password here? No. Web pages can and do display whatever they want, as do application programs.
Although they will probably pop up in front of some other window, legitimate system dialog boxes can be dragged to the desktop, where they will display in front of your desktop pattern, without any title bar, as seen above. Malicious web sites or programs cannot duplicate this behavior.
However, to make it tricky, you may have to grab them by the very top of the window, where the title bar would be, in order to be able to move them.
The other safety test is really up to you. Even though the dialog itself is legitimate, it may be asking you for a permission you don’t want to grant. For installer permissions, only grant permission if you are knowingly in the process of installing or updating a program. Don’t agree to install a program just because a web site told you to.
Think twice before giving programs special permissions. Does a word game legitimately need permission to access your microphone and camera? Probably not. You shouldn’t grant it unless there is some real, unusual reason.
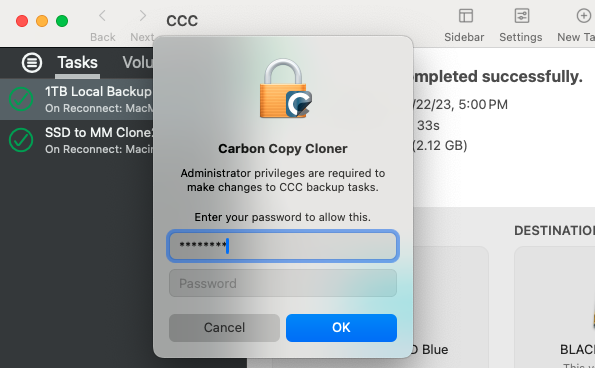
Carbon Copy Cloner asking for Administrator Privileges
Above, the application Carbon Copy Cloner is asking for Administrator Privileges. This is a very powerful and sweeping request. You should trust the program and it should have a very good reason before granting this request. Carbon Copy Cloner has a long and good reputation, and it is performing system-level functions, so I choose to give it permission.
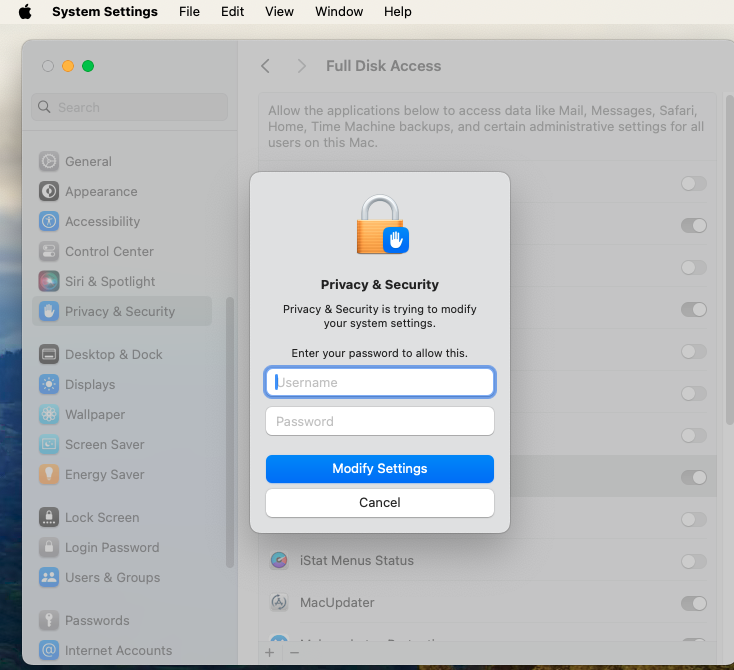
There is an exception to every rule. The legitimate dialog below from the System Settings app cannot be moved or dragged. Because it appears in the context of System Settings (a built-in and integral part of MacOS) I trust it anyway.
I hope this discussion has given you some useful hints about entering passwords on your Mac. I hope the computer elves were good to you this Christmas and happy New Year to you.
If you have photographs taken before you started using a digital camera, probably before about 2005, those photos may never have been digitized and are not available for viewing and sharing in your on-line digital world.
What’s your best strategy for getting those digitized and into your computer or phone?
Pile of photos
This Could Take a While
Even the small pile of pictures above contains over a hundred photographs. You should expect that digitizing them all will take a while, even in the best case.
Service, Camera or Flatbed Scanner?
There are three basic strategies:
1.) Send them out to a service to be digitized
2.) Digitize them with a flatbed scanner
3.) Digitize them using your iPhone camera or another digital camera
Digitizing services can be expensive but are worthy of serious consideration. They can save you a lot of time and frustration. Because they charge by the photo, you should be selective as to which photos you send them. This is by far the fastest method. If you have a lot of photos and don’t want to spend years working on them, just get your wallet out.
A flatbed scanner gives high-quality results and you are in charge of the quality, the cropping and everything else. You’ll get the best results that your originals, your equipment and your abilities allow.
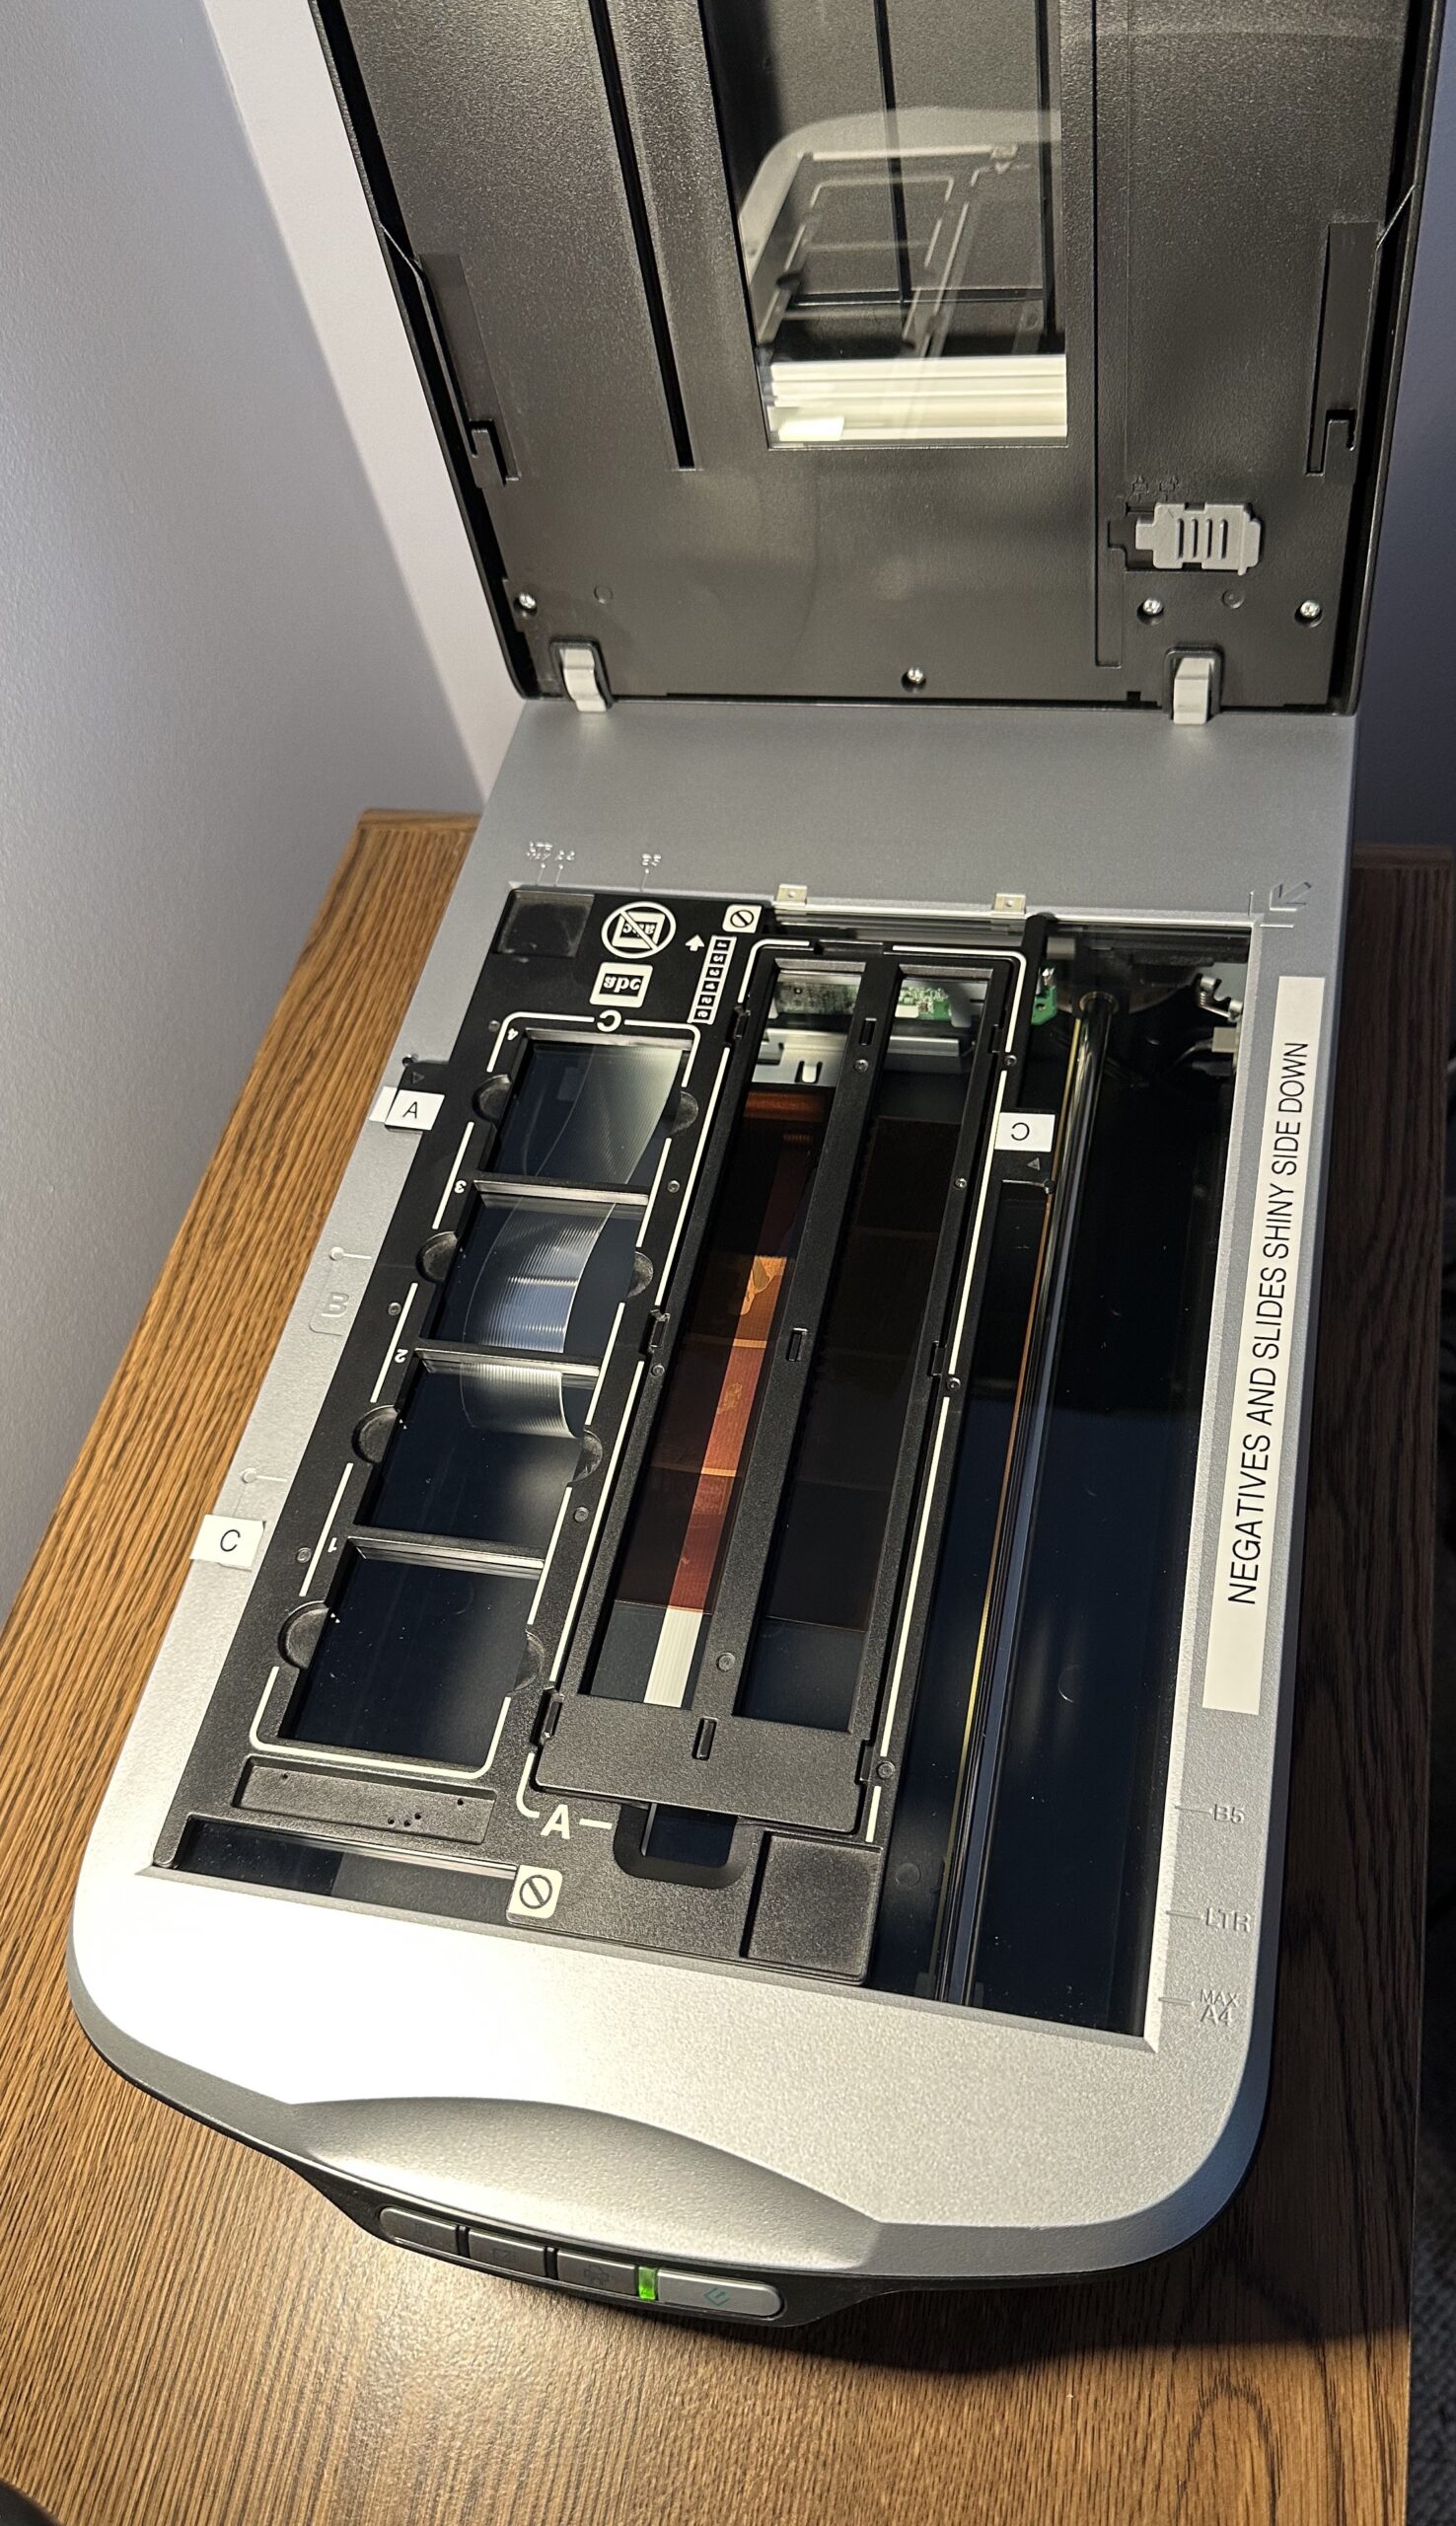
A scanner with a transparency feature allows you to also scan slides and negatives.
Flatbed Scanner Ready to Scan Negatives
Using your phone or a camera to “scan” or take a photograph of the original can produce reasonably high quality copies. This method has some advantages you should consider:
It’s faster than a scanner
Can digitize large or awkward photos that don’t fit on the scanner
Can digitize photos in a frame
You can digitize while traveling without a flatbed scanner
Can produce better results for originals printed on matte paper
Works if you don’t own a computer
Using a phone or camera can also produce poor results unless you take the time to get proper lighting.
Organize – Before and After
As you take your originals out of the albums or envelopes to be digitized, look for context. Who’s in the photos? Where were they taken? What was the date? You should write on the back of the originals for future reference. Don’t just write “grandmother”. That’s not very helpful. Maybe “Mrs. Mary Jane (Doe) Smith” would be better. Use a non-smearing ink pen that doesn’t require too much pressure to write. I like Bic Round Stic ball-point pens for this.
After digitizing a photo, write something on the back of the photo saying so, like “digitized in 2023”. This will keep you from wasting time or money scanning the same photo again.
Assign long meaningful file names to your photo files. If you give them meaningful names, you and your descendants might be able to find them later. VueScan will create files with a serial number like 2023-02-17-0007. This would be the seventh photo scanned on February 17, 2023. I keep those serial numbers as a suffix to my file names to avoid having multiple photos all with the same name. Suppose I have a bunch of photos of John Doe, all taken in 1999. If I name them “John Doe, 1999”, they would all have the same name which will cause problems when I try to put them into a folder together. But if they have a unique suffix, no problem.
Long file names are allowed, so take advantage of it.
The Best Way to Restore an Old Photograph is to Find a Better Original
Prioritize and Select
Take some time to find the best existing versions of your photos to digitize. That version may be a print, or a negative, or a slide. In the 2000s, some film development services included a CD-ROM with your photos on it. If you find one of those, you can save yourself a lot of time and trouble, although the CD images may not be high-resolution by today’s standards.
Prioritize slides. Slides are often photographic gold. Usually whoever was shooting slides had a nice camera and was a better-than-average photographer. Slides often haven’t been seen since the slide projector broke decades ago. So, there could be some nice surprises. And, if they have been stored in a closed box, they might be cleaner and in better shape than prints which might be torn, faded and dirty. Slide film often captures and preserves color better than print film.
Sort your photos so you are digitizing a batch of similar photos at once. It is easier if you don’t have to change your settings between photos. So, separate the black and white photos from the color photos, and the 3x5s from the 4x6s.
Be selective. Many of your photos are losers. Skip them. Digitize the best versions of each series.
Sample Workflow
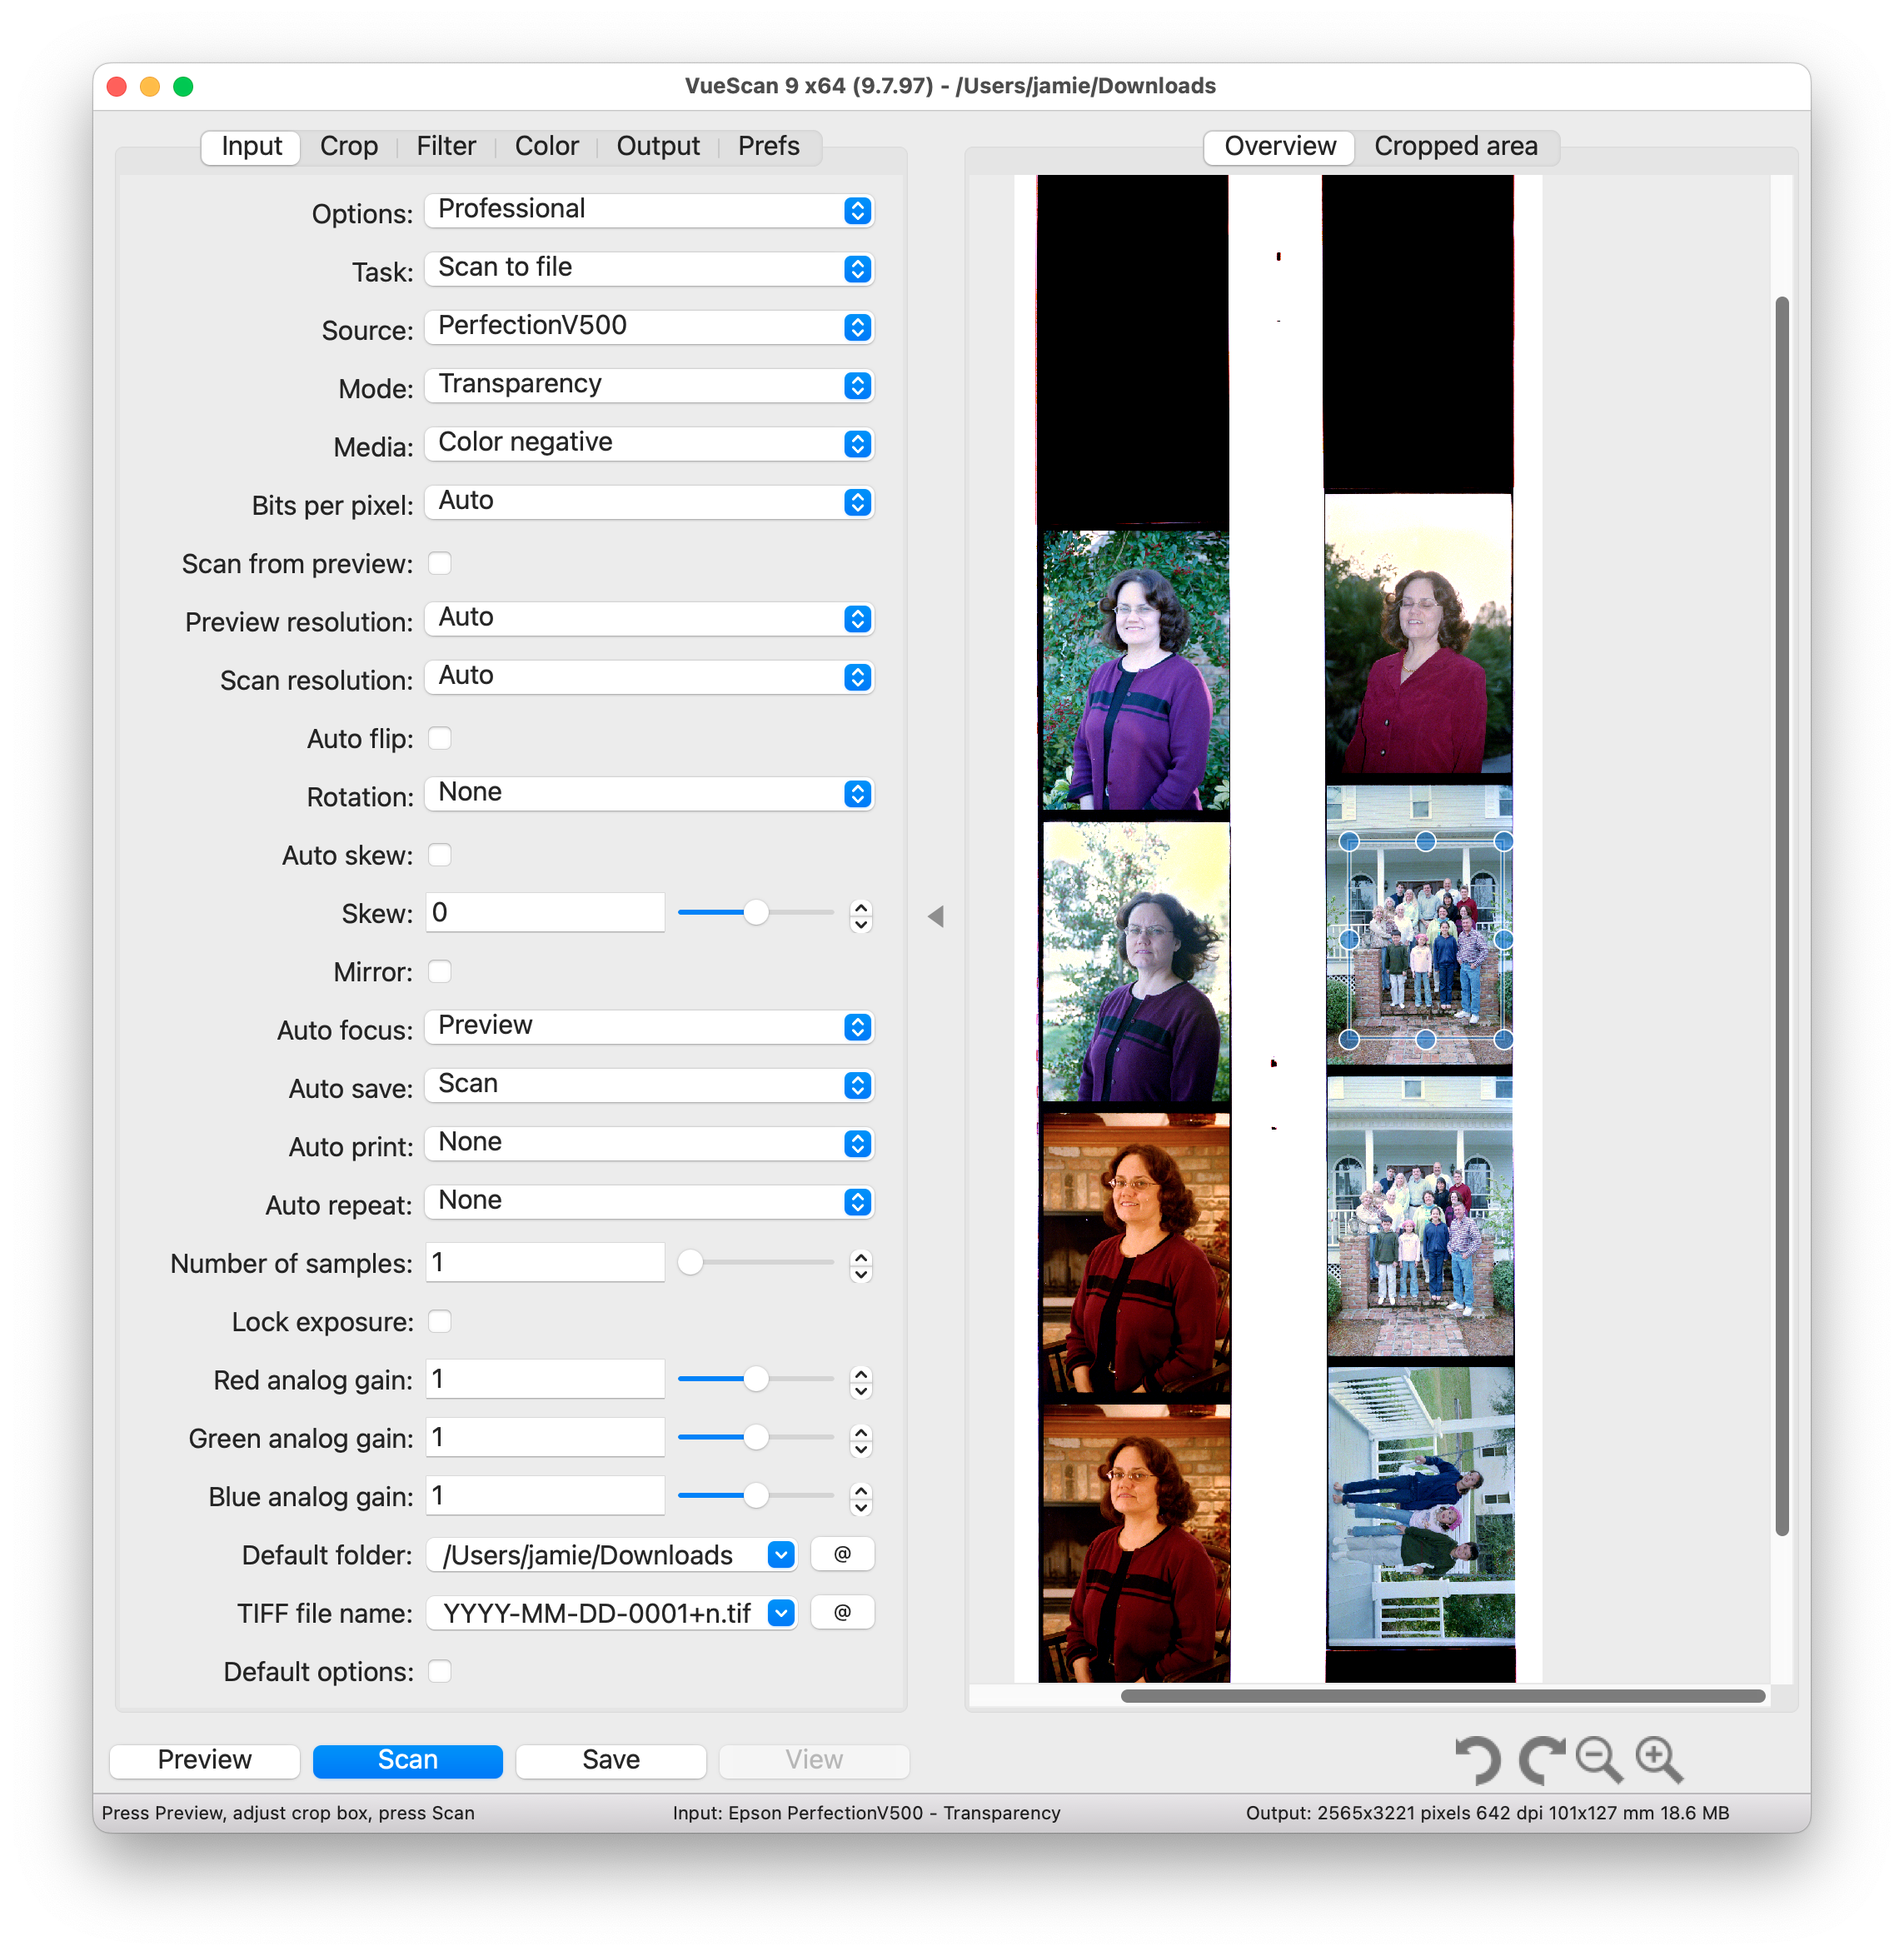
Scan with VueScan to TIF files in Downloads Folder
Add descriptive filenames
Crop, adjust and clean-up in Affinity Photo
Export final photos as JPG into Download Folder
Copy final JPGs to preferred storage folder(s)
Delete temporary TIFs and JPGs from Downloads
(you do have a backup plan, right?)
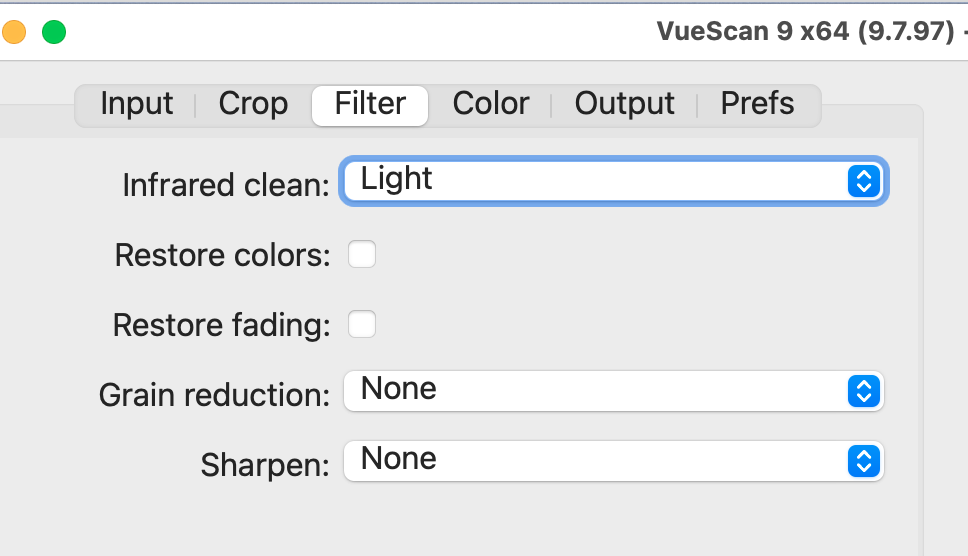
VueScan’s Complex “Professional” Options Scanning NegativesUseful Filter Options in VueScan
The Infrared clean option is good on negatives and slides. It largely eliminates dust. It does require an extra scan step, so takes twice as long to scan. I think it’s worth it for almost all slides and negatives. A similar option is available in other software.
Restore colors and Restore fading can be amazing for old prints. You have to try these to see if they help your specific photos or not. The Restore colors option does a better job than I have been able to do with photo editing software.
Image Capture Screen and Options
Above is the Image Capture software included with MacOS. It is easy to use, and automatically identifies multiple images to be scanned.
Tips for Digitizing with your phone or camera
Find good lighting. Indirect sky light is best, but avoid direct sun. A shady porch where lots of sky is visible is ideal.
If you are setting up your own lights try to position them off to each side of the photo shining at a 45° angle. If you only have one, that’s okay, but one on each side is better.
Don’t use flash unless:
You have an off-camera flash
You are using the PhotoScan App or similar with anti-glare feature
Epson makes good scanners, but their software support for MacOS is pretty terrible. You should plan on using 3rd party scanning software (below) eventually. The Epson scanning software is pretty nice, but whether or not it will work on any given version of MacOS is a gamble.
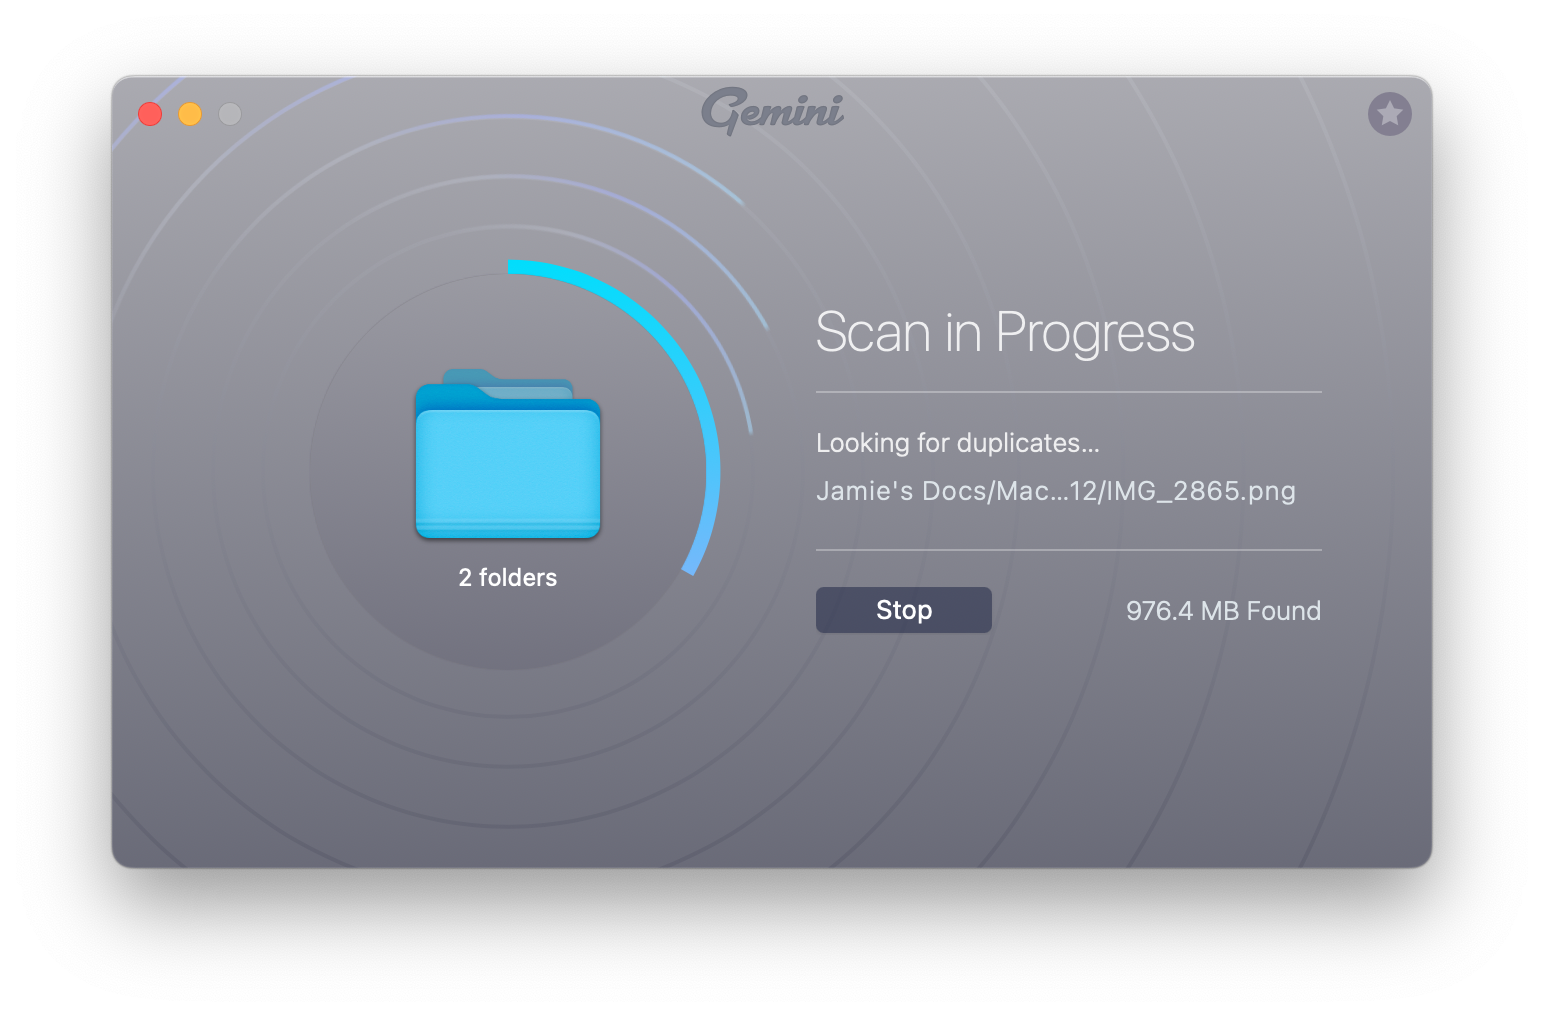
You tell Gemini which folder or folders you want it to scan, including your Photo library. It scans them pretty darn fast.
Scanning Your Files
It finds duplicate files of all kinds, not just photos.
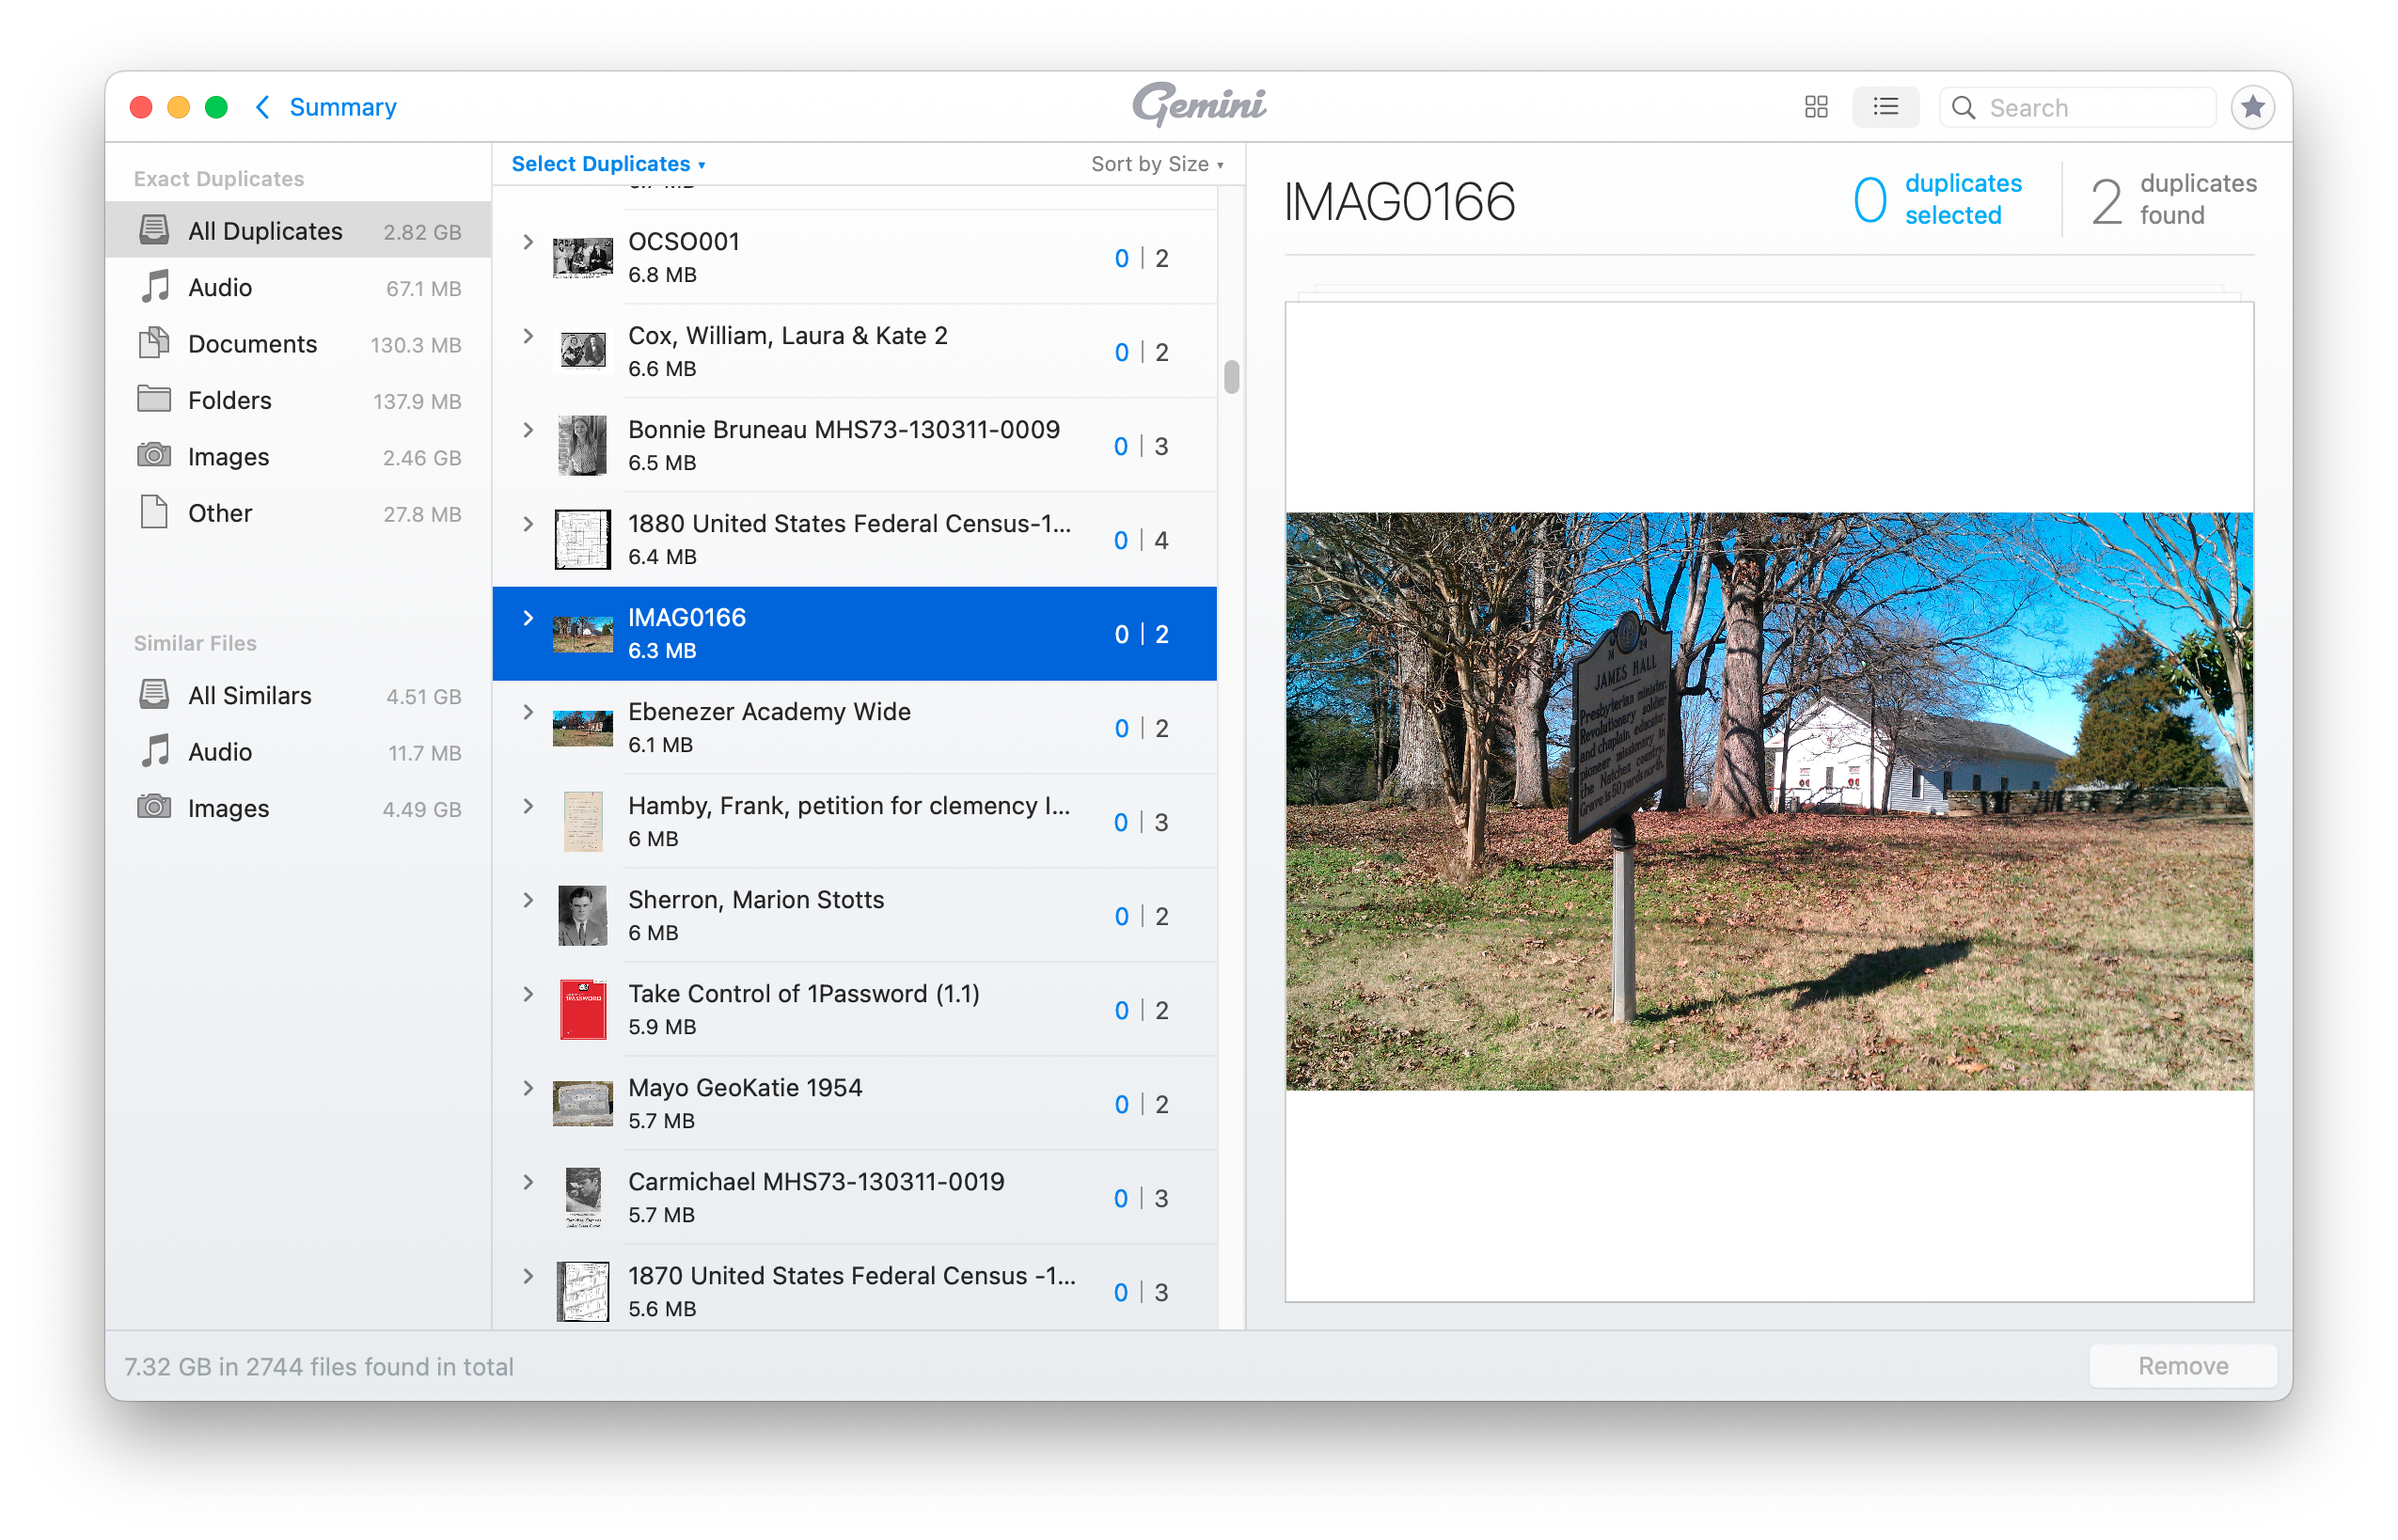
Gemini’s Main Screen with List of Duplicates
You can sort and search these in various ways. You can then select groups of the duplicates for deletion.
Details of a Duplicated Photo
You should be very cautious about deleting duplicates en masse. The duplicates may be in folders belonging to specific applications which expect to find them in those locations. Or, you may want to have duplicates in specific locations for your own organizational purposes.
It probably isn’t worthwhile trying to remove all duplicates. If you can find a few large files that can be deleted, or find entire folders that you no longer need, you may recover a lot of space with a minimum of effort and risk.
Gemini 2 is available on a subscription basis starting at $19.95 per year, or an outright purchase starting at $44.95. It is also available through a subscription to SetApp (also from MacPaw).


