Apple’s Photos App is deeply integrated into our daily use of our iPhones. At MacMAD, we get a lot of questions about photo storage, sync and general usage of the Photos App. So, this month we’re going to go over some of the common ones.
MacMAD Presentation Meeting for Tuesday, September 17, 2024
Helpful Basics On-Line
Tonight’s meeting is primarily an on-line demo. But, here are some supplementary on-line references oriented towards the basic iPhone or iPad user.
iOS 18 and iPadOS 18 have just been released, so the User’s Guides will probably be updated accordingly. For the beginning user, the biggest difference is probably that the Control Center looks slightly different now.
See your device’s model (is this an iPhone 11 or iPhone 12?)
See your device’s warranty status
See how much of your device storage you are using
See how much of your iCloud storage you are using
Sign in to iCloud – You are probably already signed in.
Note – Almost ALL iPhone & iPad owners have an iCloud account, whether you know it or not. If you are paying any amount monthly for iCloud, you have an iCloud+ account.
More On-Line Demos
Take a photo and send it to someone via eMail or text (e.g. sharing with family)
Open an email and add the sender to your contacts.
Open a contact and send them email.
Open a contact and navigate to their address.
Buy and install a new App from the App store.
Add a credit card to Apple Wallet .. Pay someone with Apple Wallet
Visit a Website. Bookmark it. Create a login at a web site. Log out and back in. (iPad)
Create a Calendar Appointment for a recurring event
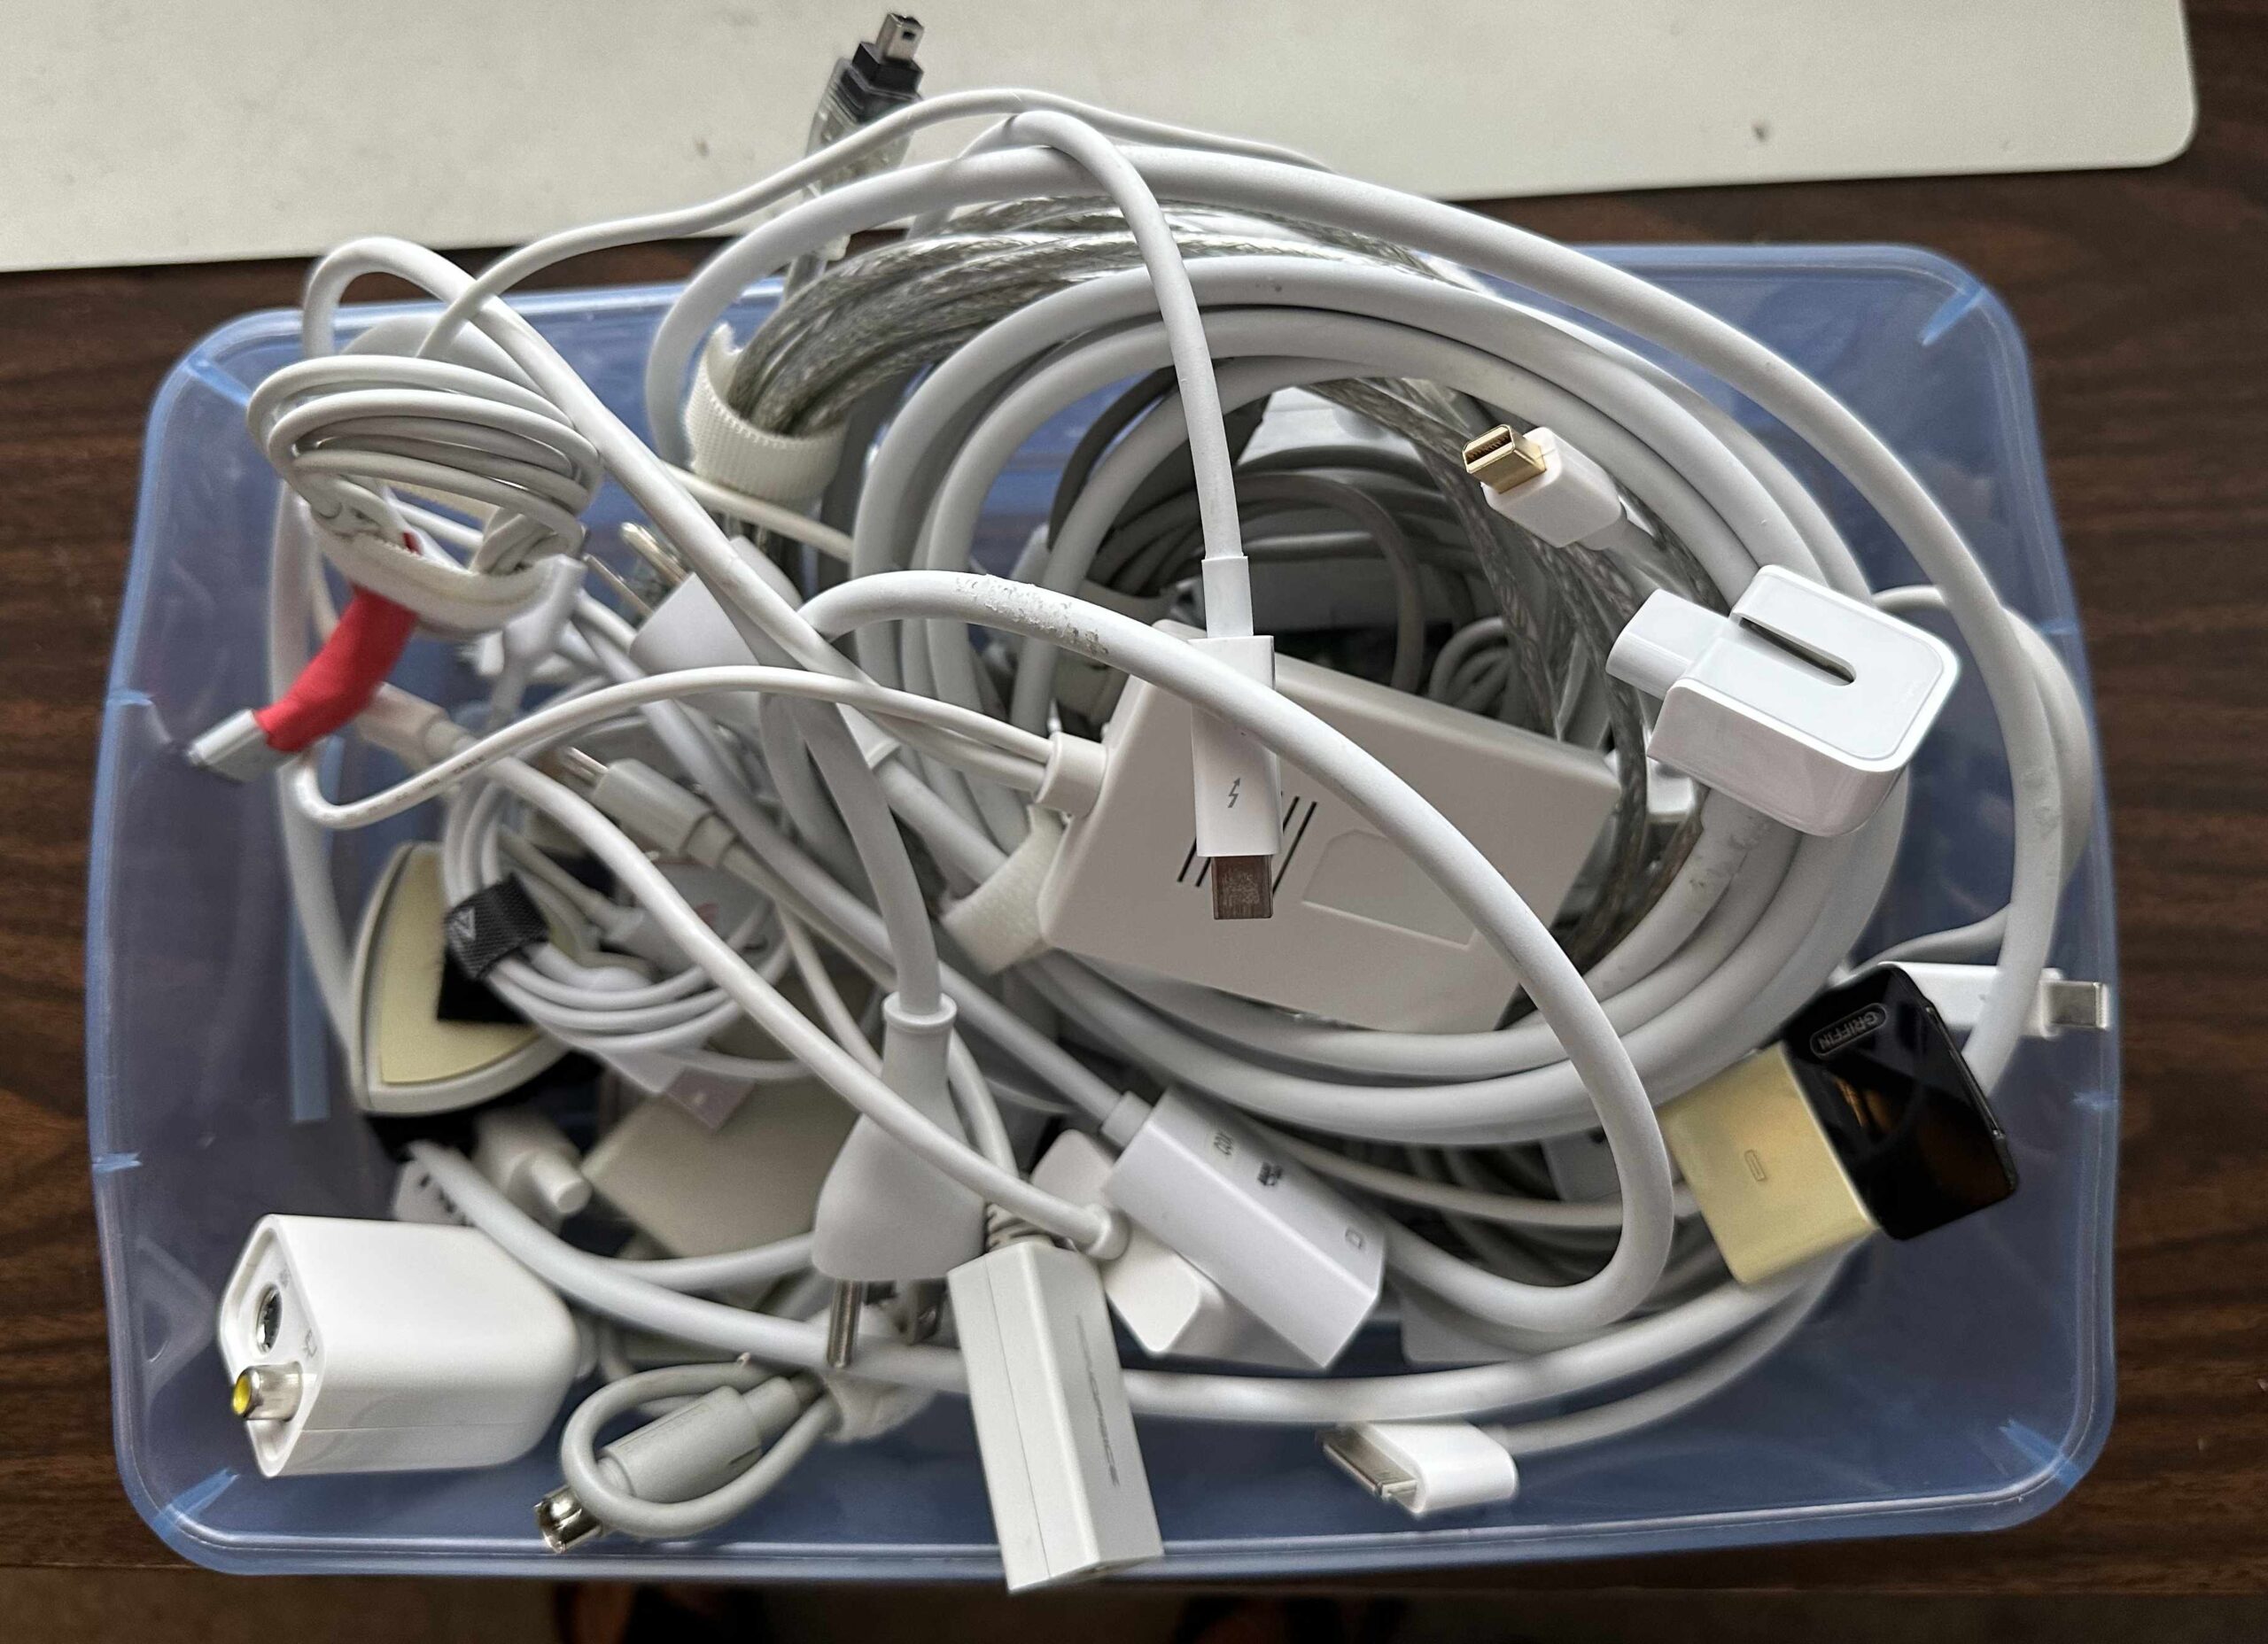
Cables are the unwanted stepchildren of our digital lives. More things are becoming wireless, but, we can’t get away from cables entirely. There are a bewildering variety of cable types, which are ever-changing. I’m sure many of you have a box of obsolete Apple cables like this one:
Rat’s nest of obsolete white cables
USB – Universal Serial Bus
USB (Universal Serial Bus) is probably the most-used cable and interface type you will come across. The secret to understanding USB naming is that, generally, USB numbers have to do with speed, but USB letters tell you the connector type. So, USB 3 is faster than USB 2, which is faster than USB 1.
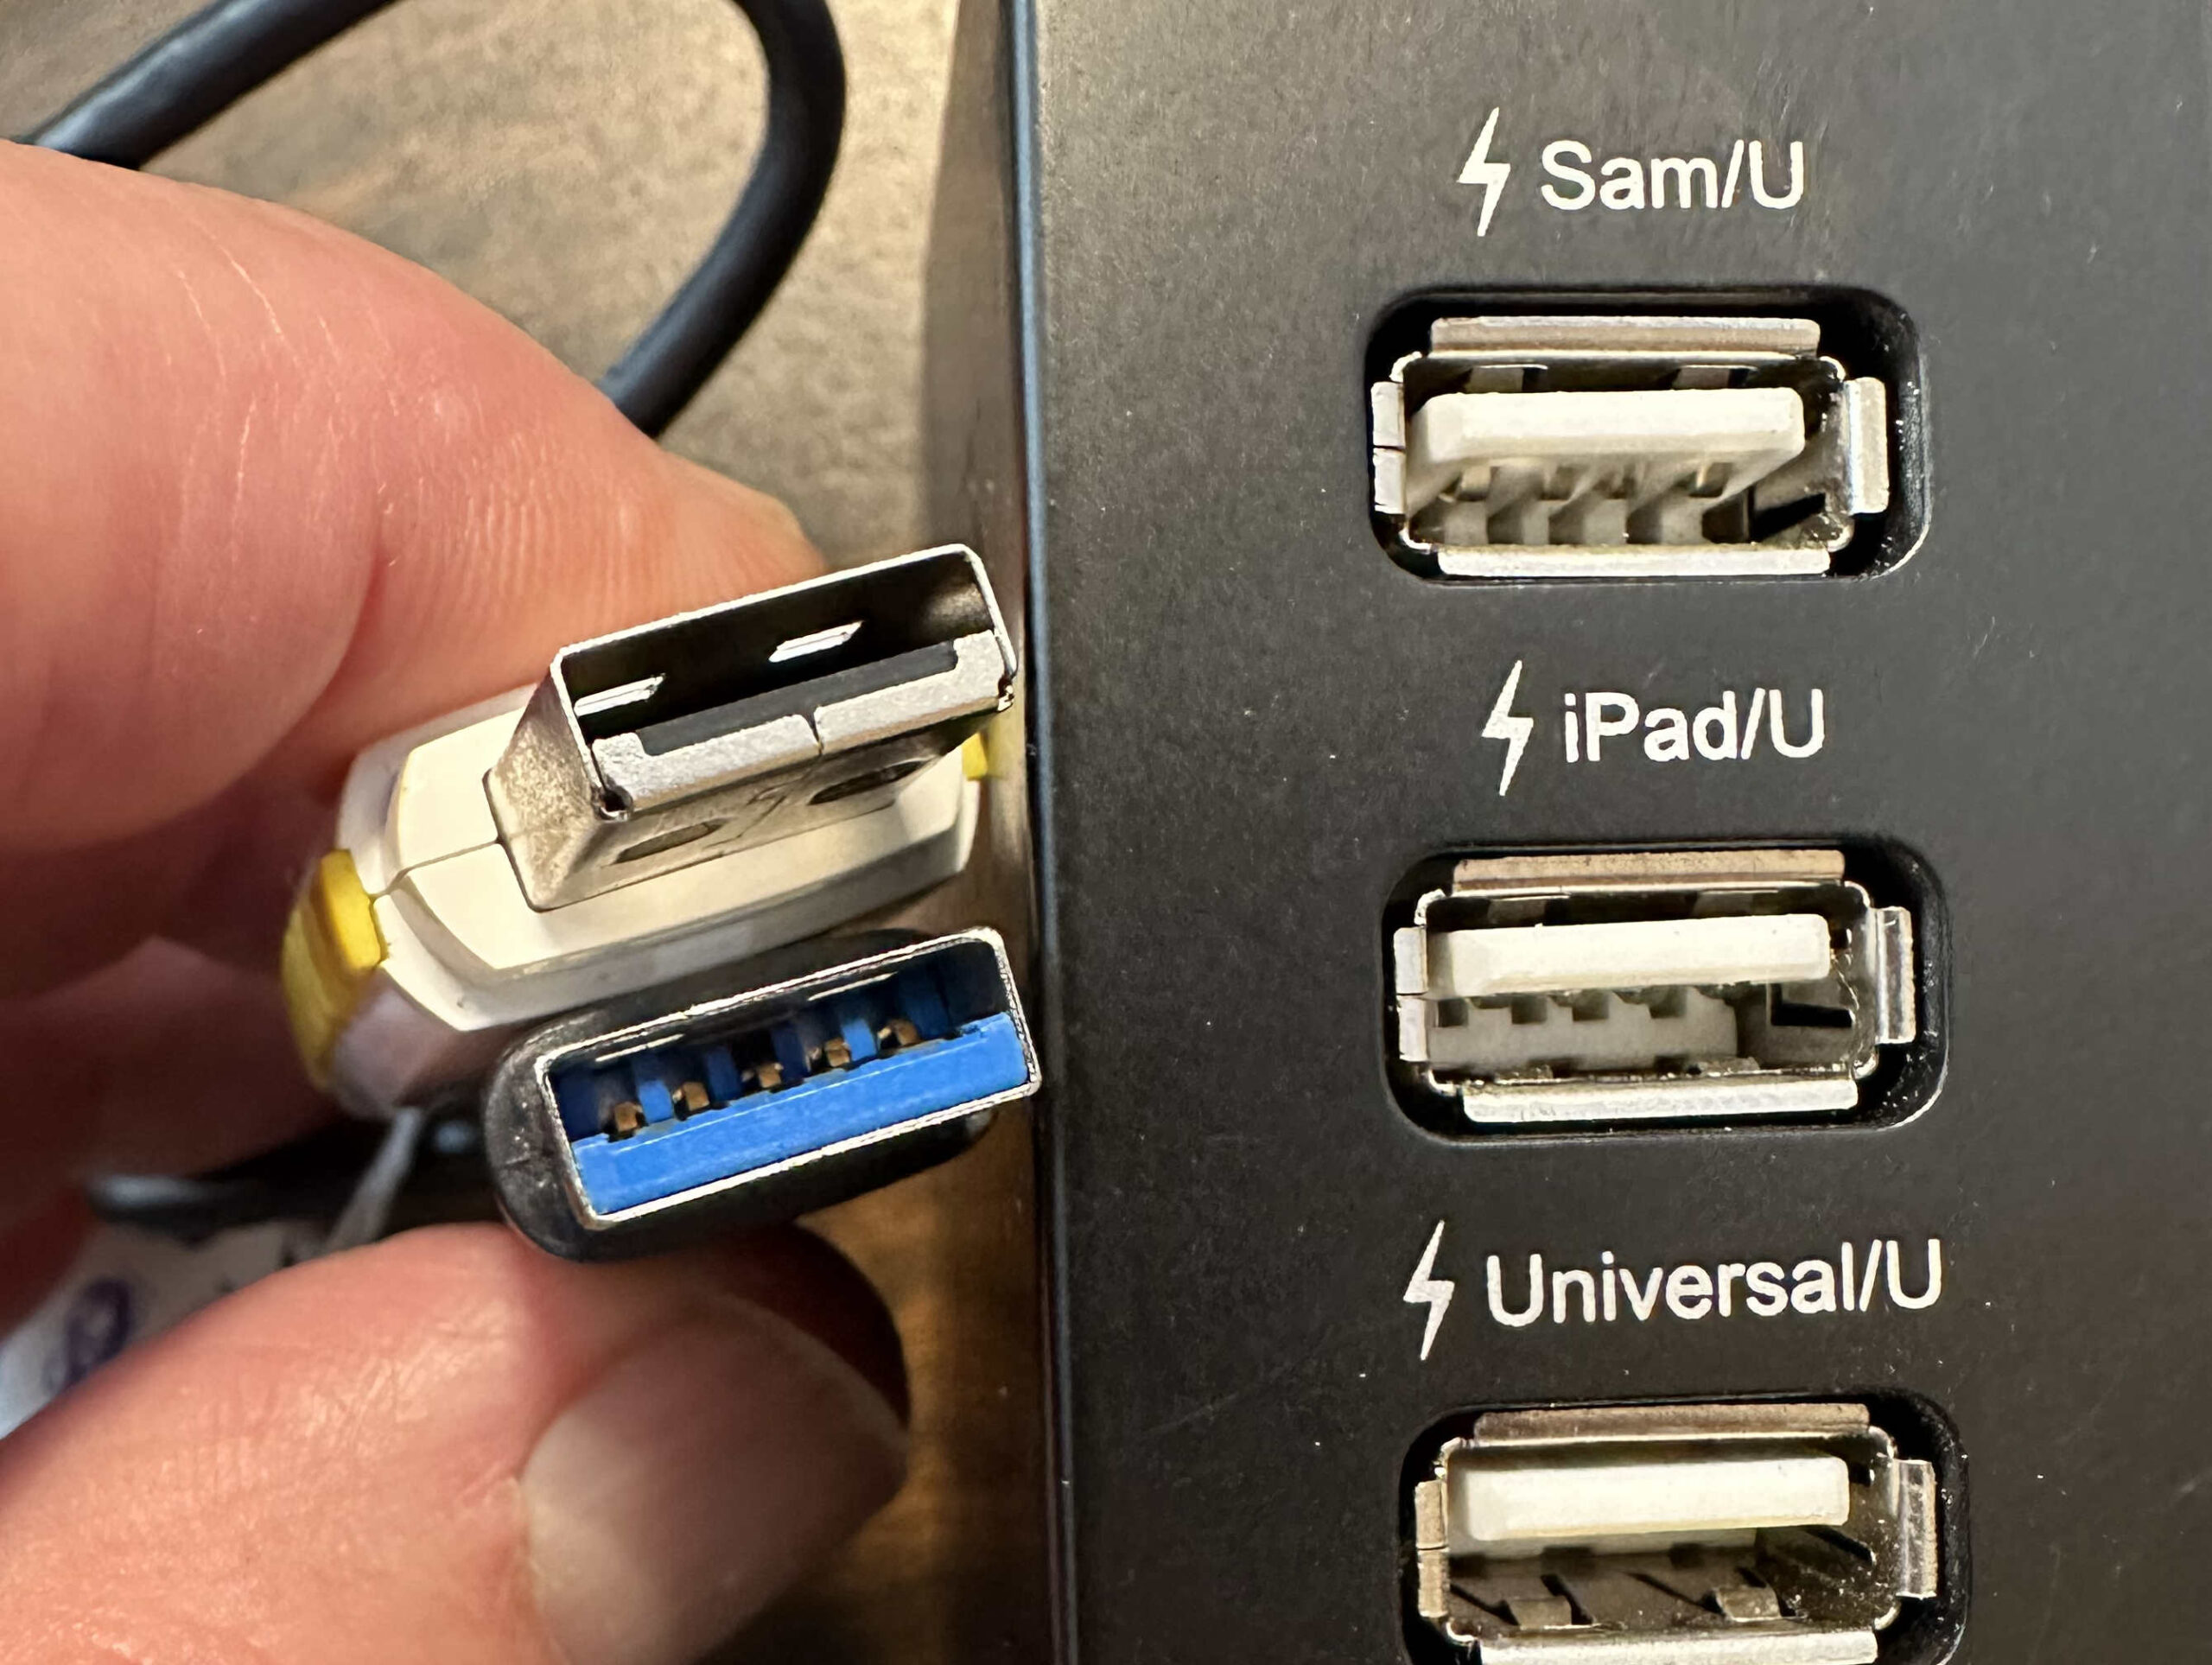
The ABCs of USB
The Familiar USB A Plugs and Jacks – Blue Indicates USB 3 Compatibility
If you bought an iPhone in the last 10 years, it came with a lightning connector, and a lightning-to-USB cable. These were USB A cables for older iPhones, and USB C since (about iPhone 11?).
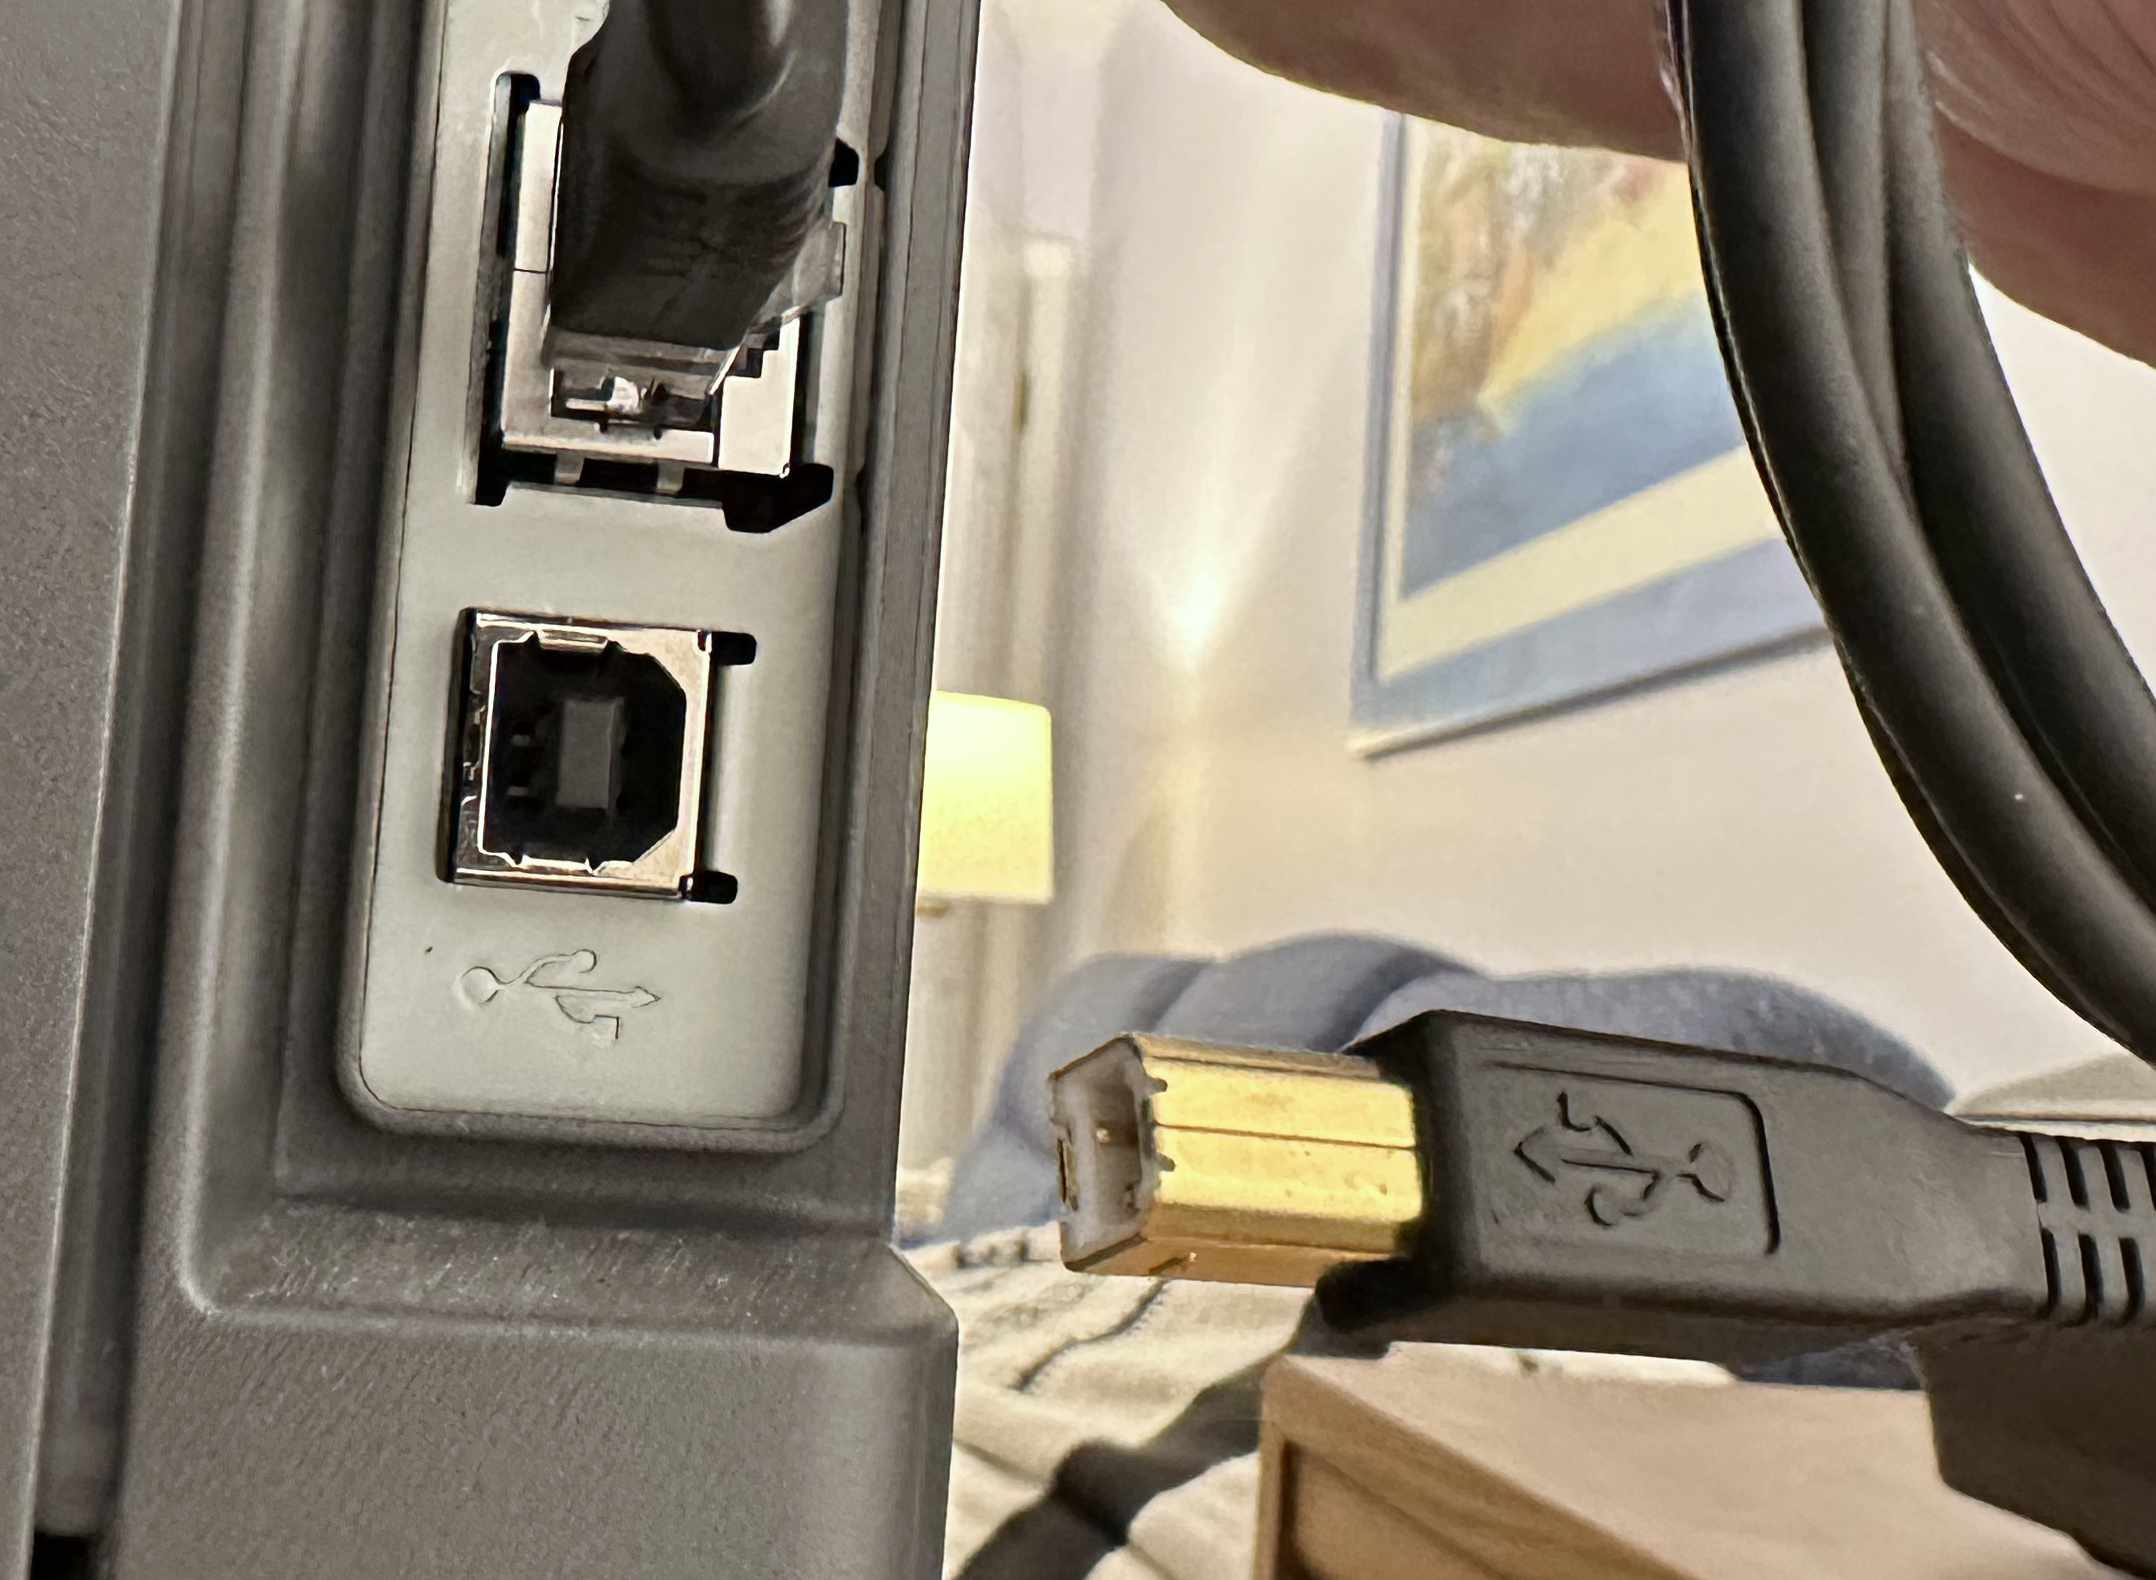
USB B was mostly for Printers – Rarely Used Now
USB B Jack and Plug for Printers
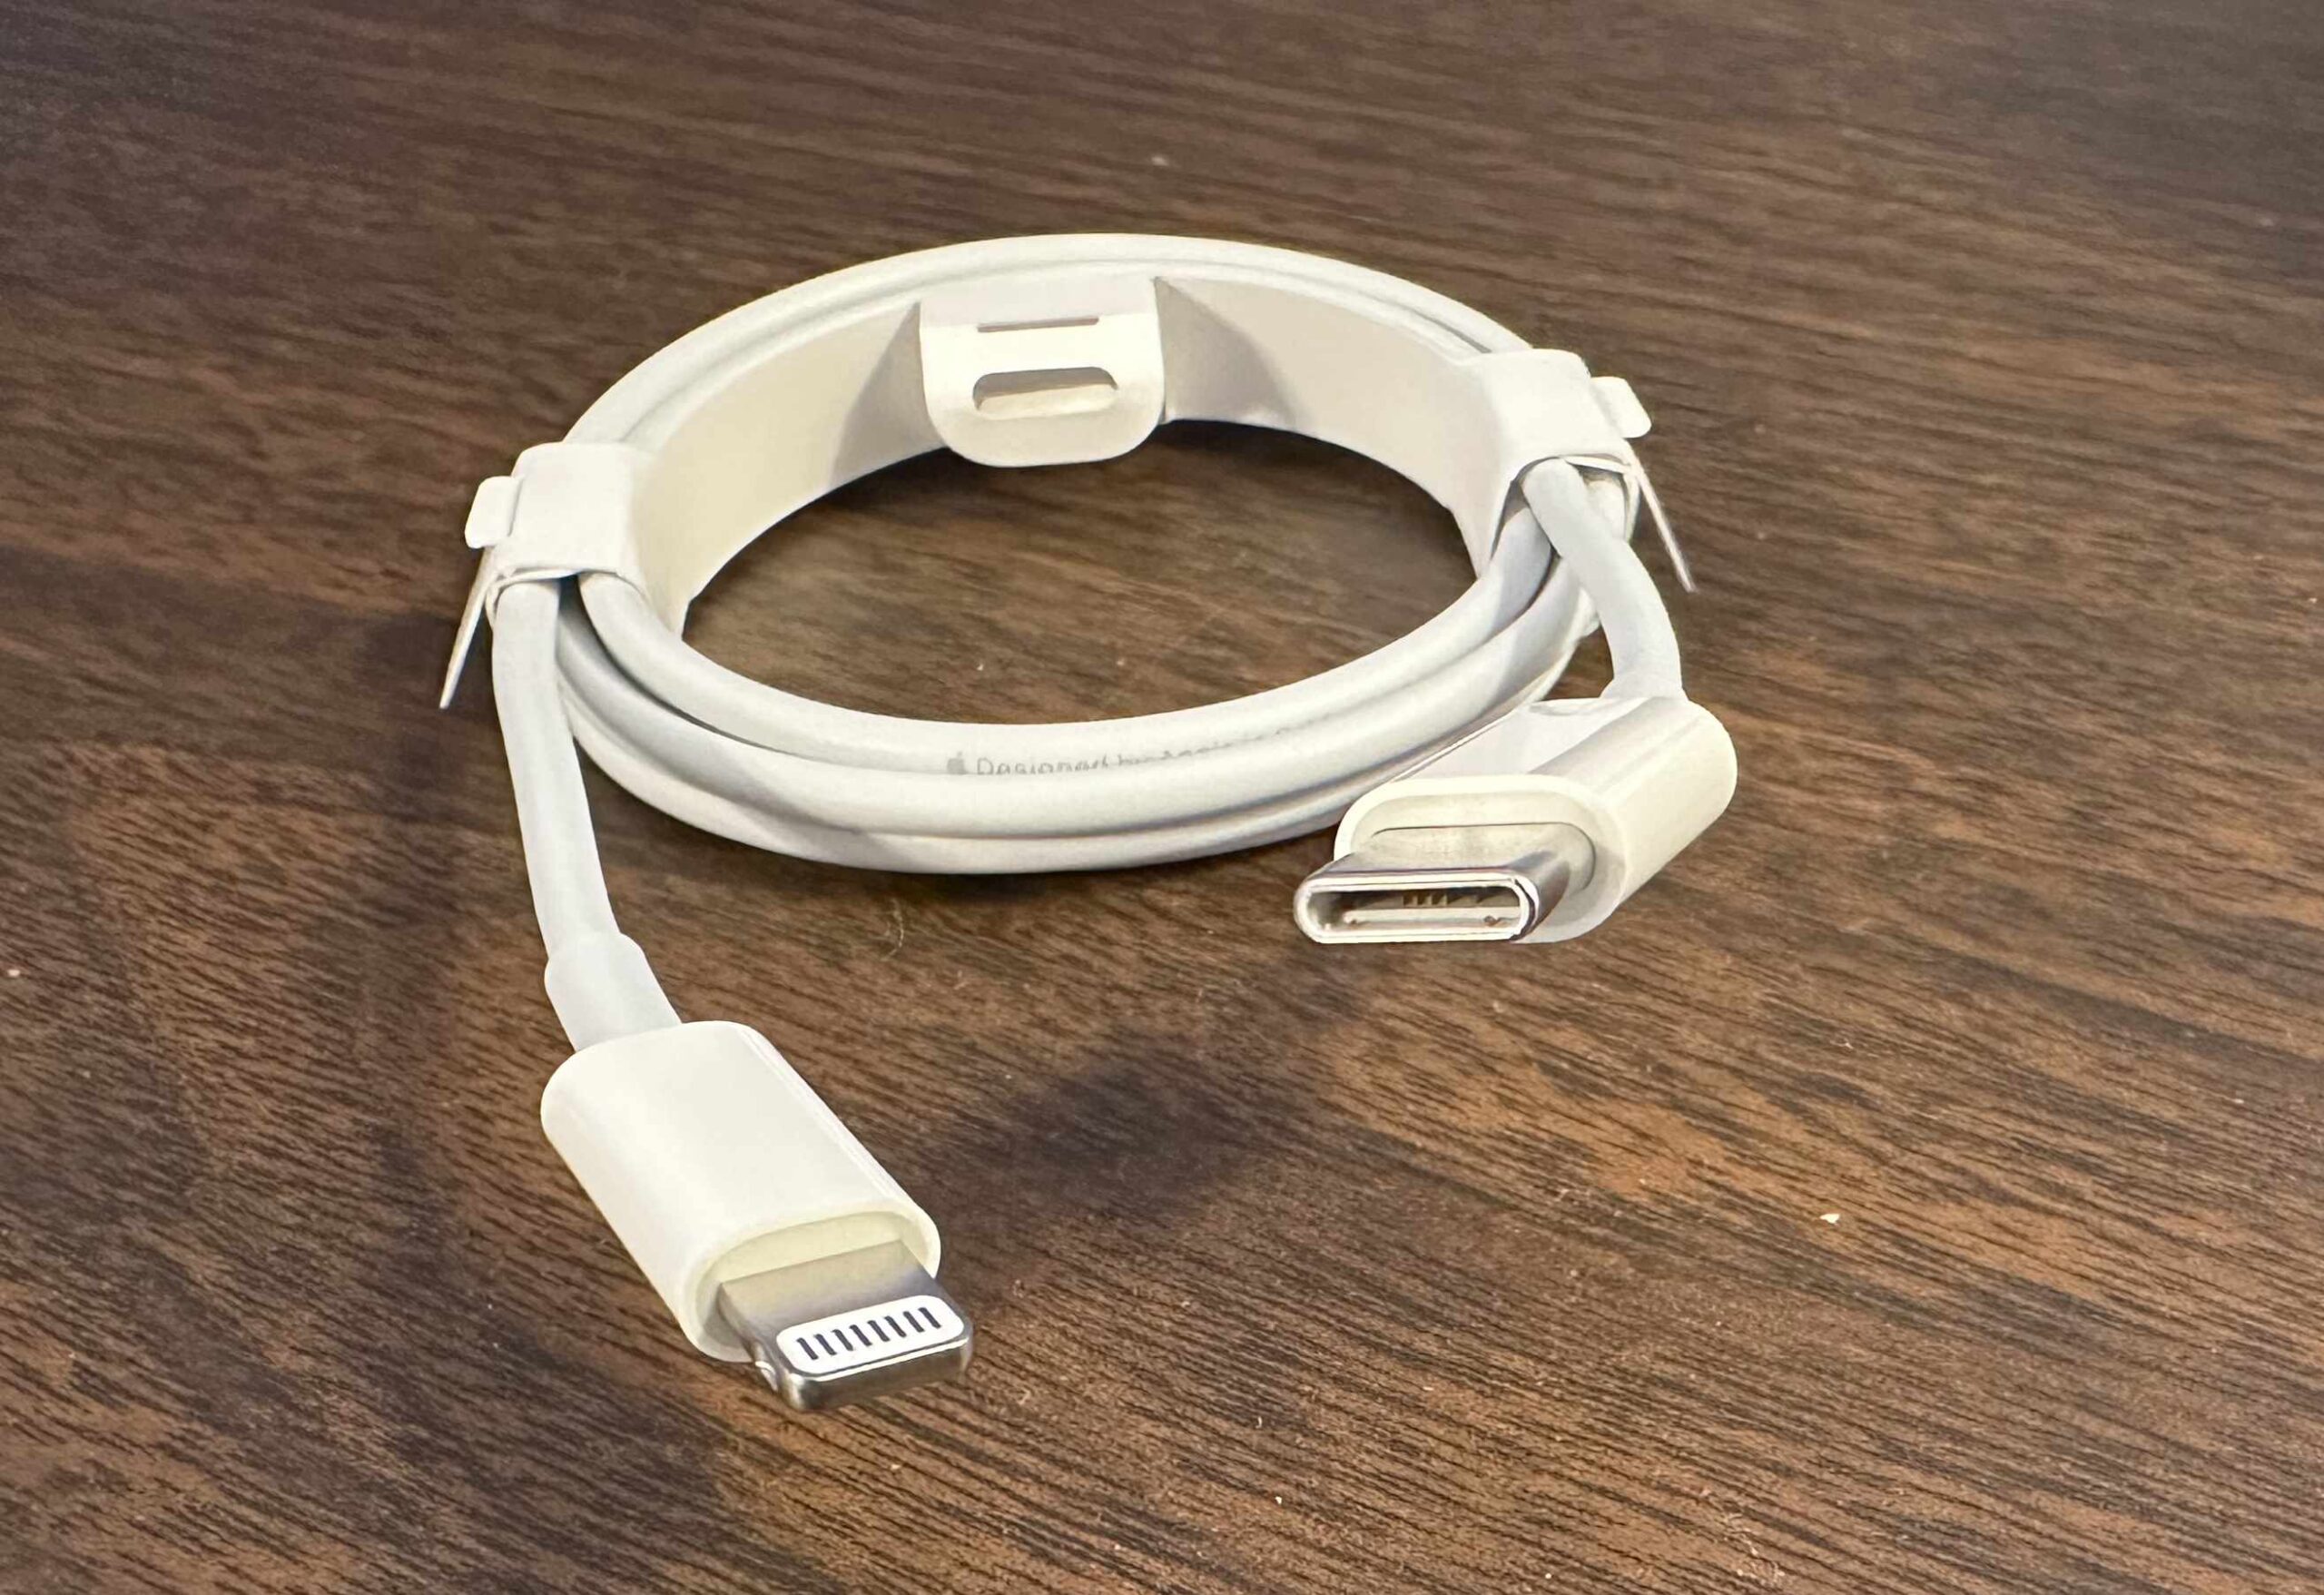
USB C is the Most Common Connector for New Devices
An Apple USB C to Lightning Cable
USB C has two popular features: The connector is very compact, and the connector is symmetrical, meaning that it will connect in either orientation. The USB C connector also carries the high-speed Thunderbolt hardware interface which used to require a separate cable and connector. Thunderbolt is used primarily for display devices and high-speed mass storage. The complex USB and Thunderbolt standards appear to be merging such that USB 4 is the same protocol as Thunderbolt 3.
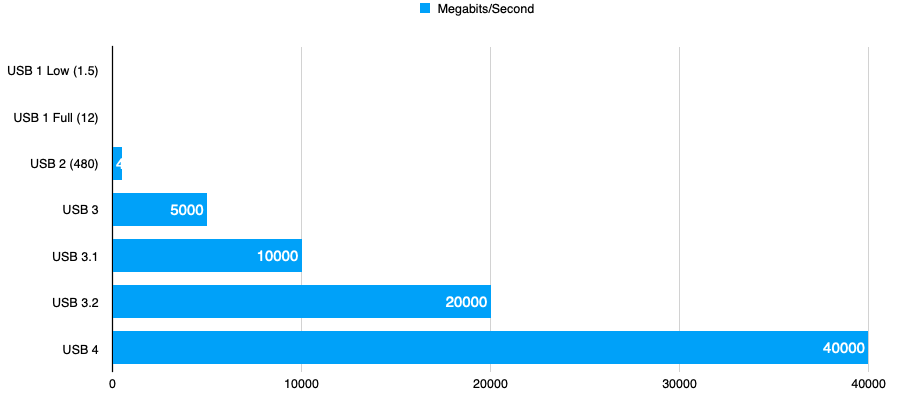
The 1,2,3s of USB Speed
USB Speeds Increase Dramatically with Recent Versions
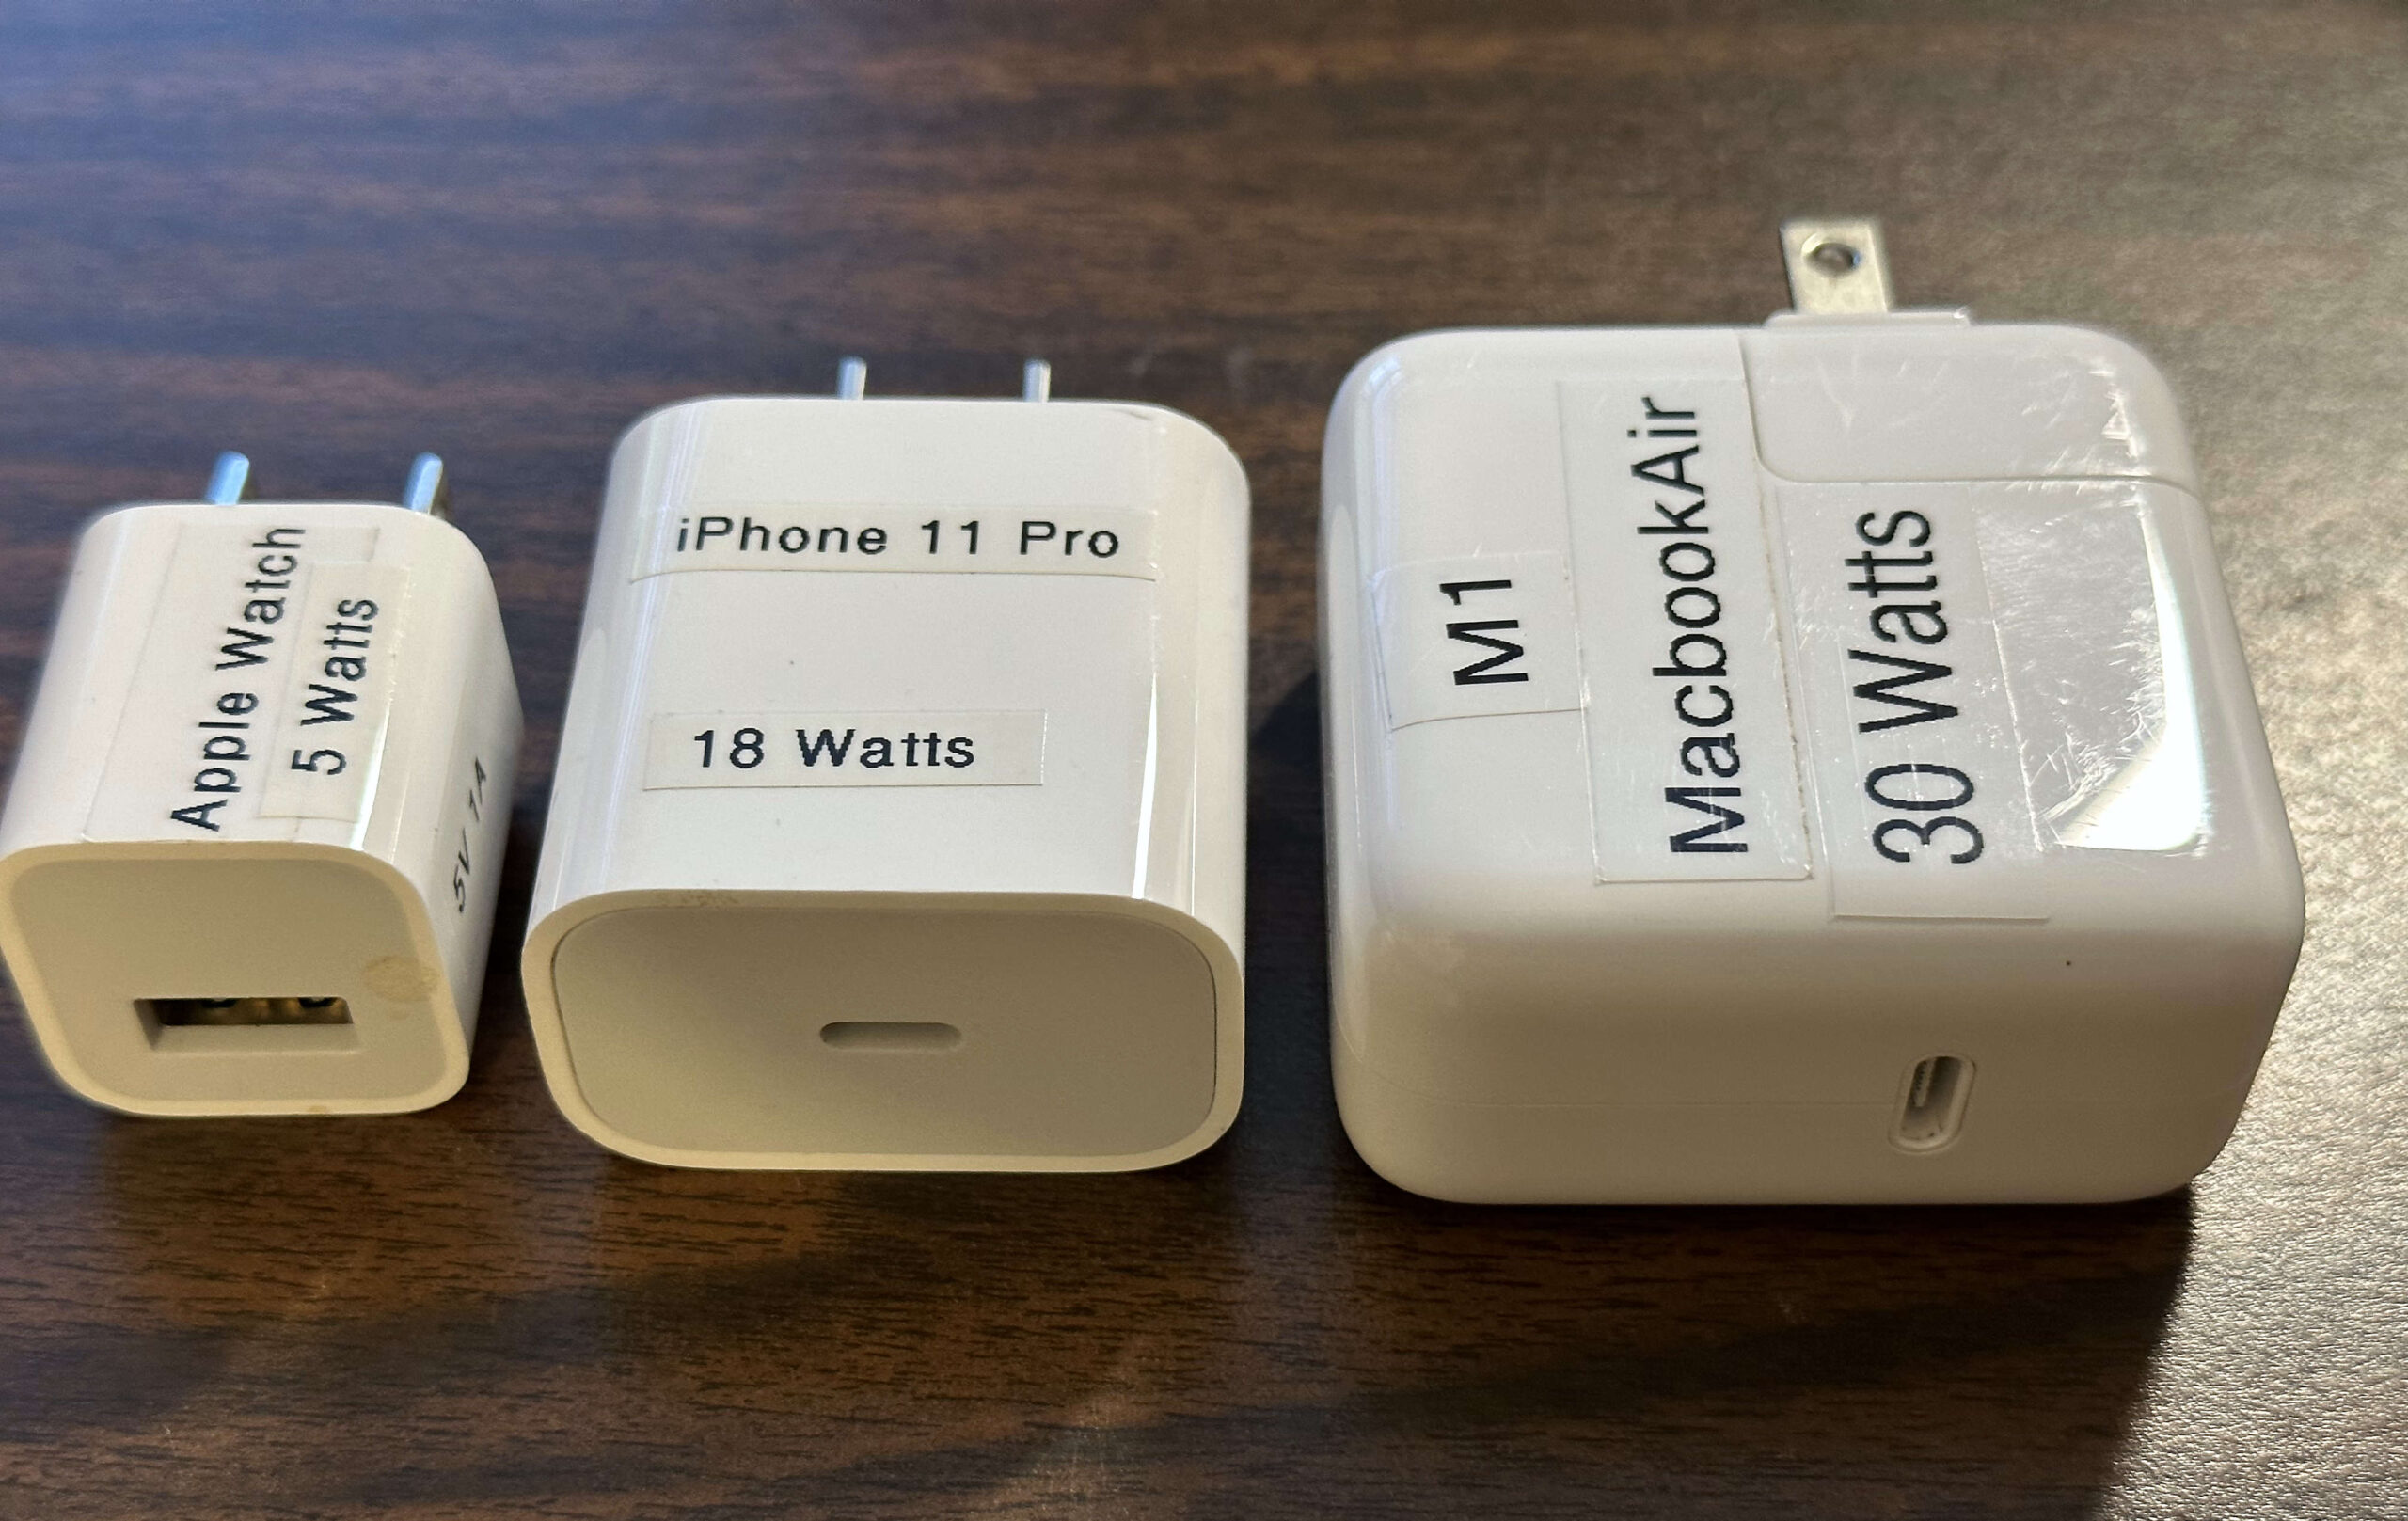
Choose Your Power
Recent iPhones and iPads may not have come with a power adapter, so it is up to you to make sure you have an appropriate one. Apple currently sells a bewildering variety of power adapters. Considering only the USB power adapters, there are are adapters with power ratings of 5W, 12W, 20W, 30W, 35W (dual), 67W, 96W, and 140 Watts. These are all USB-C, except for the older 5 and 12 Watt models. These are all for household plug-in use and do not include adapters for use in the car. A similar range of compatible adapters are also available from other companies.
Your device will not be harmed by a higher-wattage adapter. It will only draw the amount of current it actually needs. If you connect your device to a lower powered adapter, it may charge slowly, or not at all. If you connect your device to a higher powered adapter, it will charge faster, up to the device’s maximum charge rate.
USB is a complex standard which includes multiple data and multiple power standards within the one USB name.
You may “know” that USB provides 5 volt power. However, for adapters providing more than 15 Watts, USB adjusts to 20 Volts. For power above 100 Watts, USB uses 48 Volts. This is all while maintaining compatibility with older 5 Volt devices.
If you still have the power adapter from a phone you got 10 years ago, even if it is “perfectly good”, it is probably not sufficient for your newer devices.
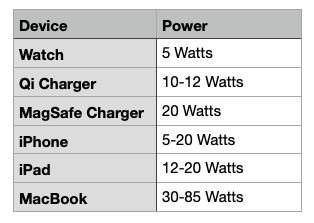
Recommended Power Estimates
Use an Adapter Appropriate to Your DeviceApple Brand USB Chargers 5 Watts, 18 Watts and 30 Watts
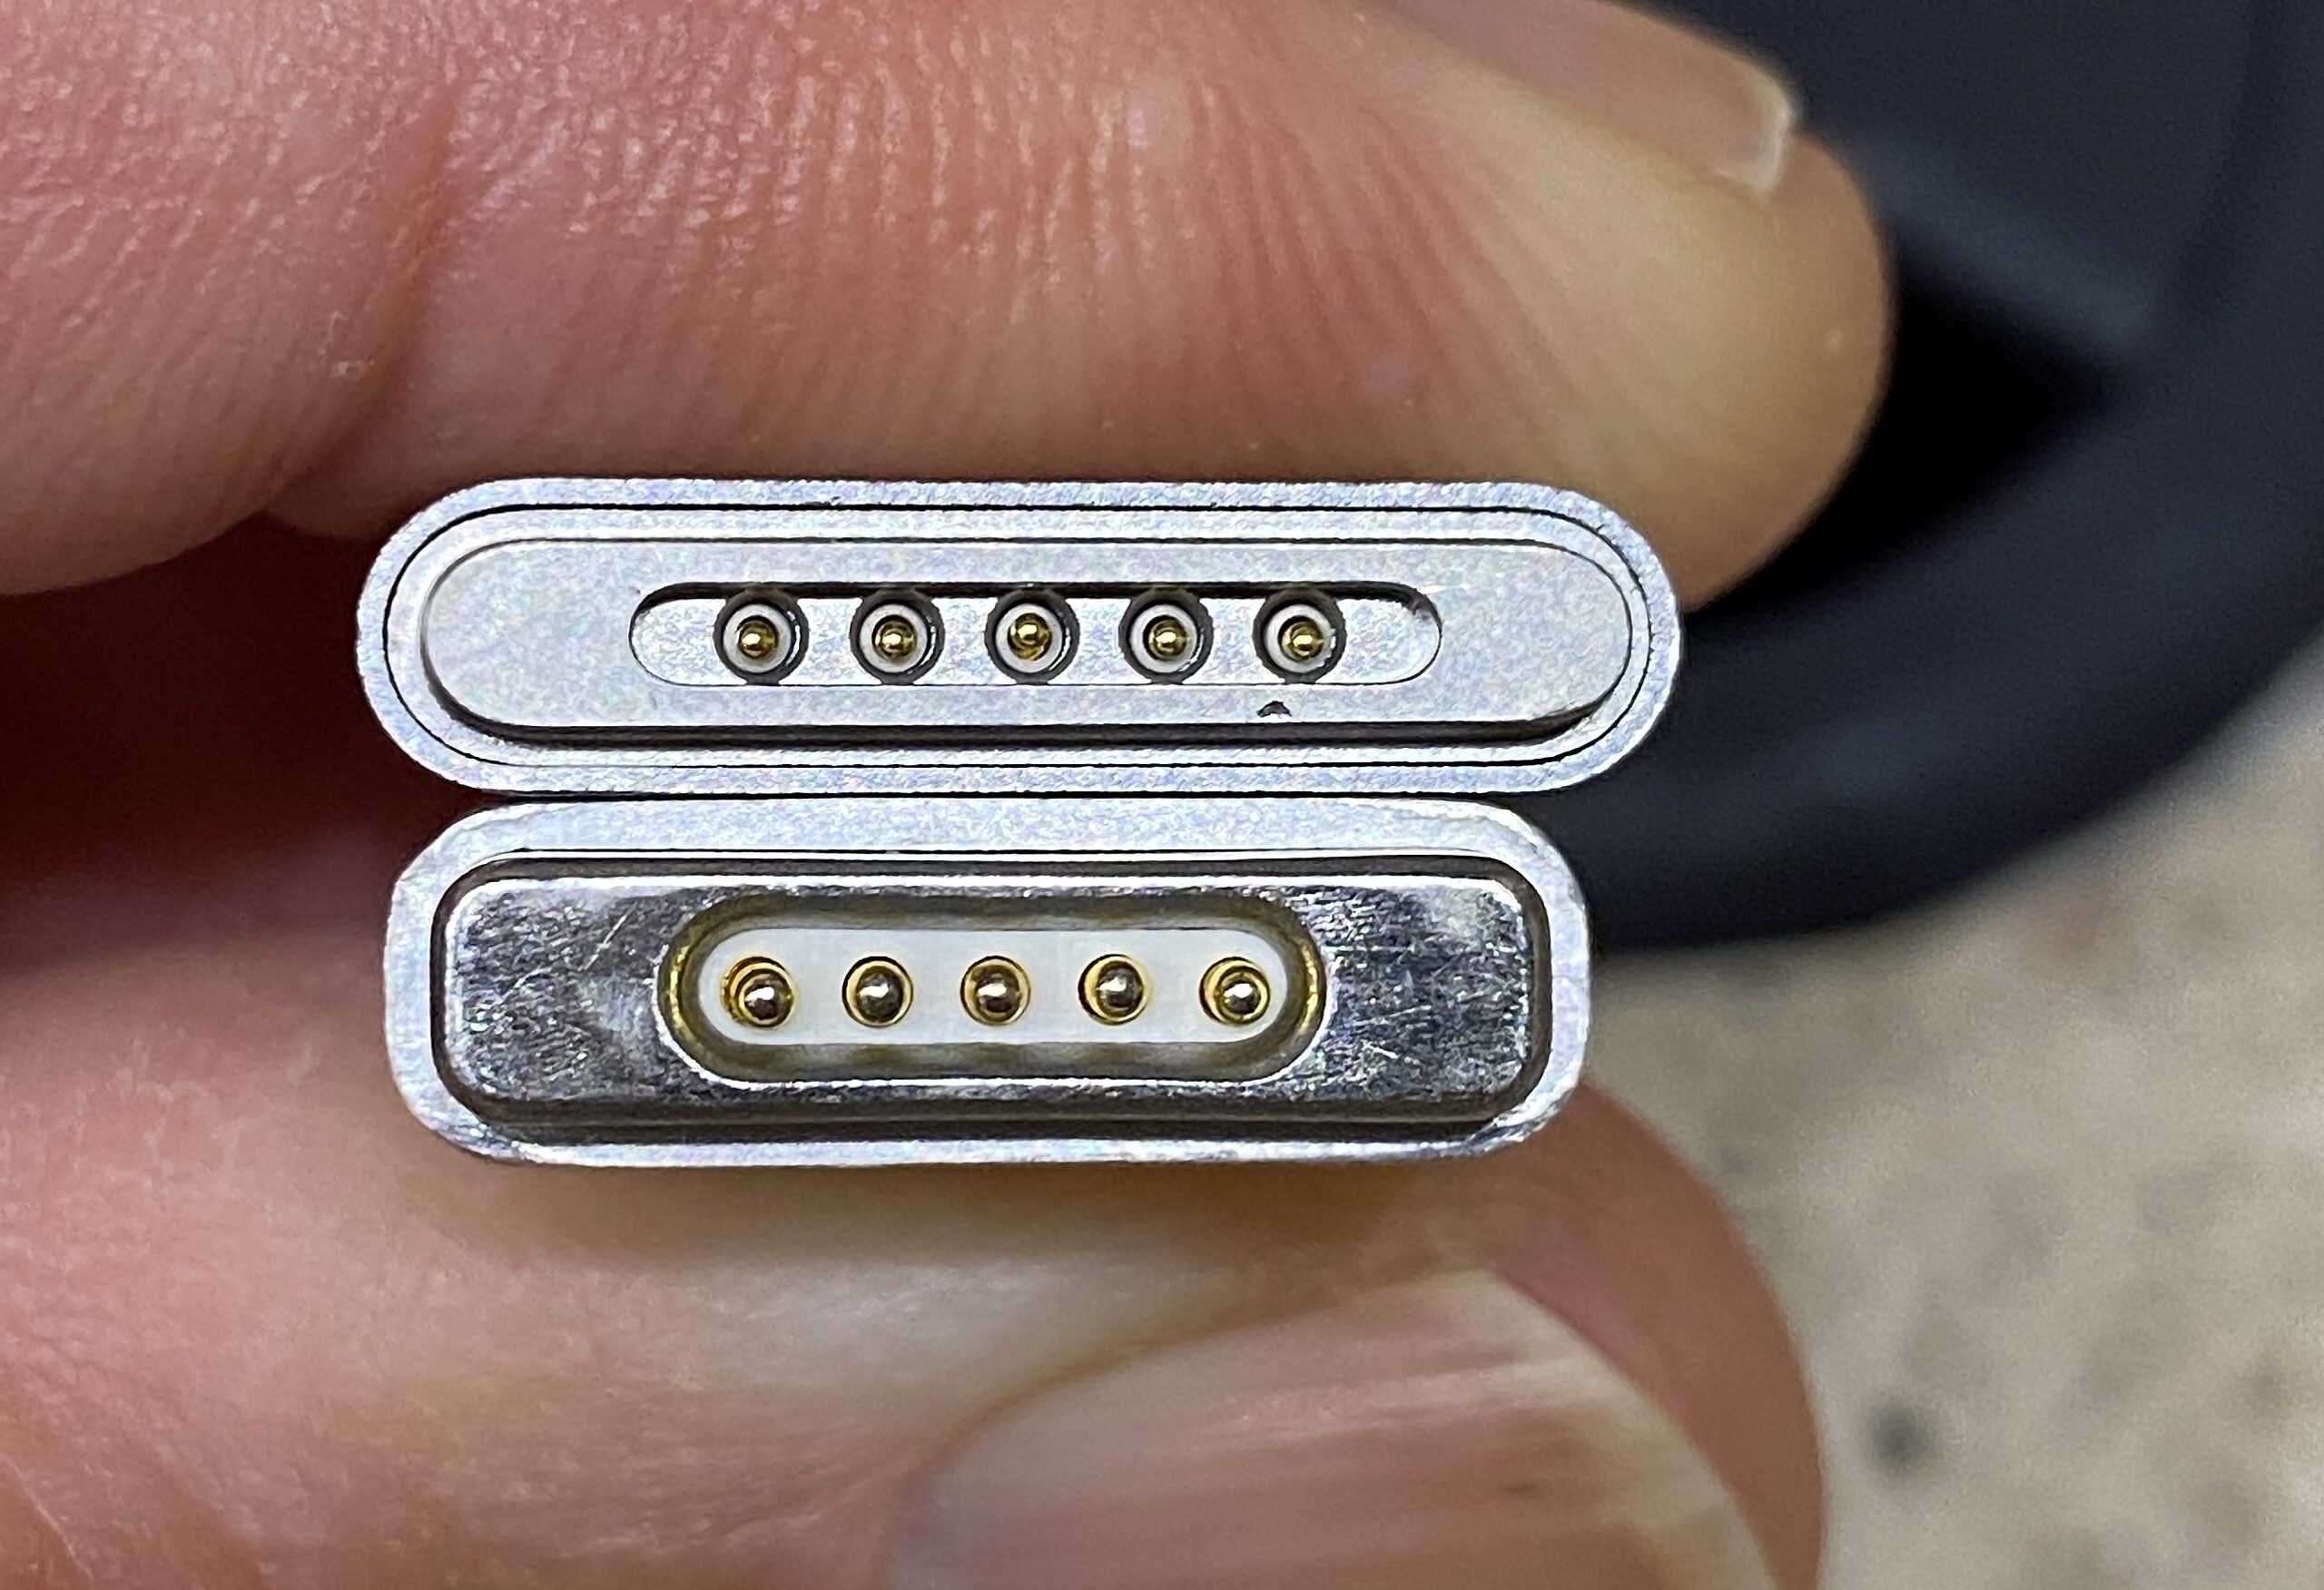
Which MagSafe Do You Mean?
Incompatible MagSafe 3 and MagSafe 2 Power Connectors (MagSafe 1 not shown)
Apple has had five different, incompatible things all called MagSafe: three cable types and two wireless chargers.
MagSafe and Qi Wireless Charging Pucks (Notice they all have wires)
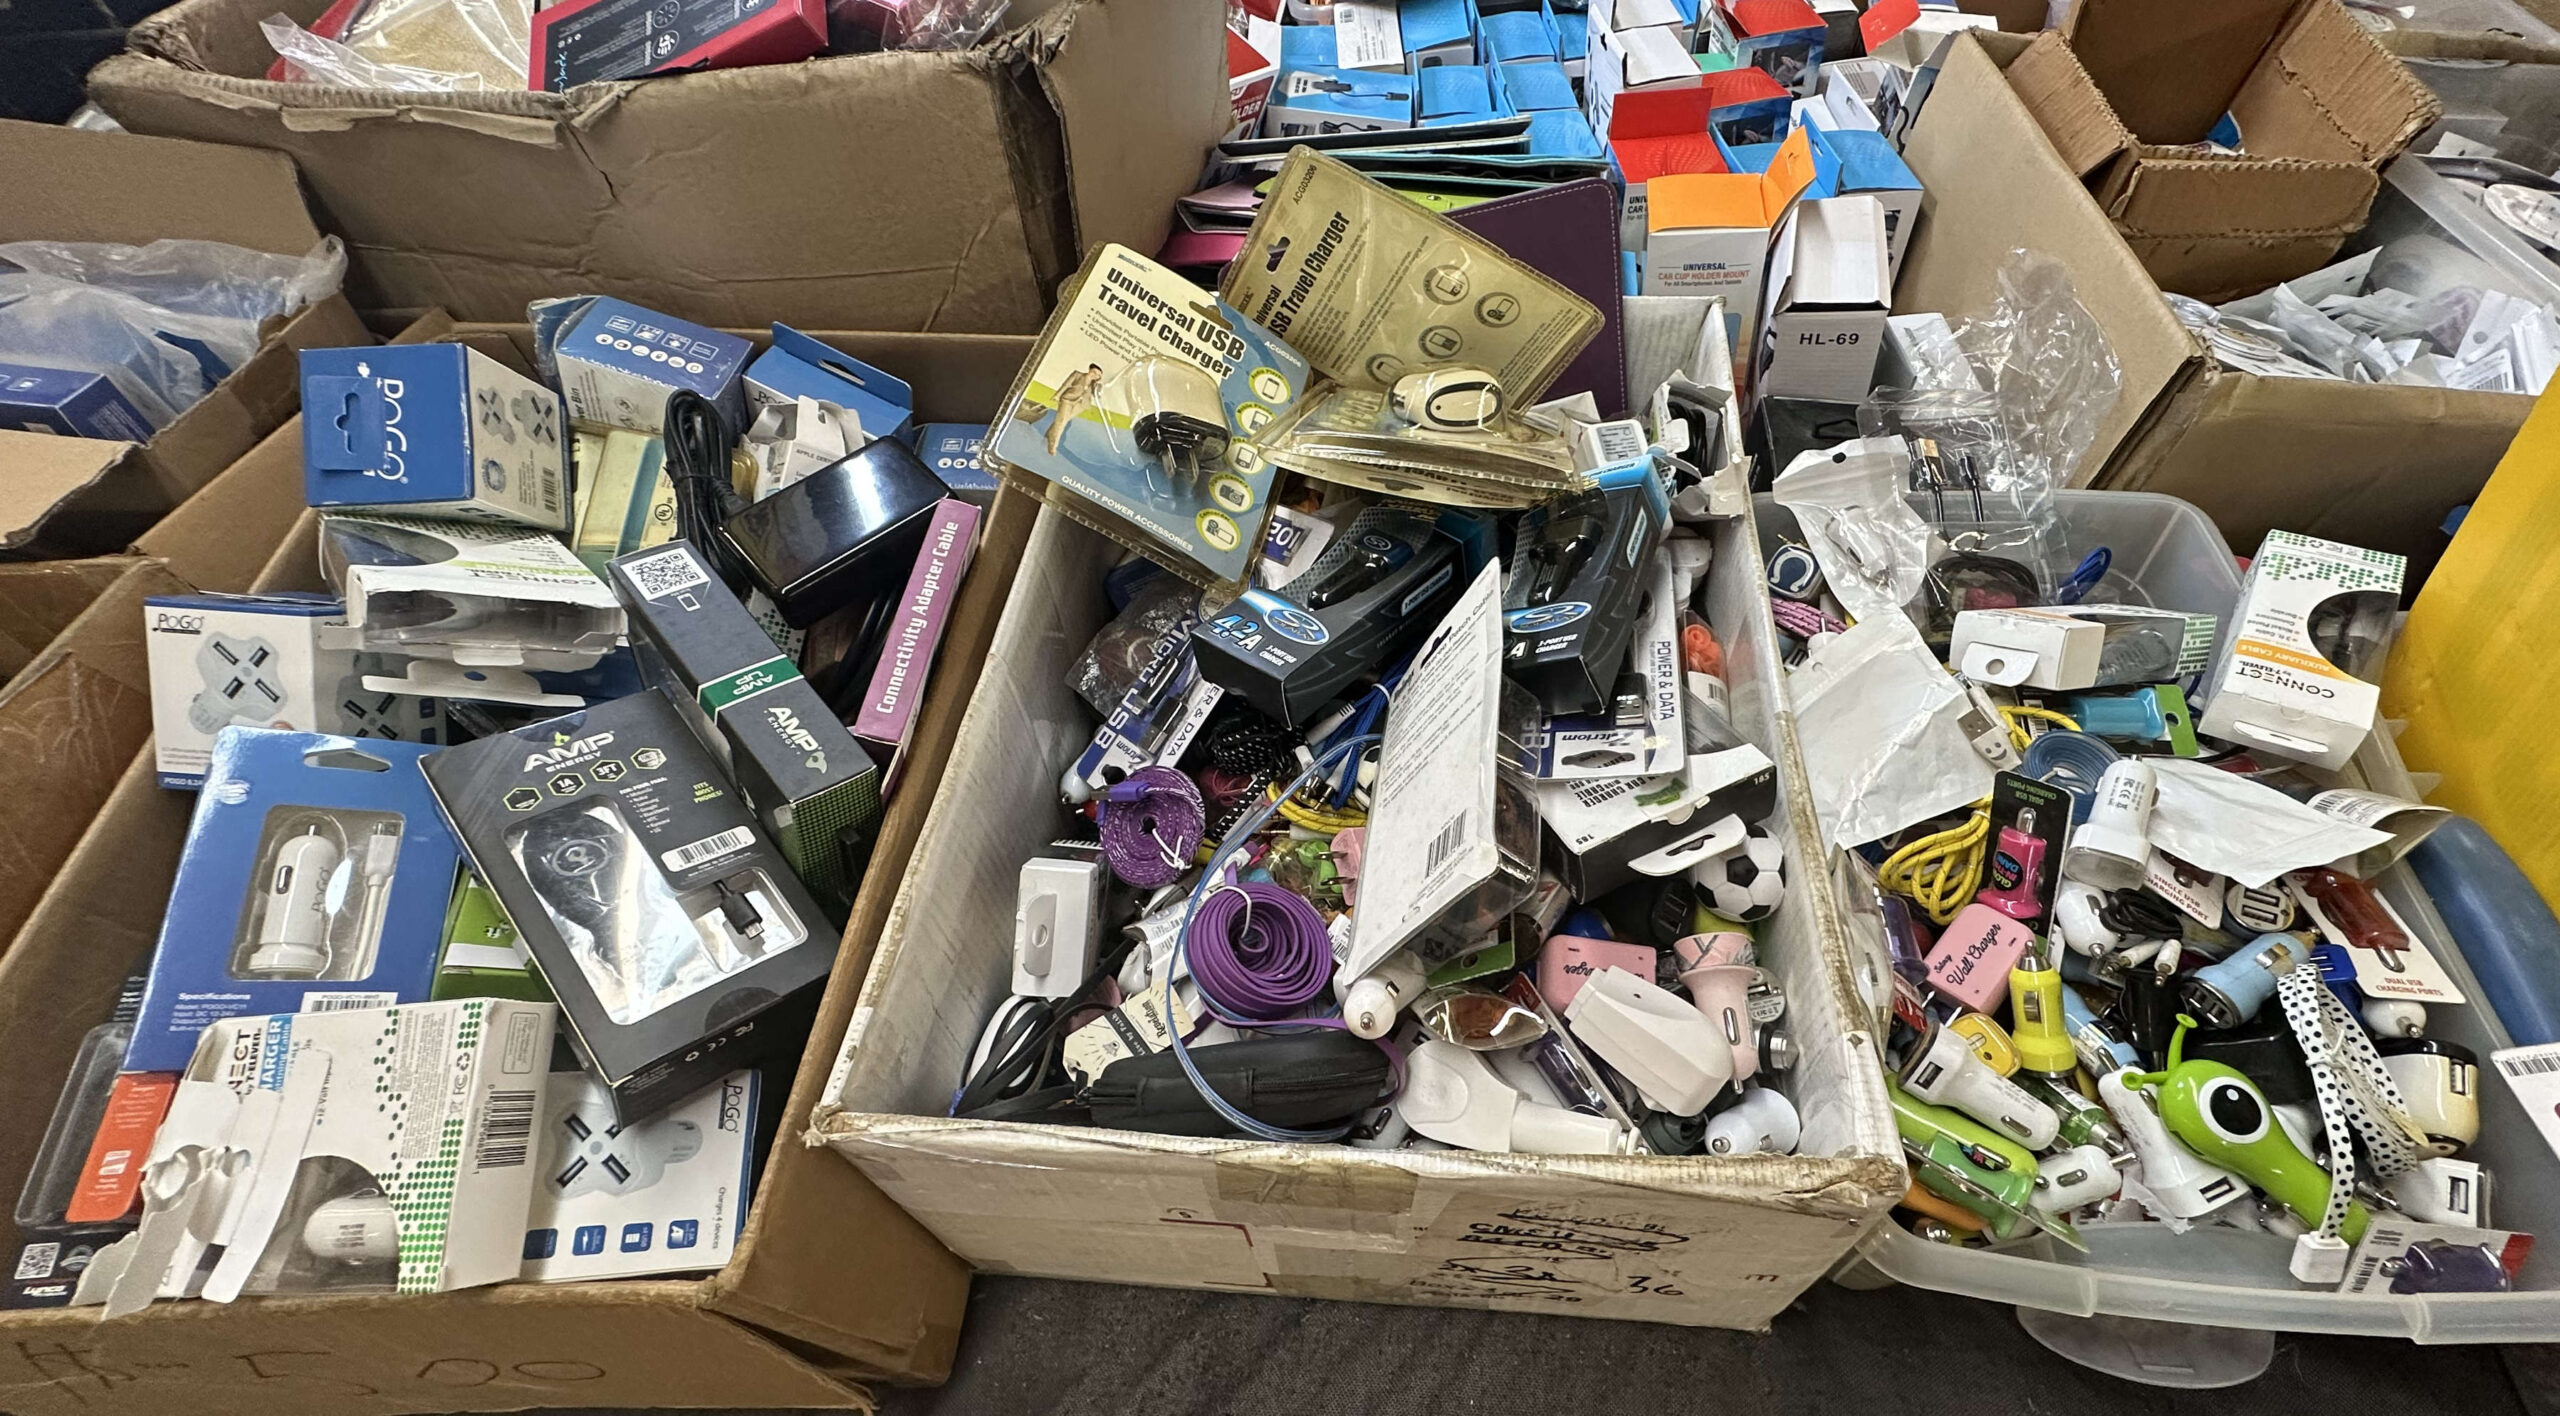
Don’t Let Junky Power Damage Your Device
Flea Market Bargain Bin Chargers
Choose reputable cables and power adapters. Apple offers the “MFi” (Made for iPhone/iPad) certification to other vendors. These products have been tested and are up to standards.
Not all cables that look alike work alike. Older or cheaper cables may work with low power devices, but may perform poorly or not at all for higher power modern devices.
Reputable brands include, in alphabetical order: Ainope, Anker, Amazon Basics, Apple, Belkin and MonoPrice. Look for emphasis on safety and clean power. Look for “MFi”. Look for USB C and USB 3.x compatibility. Beware cheap deals that come in a six-pack.
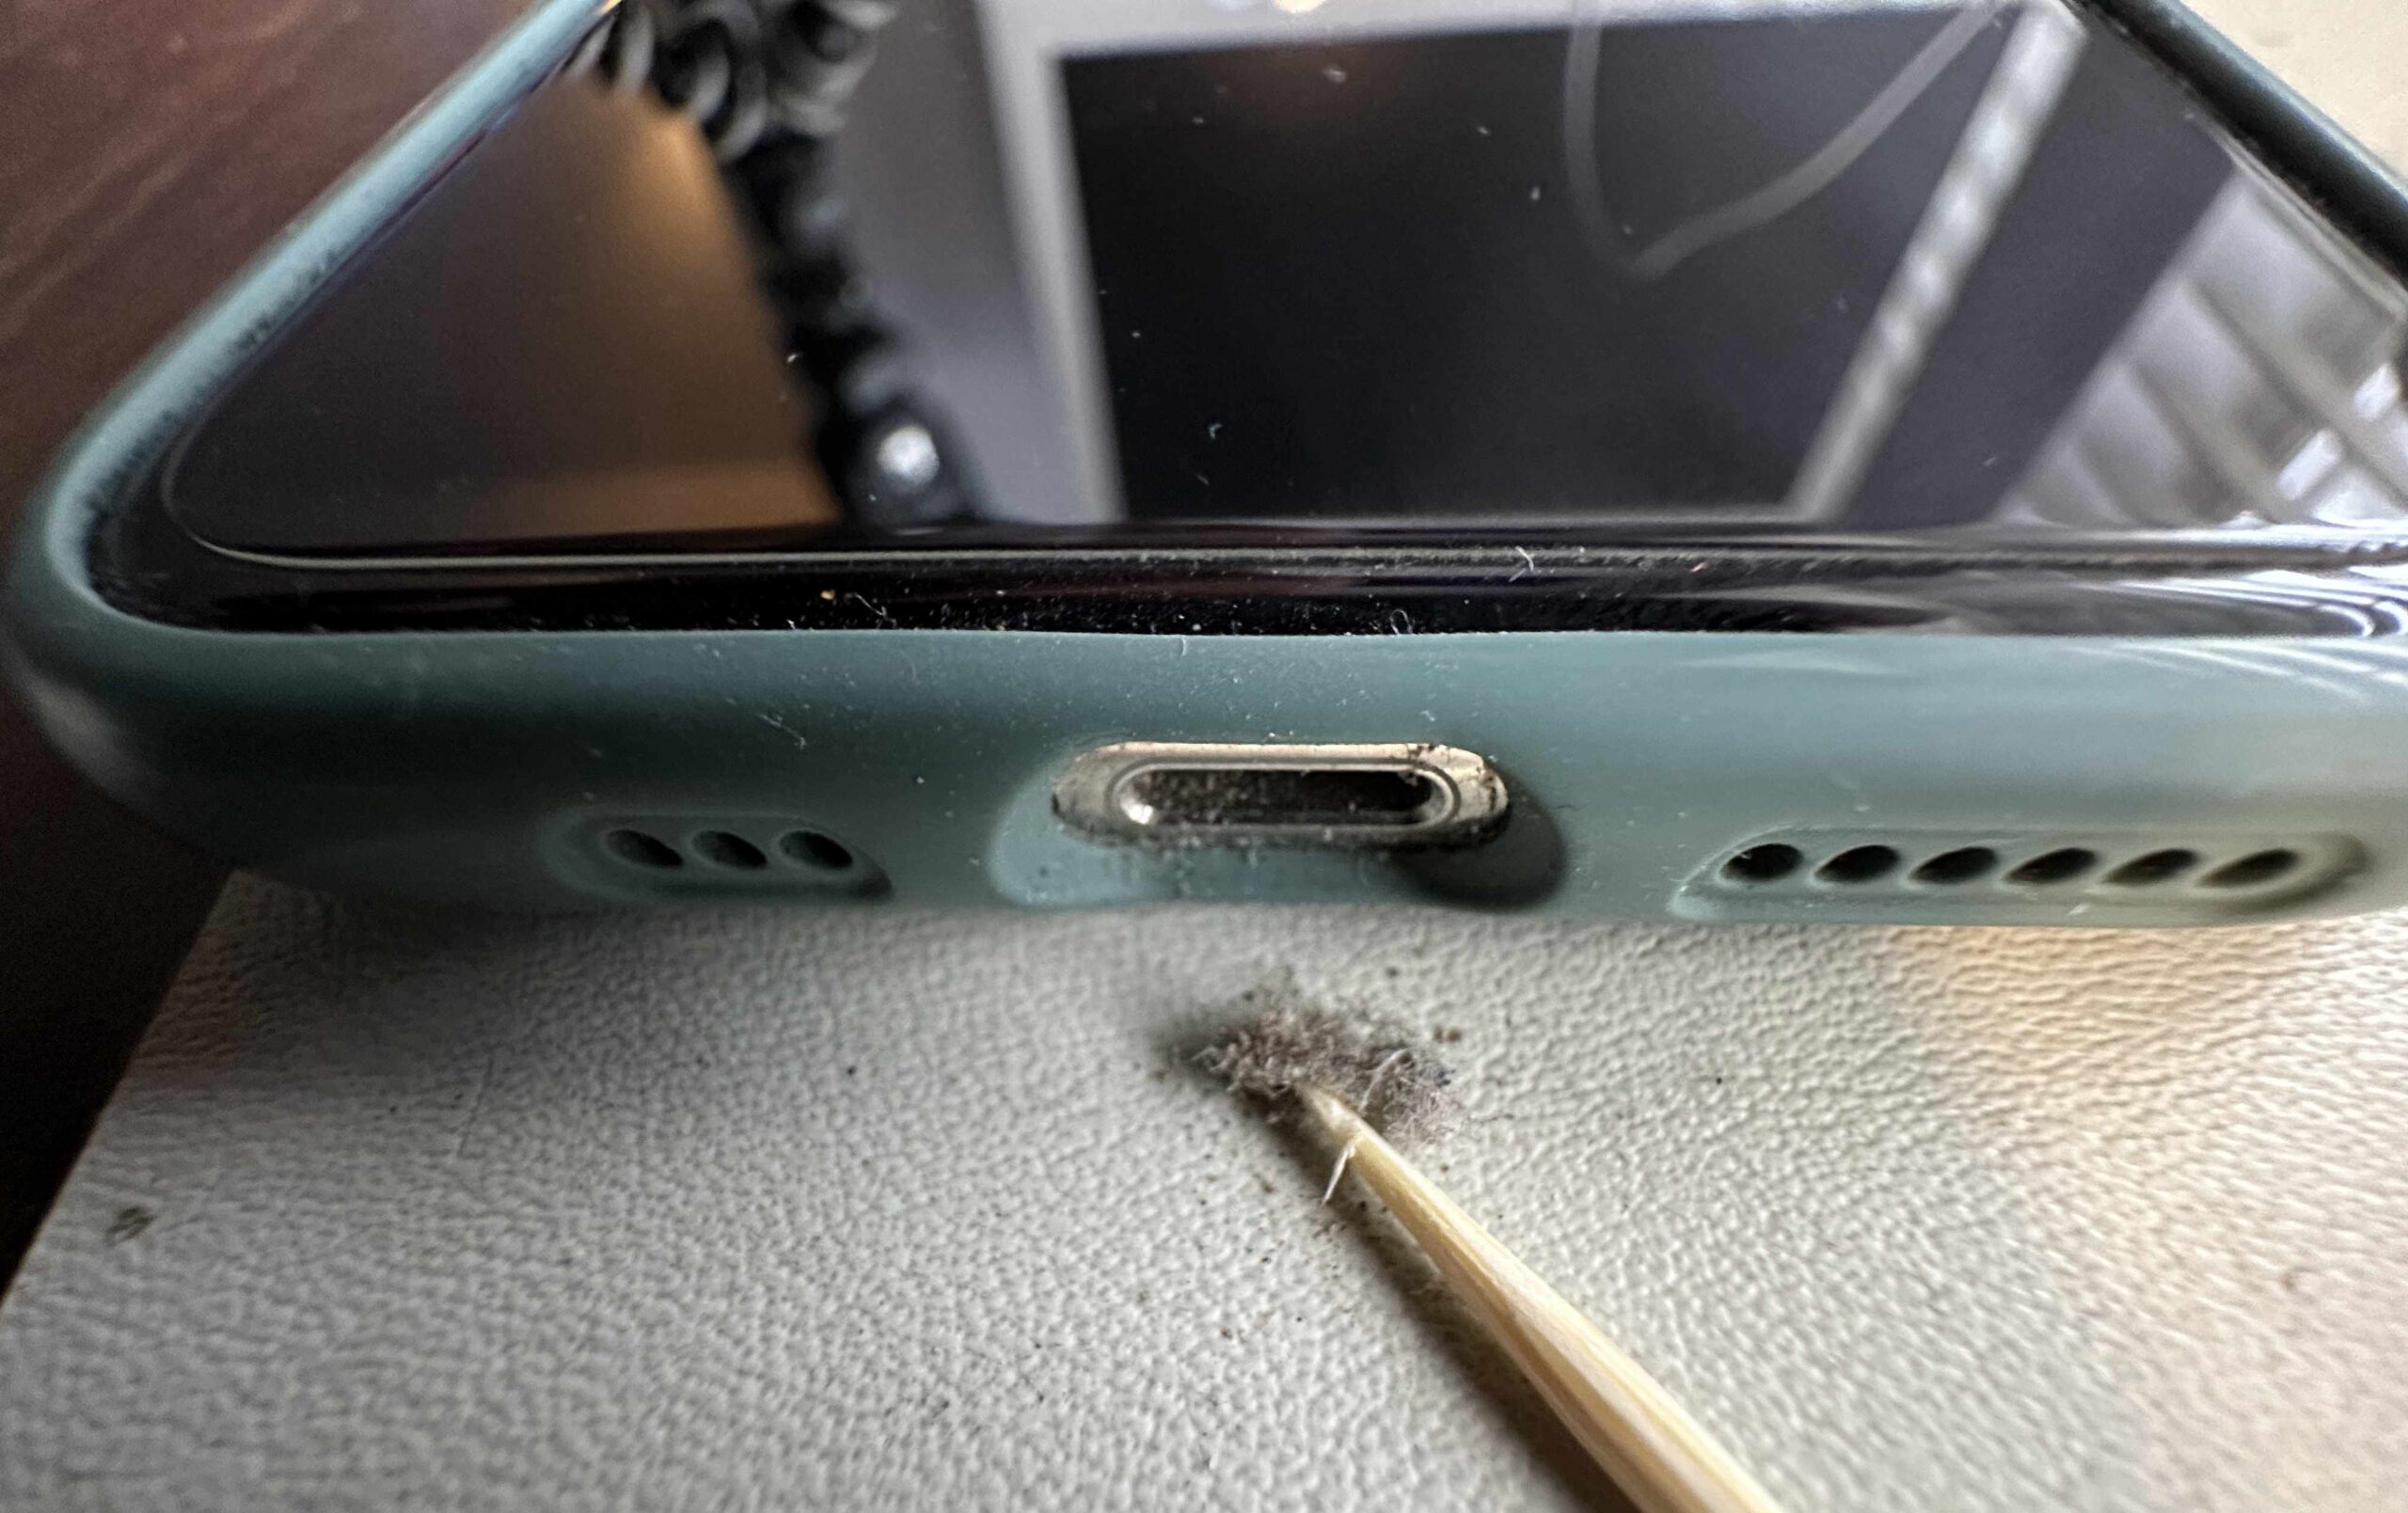
Having Problems? Clean Your Lightning Port
Clean Dust Bunnies Out of the Lightning Port With a Toothpick
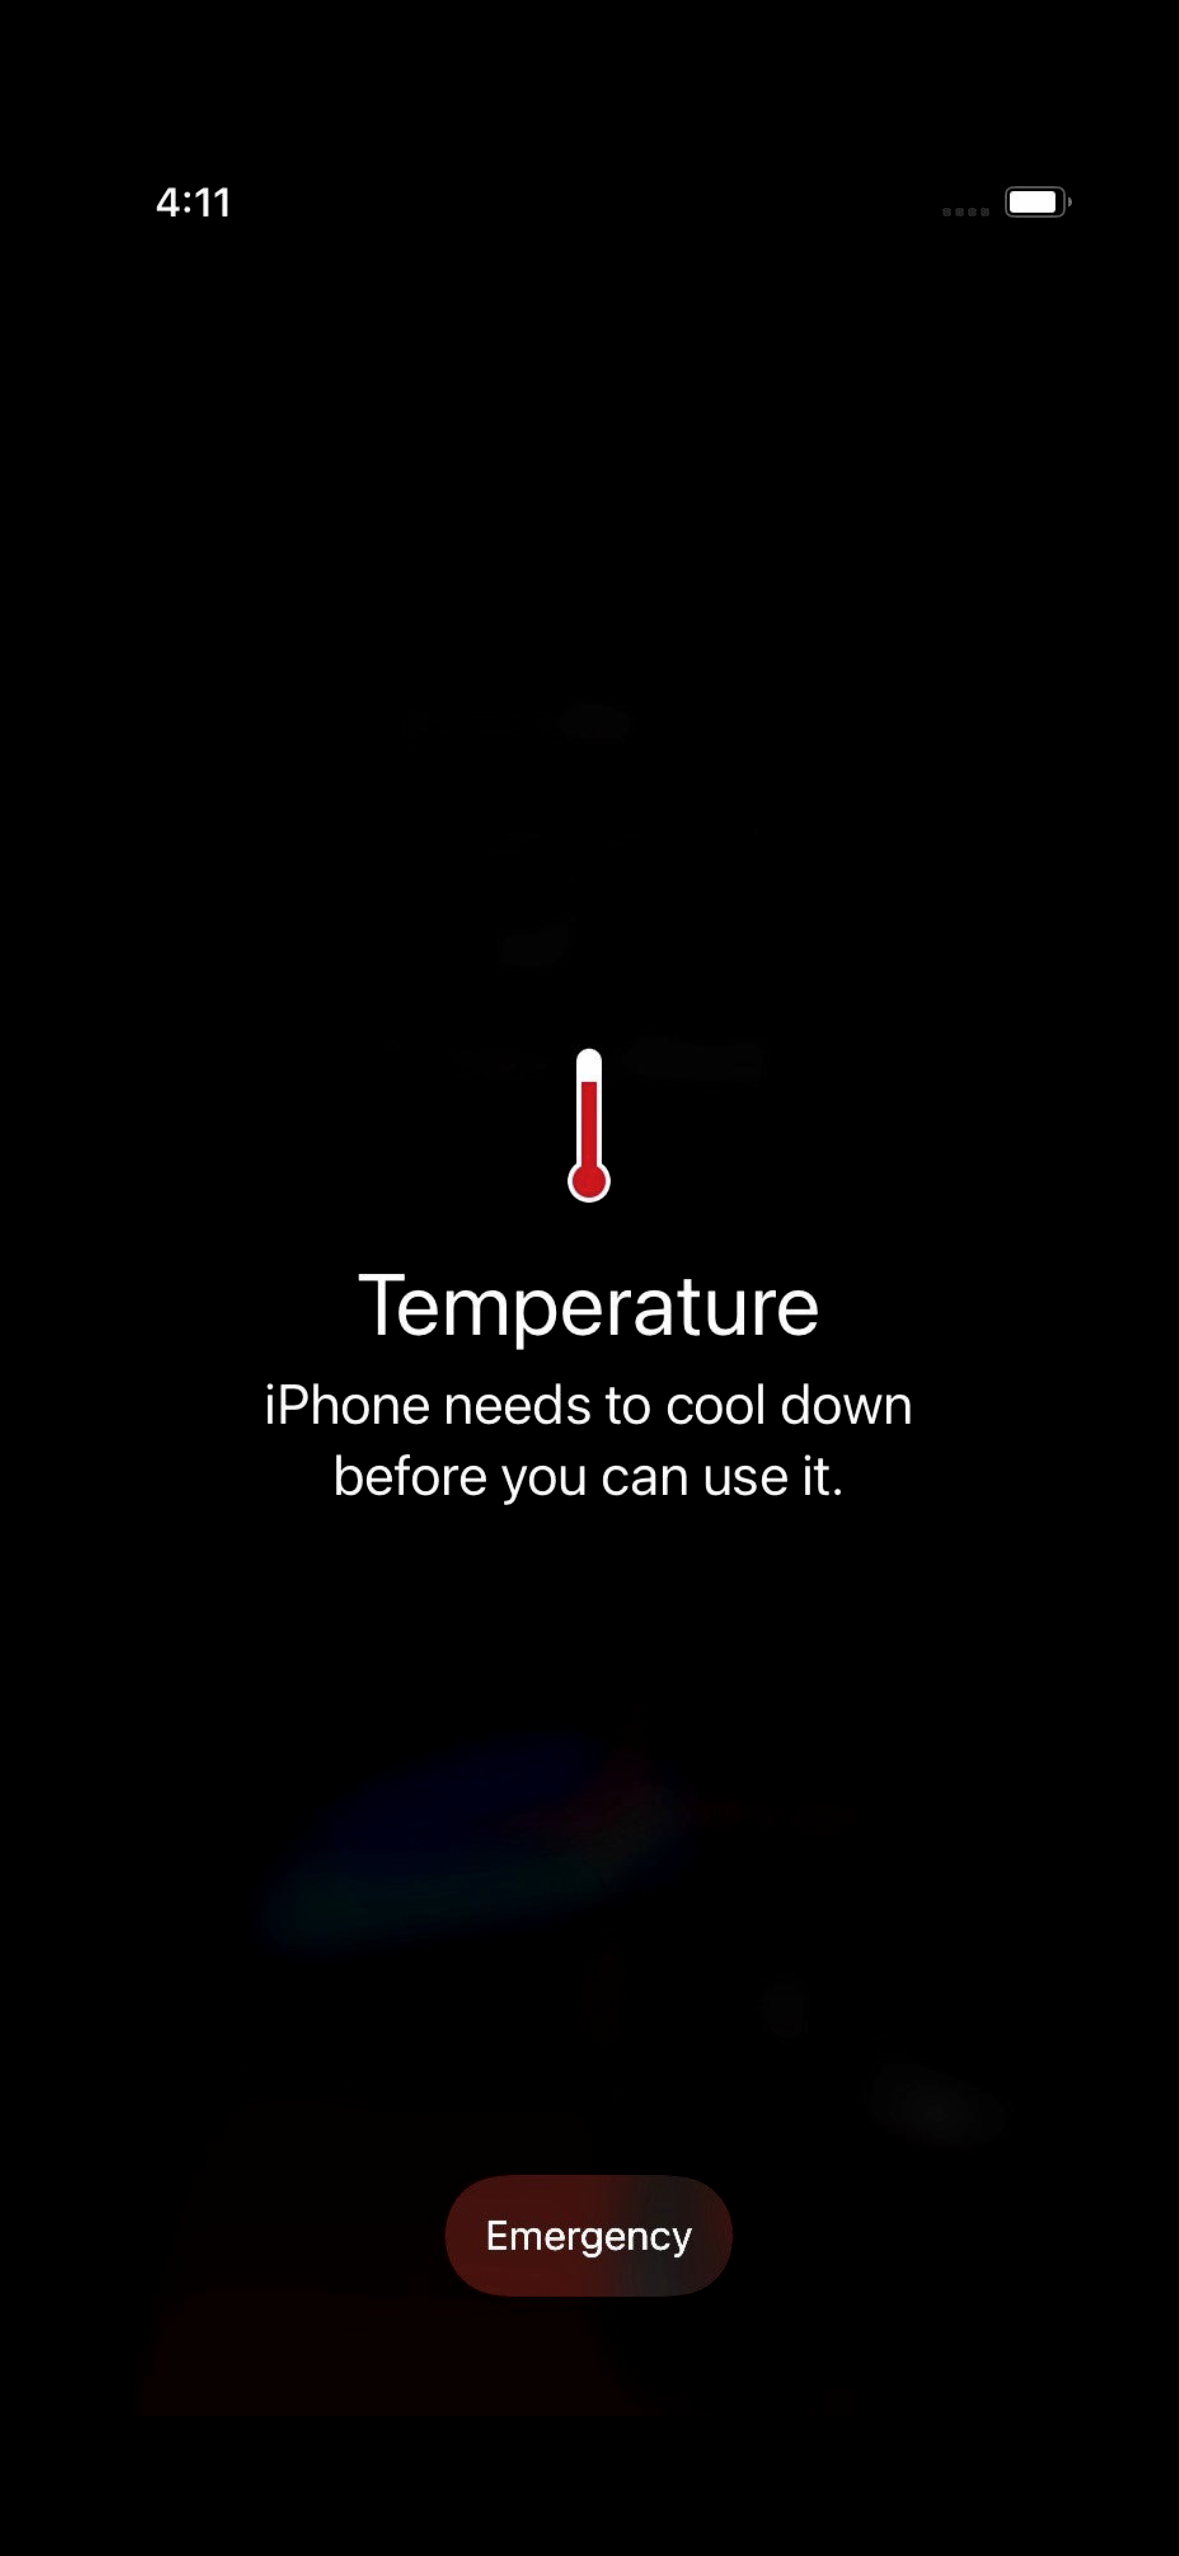
Beware of Heat
Your device may get hot when charging. Keep it out of the direct sun, especially on your car dashboard. In the car, positioning your phone in front of an air conditioning vent can keep it cool. A hot battery may charge more slowly, if at all.
iPhone Overheating Warning Screen
Fire Safety
Don’t charge your device on the bed or upholstery, especially overnight.
Throw away old, frayed, melted or intermittent cords.
Throw away power adapters that have overheated.
Charging in the Car
Modern cars probably have USB ports for charging and for Car Play or for playing audio. Cars tend to lag behind in technology. Many still have USB A ports. It pays to check your owner’s manual to find out which USB ports in your car will charge more quickly. My Honda has low-powered ports in the front, and higher-powered (12.5 Watt) ports behind the center console. Devices can charge twice as fast plugged into those ports.
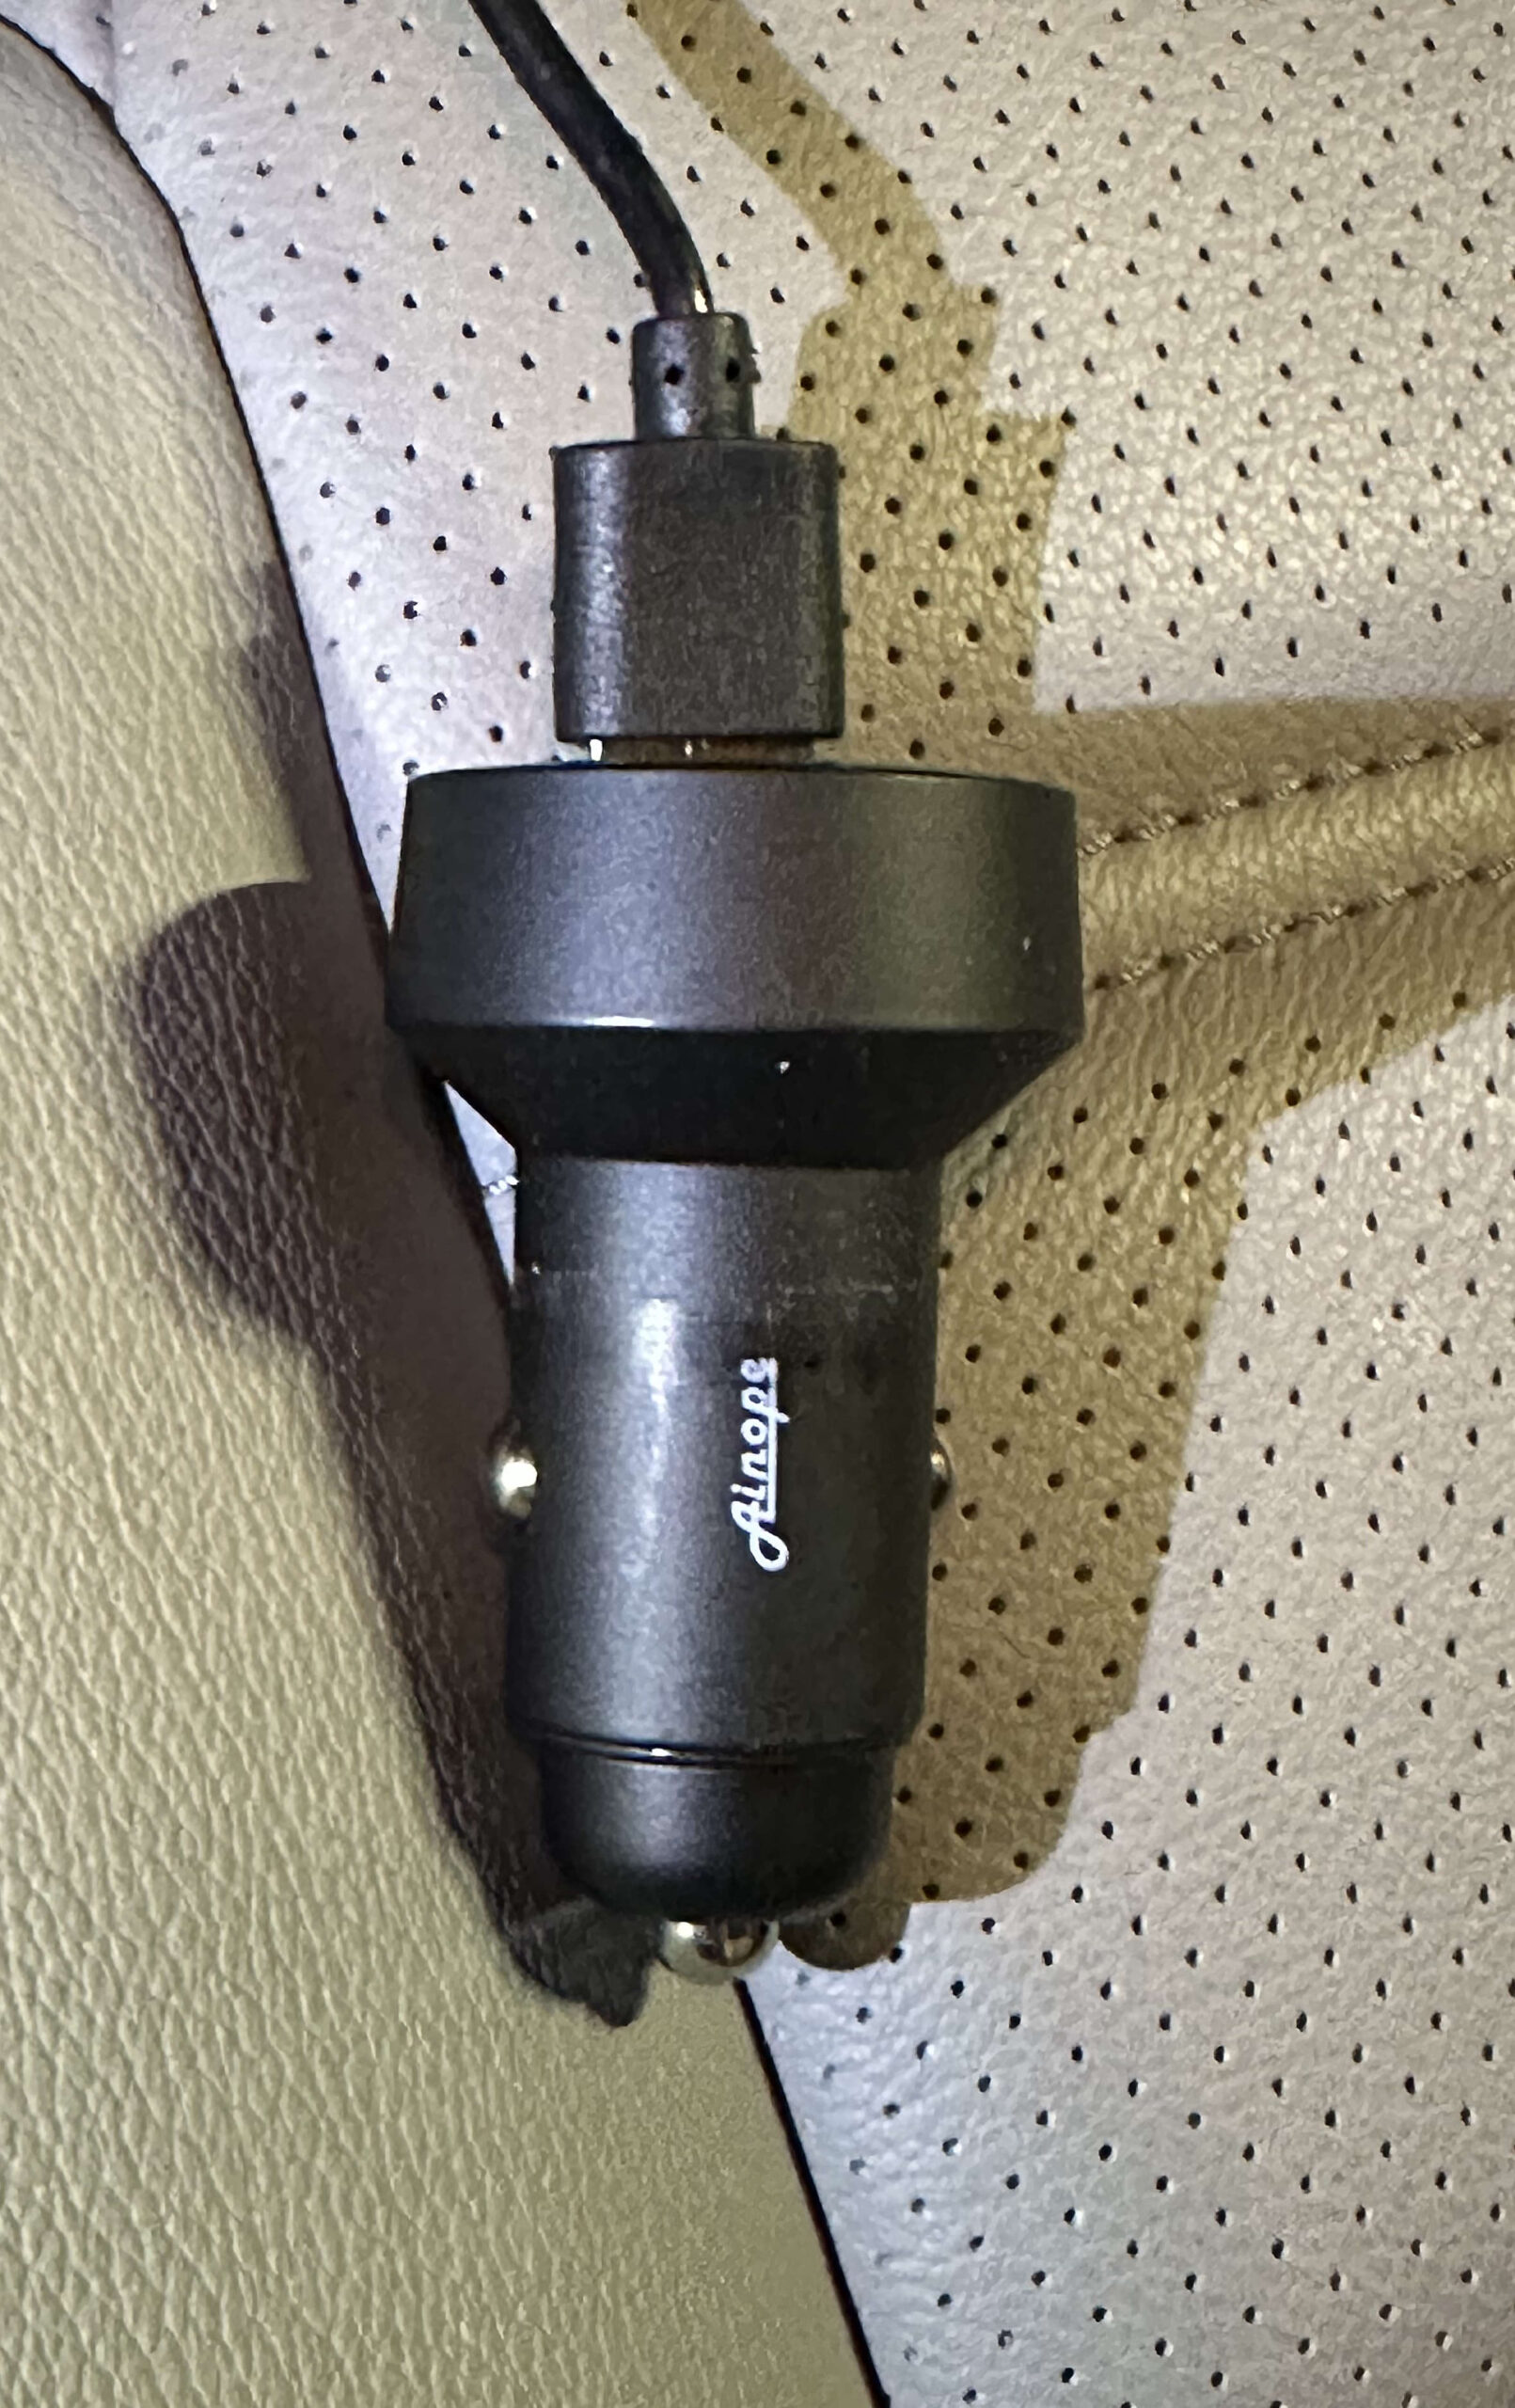
Most cars have a 12 V accessory outlet somewhere (aka, the old cigarette lighter outlet). These can supply plenty of power. You can find modern adapters to get the USB power you need from these. They are much cheaper than a new car!
12 Volt Accessory Outlet to USB Adapter
The World is Moving Toward USB C
But, USB A will be around for a long while. You should get yourself some USB A to C adapters ( both directions) to make the transition easier. They are cheap.
I have a MacMini which has no built-in camera. During the pandemic, I have been doing more on-line teleconferencing (mostly Zoom and Facetime meetings). I have used various cameras and various software to connect them to my computer.
I recently came across Detail, from Detail.co . This application allows you to use your iPhone or iPad as a web camera for your Mac. This is the best solution I have seen yet, and the iPhone has a good-quality camera, so my video looks good.
The Mac application does much more than that, which is both an advantage and disadvantage. It is a disadvantage in that it makes it harder to learn to use. There is a video tutorial on the site. The quick summary is to download the Detail app from the iOS or iPad OS App store on your iPhone or iPad, and also download the app for Macintosh from the web site. The app can work wirelessly, or via a USB cable (recommended).
You may want a tripod adapter for your phone. I bought this one and it seems like a good one. You might want to use that with a small desktop tripod like this, if you don’t have one.
Detail is not free, and they are kind of cagey about the price. I actually don’t know how much or how often they charge. There is a 14 day free trial period. I discovered and got access to Detail through my Setapp subscription, which is excellent for just-in-time discovery of useful, curated apps.
Here is an overview of iPhone prices. These are the prices from Apple’s on-line store in June, 2021. There are 13 different models available as new and refurbished. Apple’s refurbished products are excellent, and usually can’t be distinguished from new.
All prices are subject to change, and availability of any specific model on the refurb store, especially, can change from day to day.
At this writing, there were 13 different iPhone models ranging from a refurbished $339 iPhone 8, up to a brand new iPhone 12 Pro Max, with 512 GB at $1399.
In the chart, the blue bars indicate the price of the base model and the green bars the price of the same model with the maximum amount of storage. There is often an intermediate model between those two.
Apple has probably never had so many different models of iPhone available simultaneously before. Choice is good.
I want to document the process I went through recently when I sent my iPhone in for repair. That’s a similar process to getting an entirely new phone. There were some unexpected issues you should be aware of. This is going to be pretty long, so here’s some key points first.
Important Points
While you still have your old phone, whether or not you expect to get a new one soon, make a backup of your phone. If your phone unexpectedly fails, or is lost or stolen, you will have to get a new one. You can backup your phone to your computer or to iCloud. If you specify a password for the backup, you will get a more complete backup than if you do not. I recommend using the password. Write it down.
If you are using two-factor-authentication (2FA) login for any sites, create backup codes to access those sites. Look at your authentication apps (e.g., Google Authenticator, 1Password and Last Pass Authenticator) and make a list of all the sites you are using with those apps. Your 2nd Factor information may not be restored to your new phone. Make sure you know how you will sign on to your sites without it.
If any of your sites use text messages or phone calls as an alternate 2nd factor for login, consider assigning another phone number, such as your spouse’s phone for these, since if you are without your phone, you can’t receive those messages.
Make sure you know your Apple ID username/password, your iPhone’s passcode, and the password to your latest iPhone backup. Write them down. Your Apple ID credentials are the same as you use for iCloud logon.
Your Old Phone
If you are sending your iPhone away, out of your control, for any reason, including repair, or sale or trade, you should follow Apple’s Instructions here. Your phone should then be a blank slate, just as it was when it was brand new, with none of your personal data in it. Be aware, that if you have an Apple Watch, this will render your Apple Watch completely useless until you pair it with another iPhone. (Is this true for cellular model watches also?)
Remove the case from your iPhone if it has one. Remove the screen protector, if any.
Remove the SIM card from your old phone. Save it. You will need it for the new/repaired phone.
Received the New/Repaired Phone
I had backed up my iPhone to my Mac. When I got the phone back, although it was the same phone (I recognized minor scratches on the back), it had a new serial number from Apple, and for all practical purposes, it was a different phone.
The process below will be different if you are restoring from iCloud, or if you make any of several choices differently than I did, but this will give you an idea.
This process was longer and more complex than I would have liked. I had to enter multiple passwords multiple times, and deal with confusing dialogs, but I got done eventually.
Begin by installing the SIM card into the phone.
Next, power on the phone. Enter your language and country when prompted.
I chose “Set up Manually” since I had no other iOS device present.
Enter your WiFi password.
You’ll see a message “…It may take a few minutes to activate your phone”.
You’ll click through the Data and Privacy notification screen.
Next, setup touch ID or face ID, depending on your phone model.
You must create a passcode. You can re-use the passcode you had before. I chose “custom alphanumeric code” for greater security.
Enter the passcode twice. (To prove you really know it, and entered it correctly.)
Restoring Apps and Data
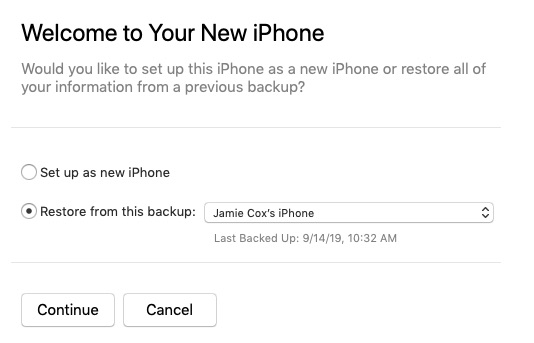
The phone presents you with the following options:
Restore from iCloud Backup
Restore from iTunes Backup
Move Data from Android
Don’t Transfer Apps & Data
I selected Restore from iTunes Backup, and connected my phone by USB to my Mac.
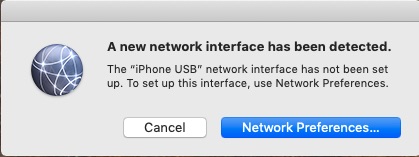
An irrelevant and distracting dialog pops up on the Mac.
“New Network Interface” Dialog
Cancel that to see the meaningful dialog behind it. As of MacOS Mojave, the actions below take place in iTunes. In MacOS Catalina, it is expected to take place directly in the Finder.
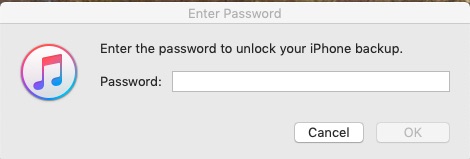
New iPhone DialogEnter password for the Backup
I selected my most recent backup to restore, and had to enter the password. Even though I had saved the password to my keychain when I created it, I still had to enter it manually here. Don’t forget your backup password, or remember where you saved it.
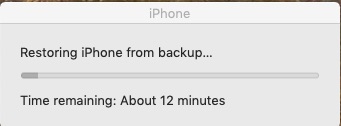
Restoring took about 12 minutes
The phone restarts automatically after the restore, and you are presented with multiple popups.
Cancel the network popup, again.
On the iPhone, press Home to upgrade, and enter your passcode on the phone (your iPhone passcode).
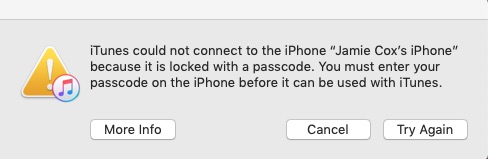
This was the one place where things actually went wrong in this process for me. After a progress bar, the Apple logo appeared on the iPhone. After a long wait, iTunes said Syncing TV Shows to “Jamie Cox’s iPhone” (Step 4 of 4), and Waiting for items to copy. I was looking at a 100% progress bar for many minutes. (I only had a couple TV episodes on my phone.)
I gave up waiting and clicked Done in iTunes. The phone wouldn’t power down with a long press on the side power button. (This was an iPhone 7) This proved to me that it really was hung, and would never have finished no matter how long I waited. I held Power and Volume Down for a reset. I then unplugged the phone from USB. When the phone started up, I had to enter my iPhone passcode. I was then at the Update Completed screen on the phone.
Things are back on track now where you should be if the phone doesn’t hang.
General New iPhone Setup
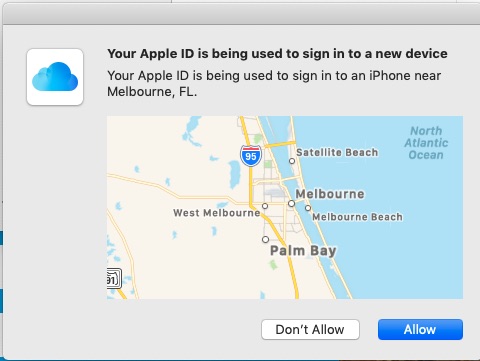
At this point, you will be prompted to enter your Apple ID password. You may also receive this security prompt on the Mac:
Apple ID Allow Dialog
After clicking Allow, on the Mac, you then get a 6-digit code which you need to enter on the iPhone. (If you have two-Factor Authentication enabled on your iCloud account.)
Then agree to the Terms and Conditions screen.
Then you see the Location Services screen. (I chose Enable Location Services.)
Now, you will see the Welcome to iPhone Screen. Choose Get Started.
Now, finally, you are at the iPhone home screen, with icons loading.
On the Mac, you may get a couple more popups. First, asking if you want to add your phone number to iMessage and FaceTime. (I clicked Yes.) Second, notifying you that “Your Apple ID and phone number are now being used for iMessage and FaceTime on a new iPhone.”
At this point, I put the case back on my phone.
Re-Pairing the Apple Watch
Initiate pairing by moving your phone close to the watch. Let the phone’s camera see the pattern on the watch face.
I selected Restore from Backup, to get my watch back to where it was previously.
You’ll have to agree to the Apple Watch Terms and Conditions screen on the iPhone.
Then enter your Apple ID password on the iPhone. (For me, the steps in this sections failed the first three times. I then restarted both the iPhone and the watch. After that, it worked.)
After your Apple ID is verified, you will get to the Shared Settings screen. Tap OK.
You will be asked to create a passcode for your watch. (I used the same code I had before.) You must enter it twice.
You may see the Heart Health screen on the iPhone. Tap continue.
You may see the Apple Pay screen on iPhone. Tap Continue. Then you will have a chance to enter credit cards or set them up later in the Apple Watch App. (I chose to set them up later.)
You’ll see the SOS and Fall Detection screen. Pay attention, this could be important later. I enabled Fall Detection. It can save your life later.
What Wasn’t Restored
All my credit cards were missing from the Apple Wallet after the restoration, both on iPhone and Apple Watch. However, my loyalty cards and passes were still present in Wallet. Apparently Credit Cards are not stored in the Apple Watch or iPhone backups, even when the encrypted backup option is selected. This is probably a security measure by Apple.
As I mentioned before, my Two-Factor Authentication information was not restored in Google Authenticator or Last Pass Authenticator Apps. So, I could no longer generate codes for those sites I had been using with those apps. The 1Password app still had all my passwords as well as 2nd factor codes for those sites which used those. Your mileage may vary depending on your version of 1Password and how you sync it.
My Home Kit devices remained set up in iPhone as before, no problem.
If you had installed a configuration profile, such as the Spectrum WiFi access profile, it isn’t restored, and you will have to follow the instructions from the provider to get it installed on your new phone.
Your WiFi credentials are not restored. You will have to re-login to your favorite WiFi networks.
You will have to re-pair your Bluetooth devices, such as headphones, speakers, and car stereos.
Entering Passwords
During the restore process, you will have to enter passwords or passcodes at least 10 times, assuming you don’t make any mistakes, and everything goes perfectly.
iPhone Backup Password 1 time
WiFi Password 1 time
iPhone Passcode 4 times
Apple ID 2 times
Watch Passcode 2 times
Before you start, make sure you know your existing passwords, or what you want them to be, and write them down in a safe place.
Conclusion
So, I hope this overview of the process of getting a new iPhone was helpful to you. This process seems like it is longer and more difficult than it should be, but knowing it in advance should help. Please leave a comment if this was useful, or if you see anything wrong or anything I left out.
Dennis showed the group this tip at this month’s meeting, and promised that the details would be on our web site.
This tip is for iOS (iPhone or iPad) users. Create a bookmark in Safari called “Open in 1Password”. Replace the URL for the bookmark with this snippet of Javascript:
When you visit a page in Safari, and realize you would rather open it in 1Password, so it can fill in your logon information for you, invoke the bookmark and the page will re-open in 1Password. The ‘op’ in the script stands for One Password.
This trick only works with the new version of 1Password. Version 4, I believe.