MacMAD Presentation Meeting for Tuesday, September 17, 2024
Helpful Basics On-Line
Tonight’s meeting is primarily an on-line demo. But, here are some supplementary on-line references oriented towards the basic iPhone or iPad user.
iOS 18 and iPadOS 18 have just been released, so the User’s Guides will probably be updated accordingly. For the beginning user, the biggest difference is probably that the Control Center looks slightly different now.
See your device’s model (is this an iPhone 11 or iPhone 12?)
See your device’s warranty status
See how much of your device storage you are using
See how much of your iCloud storage you are using
Sign in to iCloud – You are probably already signed in.
Note – Almost ALL iPhone & iPad owners have an iCloud account, whether you know it or not. If you are paying any amount monthly for iCloud, you have an iCloud+ account.
More On-Line Demos
Take a photo and send it to someone via eMail or text (e.g. sharing with family)
Open an email and add the sender to your contacts.
Open a contact and send them email.
Open a contact and navigate to their address.
Buy and install a new App from the App store.
Add a credit card to Apple Wallet .. Pay someone with Apple Wallet
Visit a Website. Bookmark it. Create a login at a web site. Log out and back in. (iPad)
Create a Calendar Appointment for a recurring event
Here are the slides from the May, 2022 MacMAD meeting on browsing with Safari.
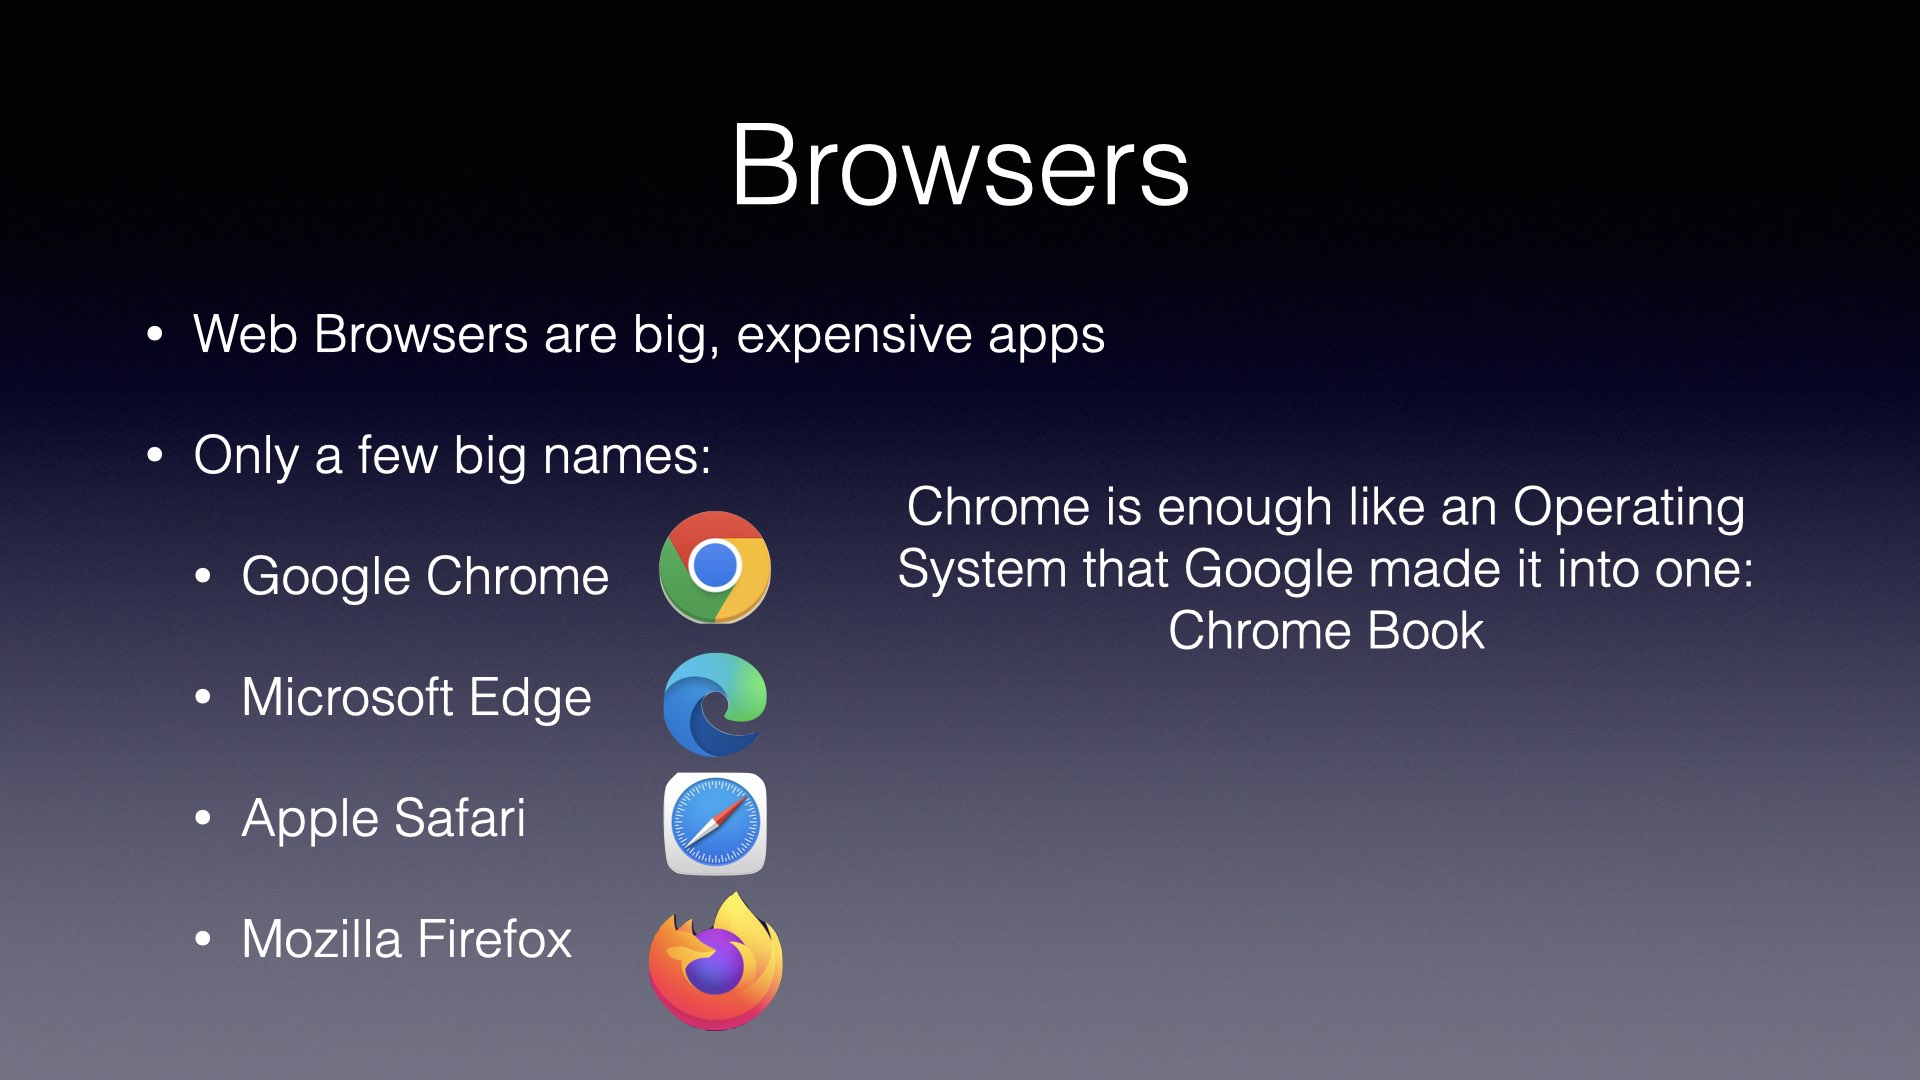
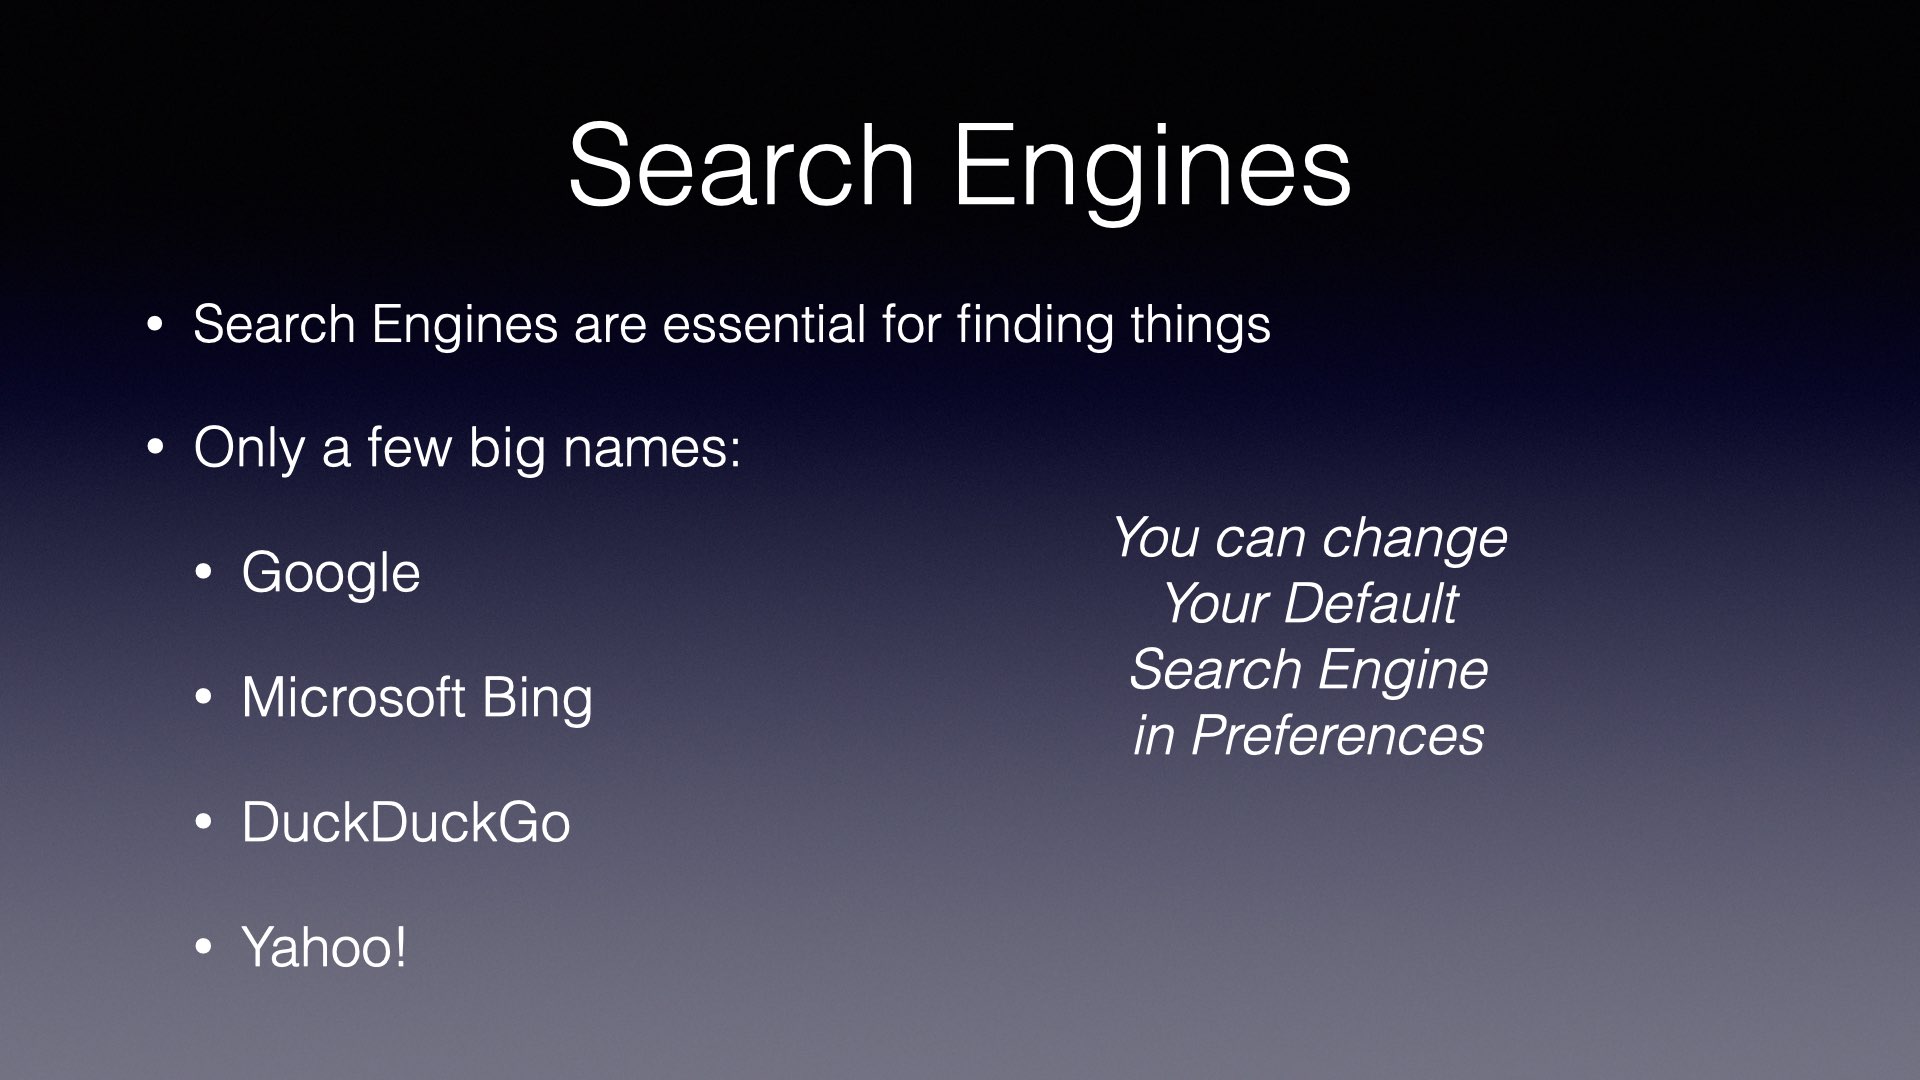
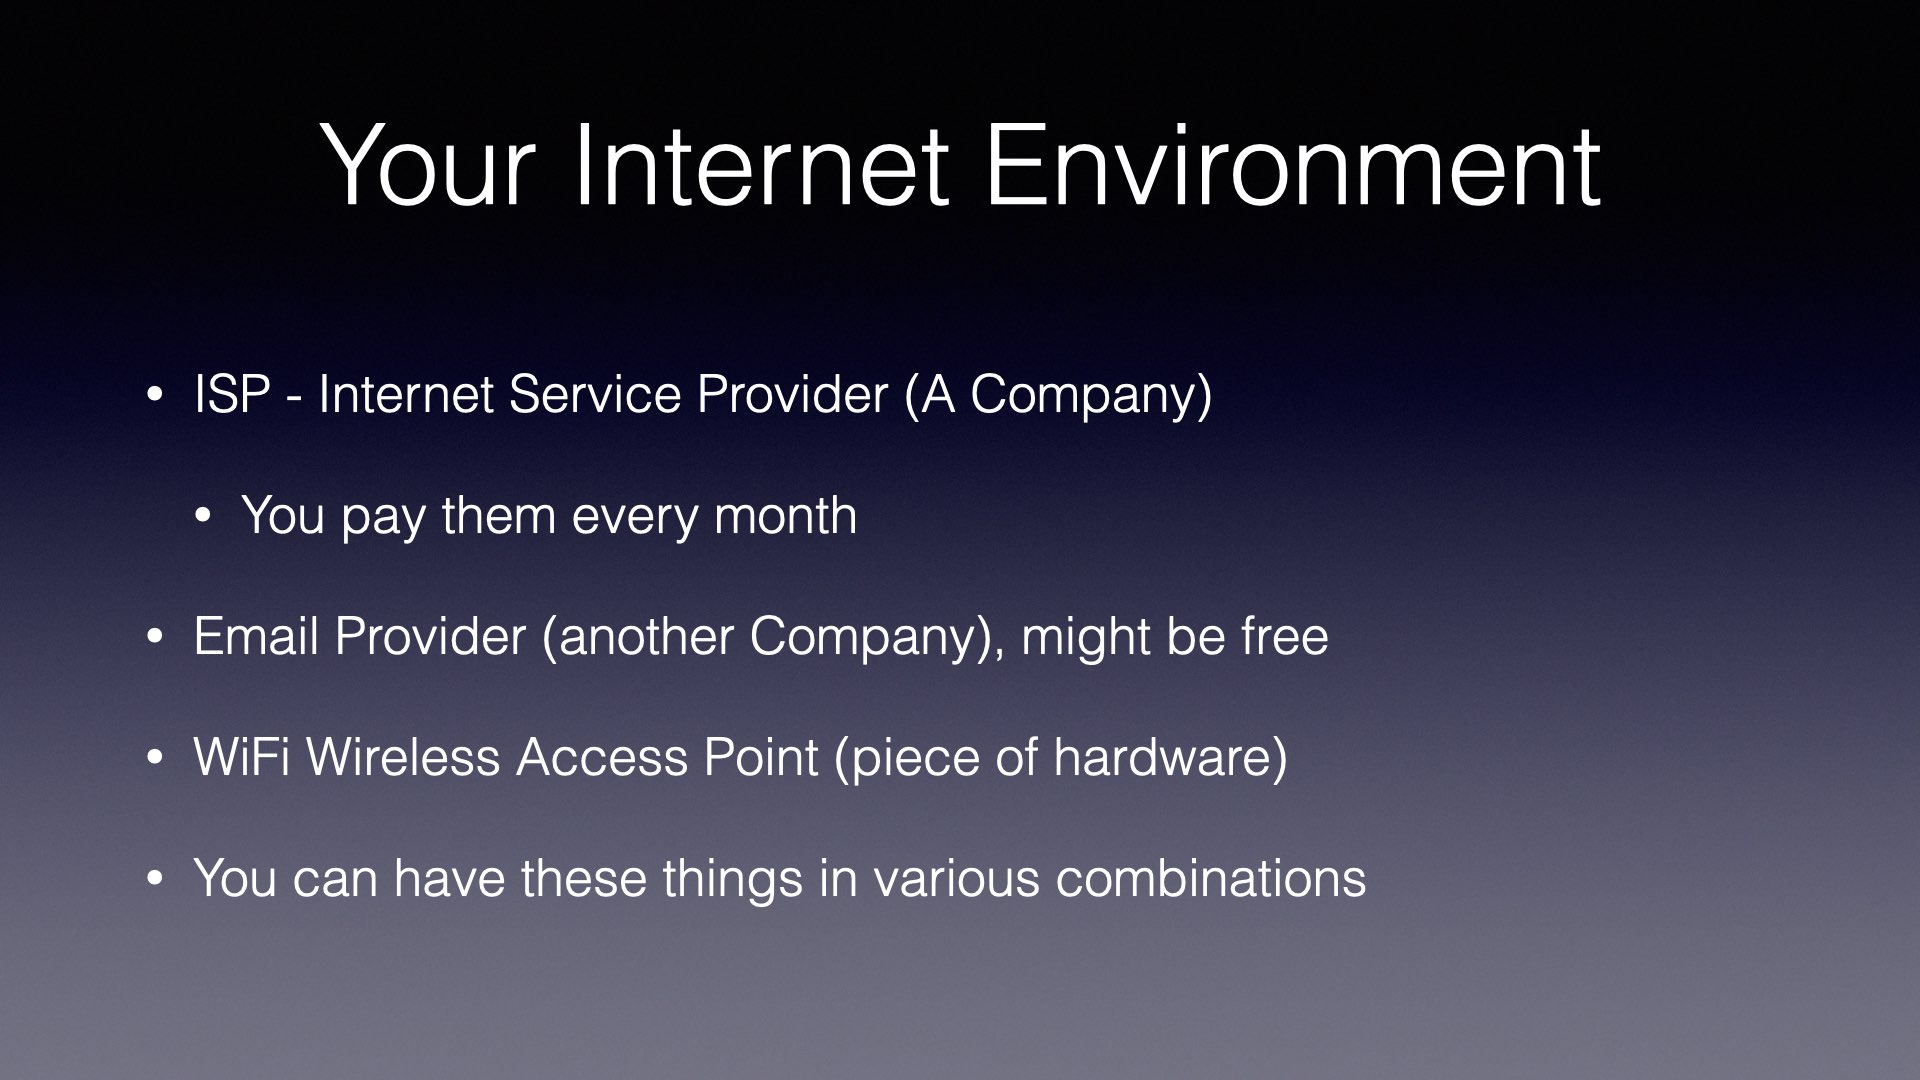
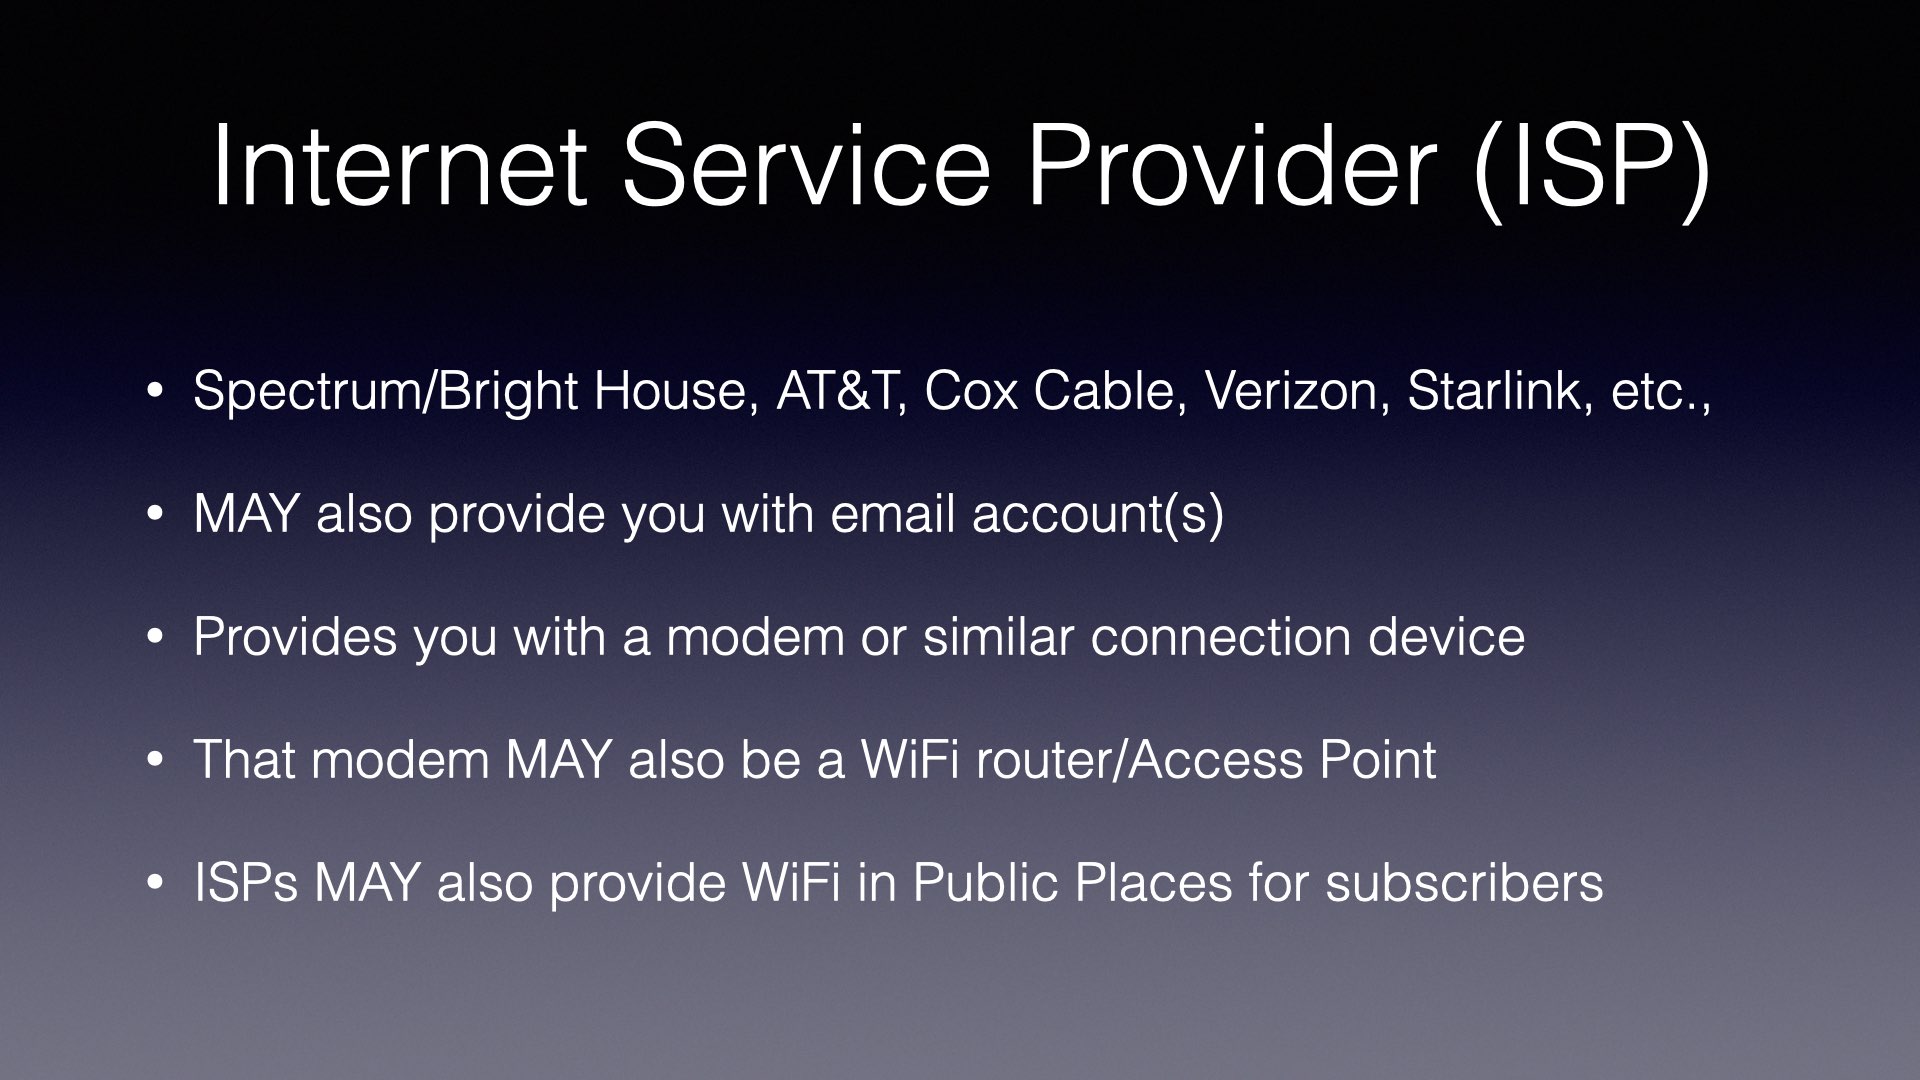
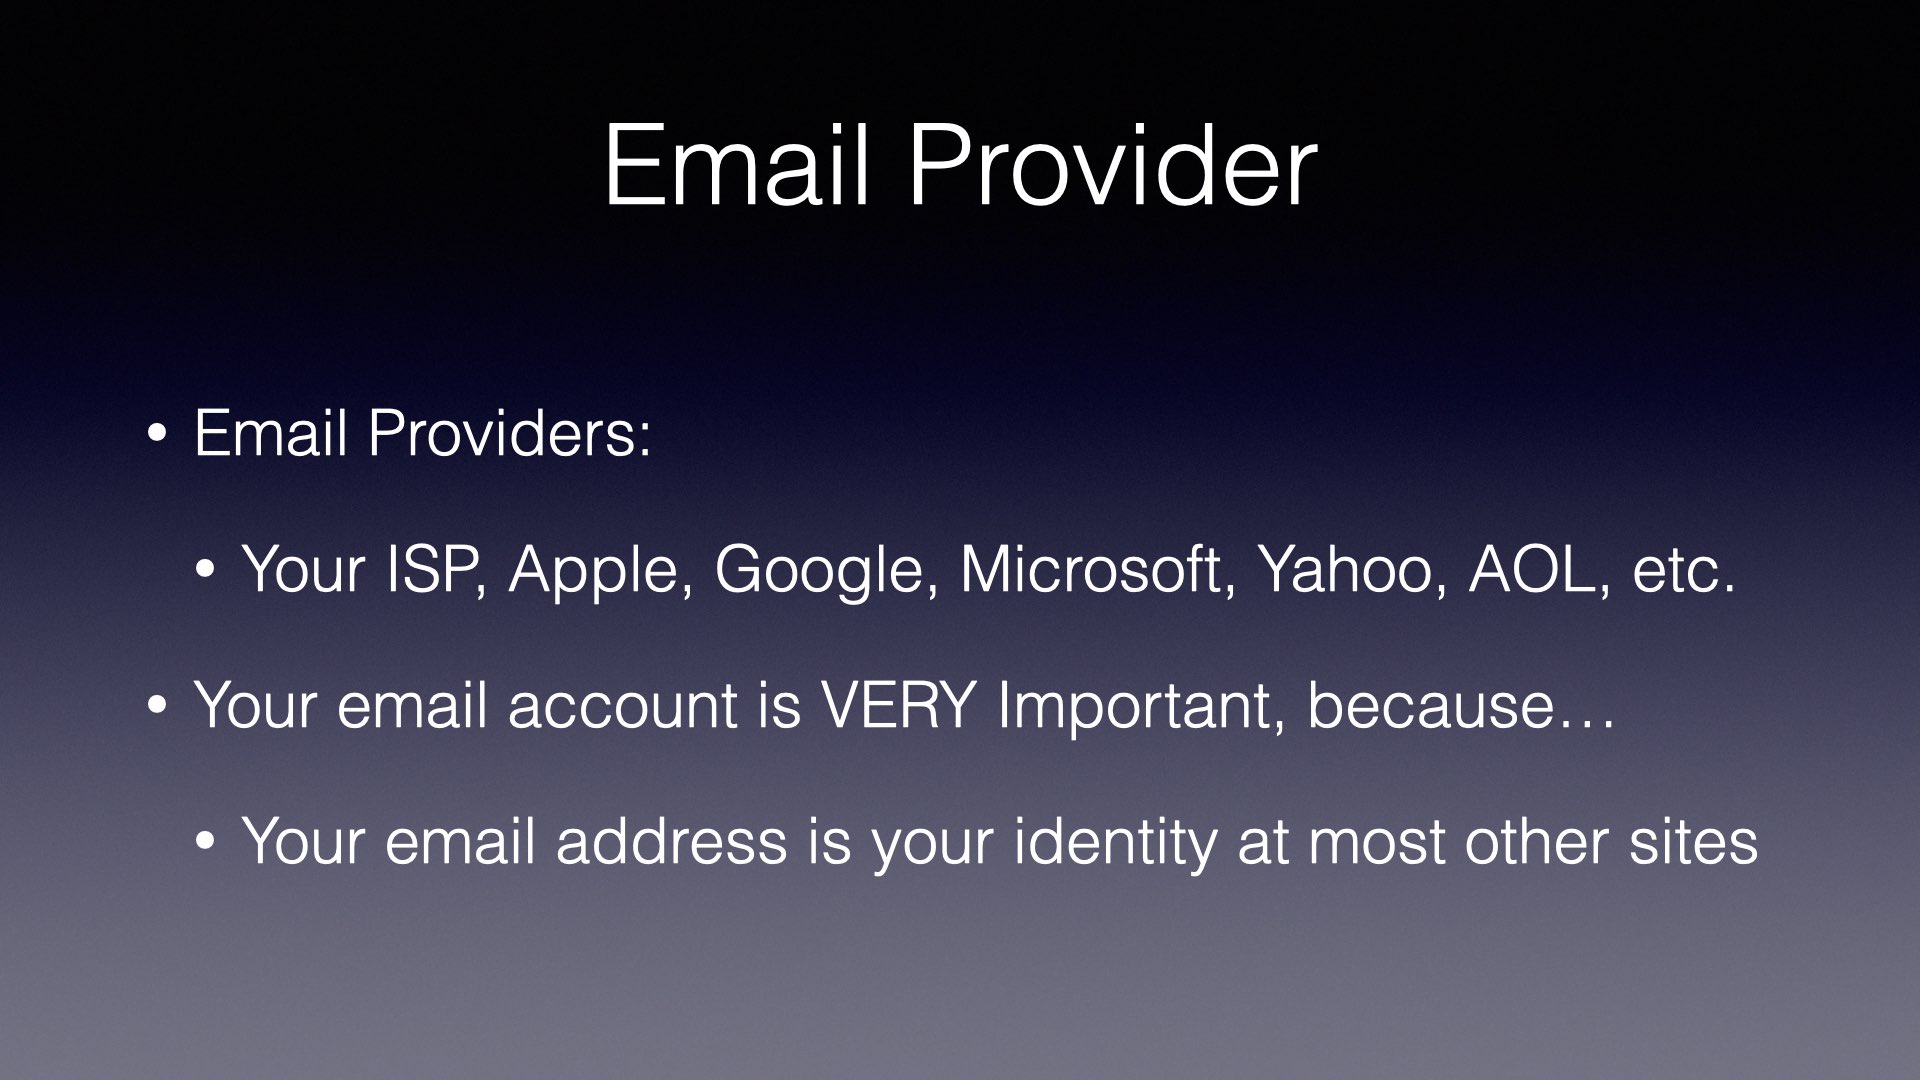
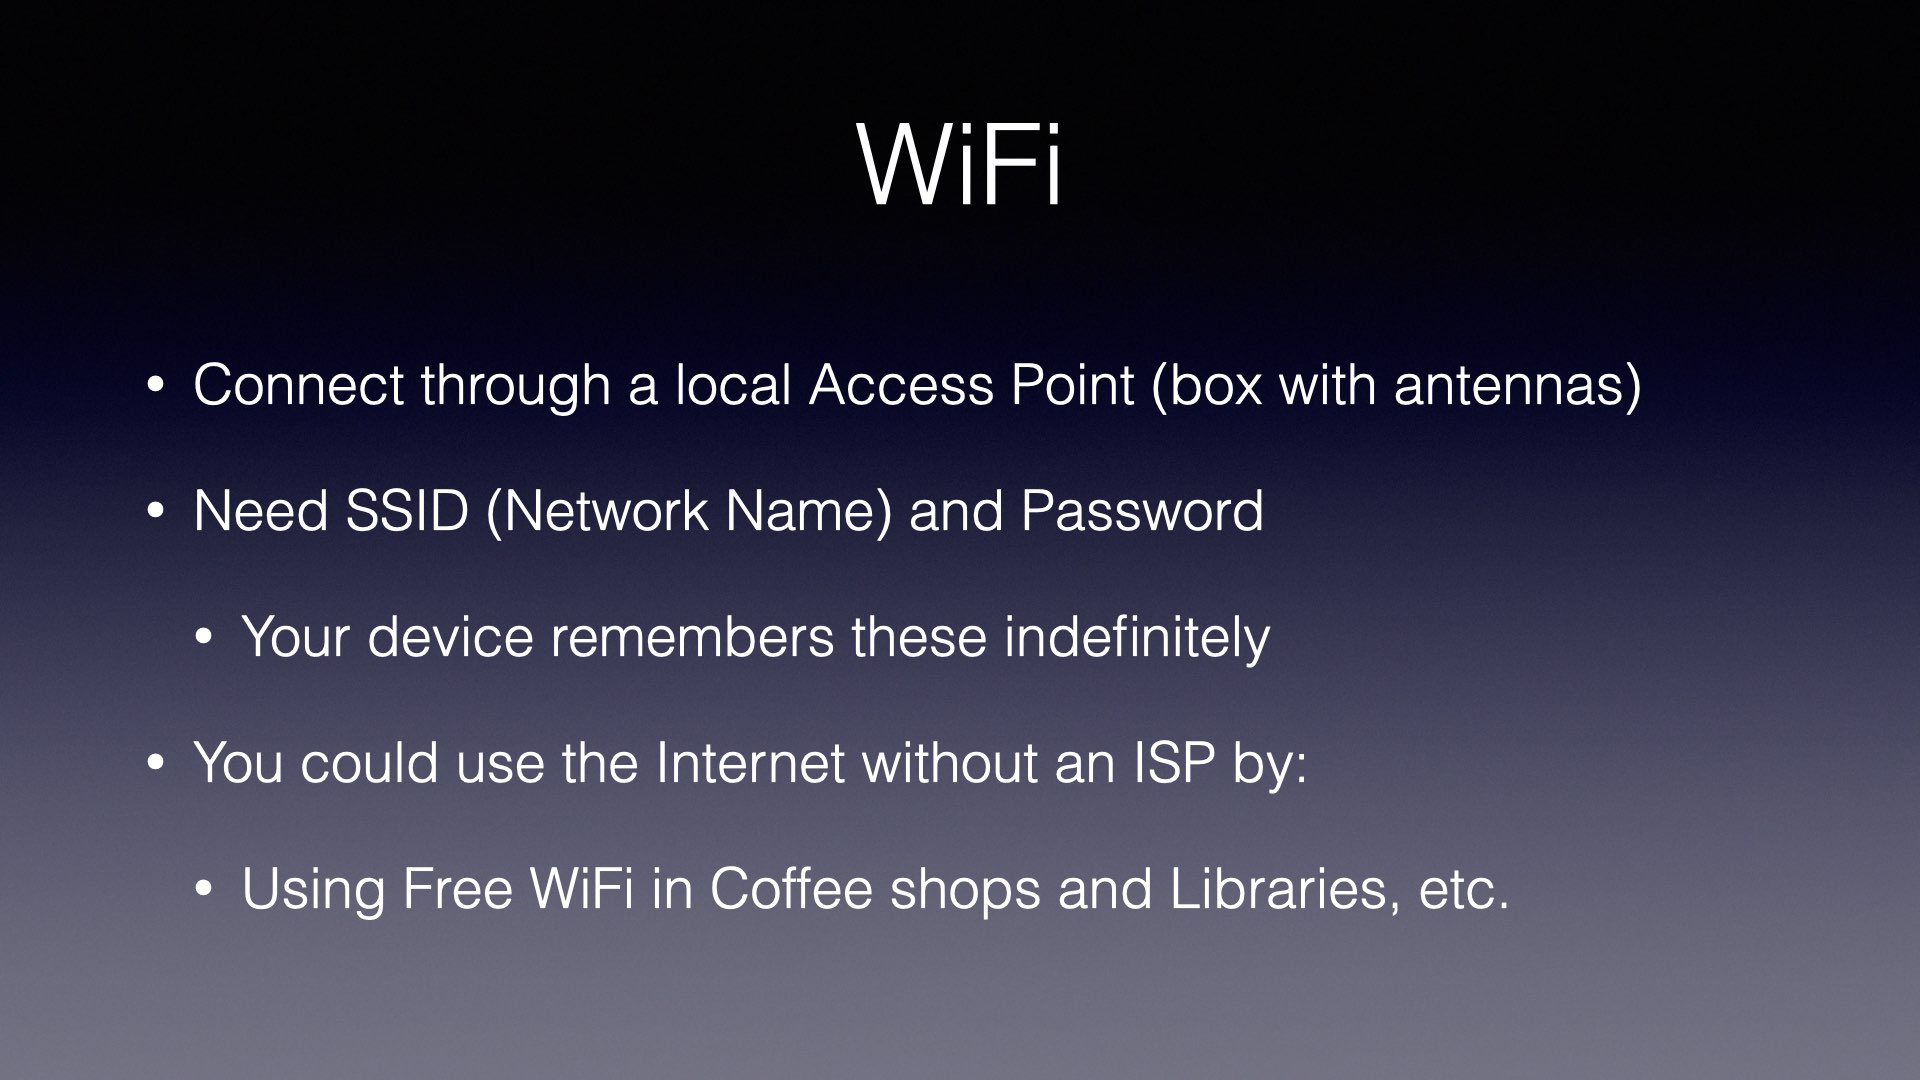
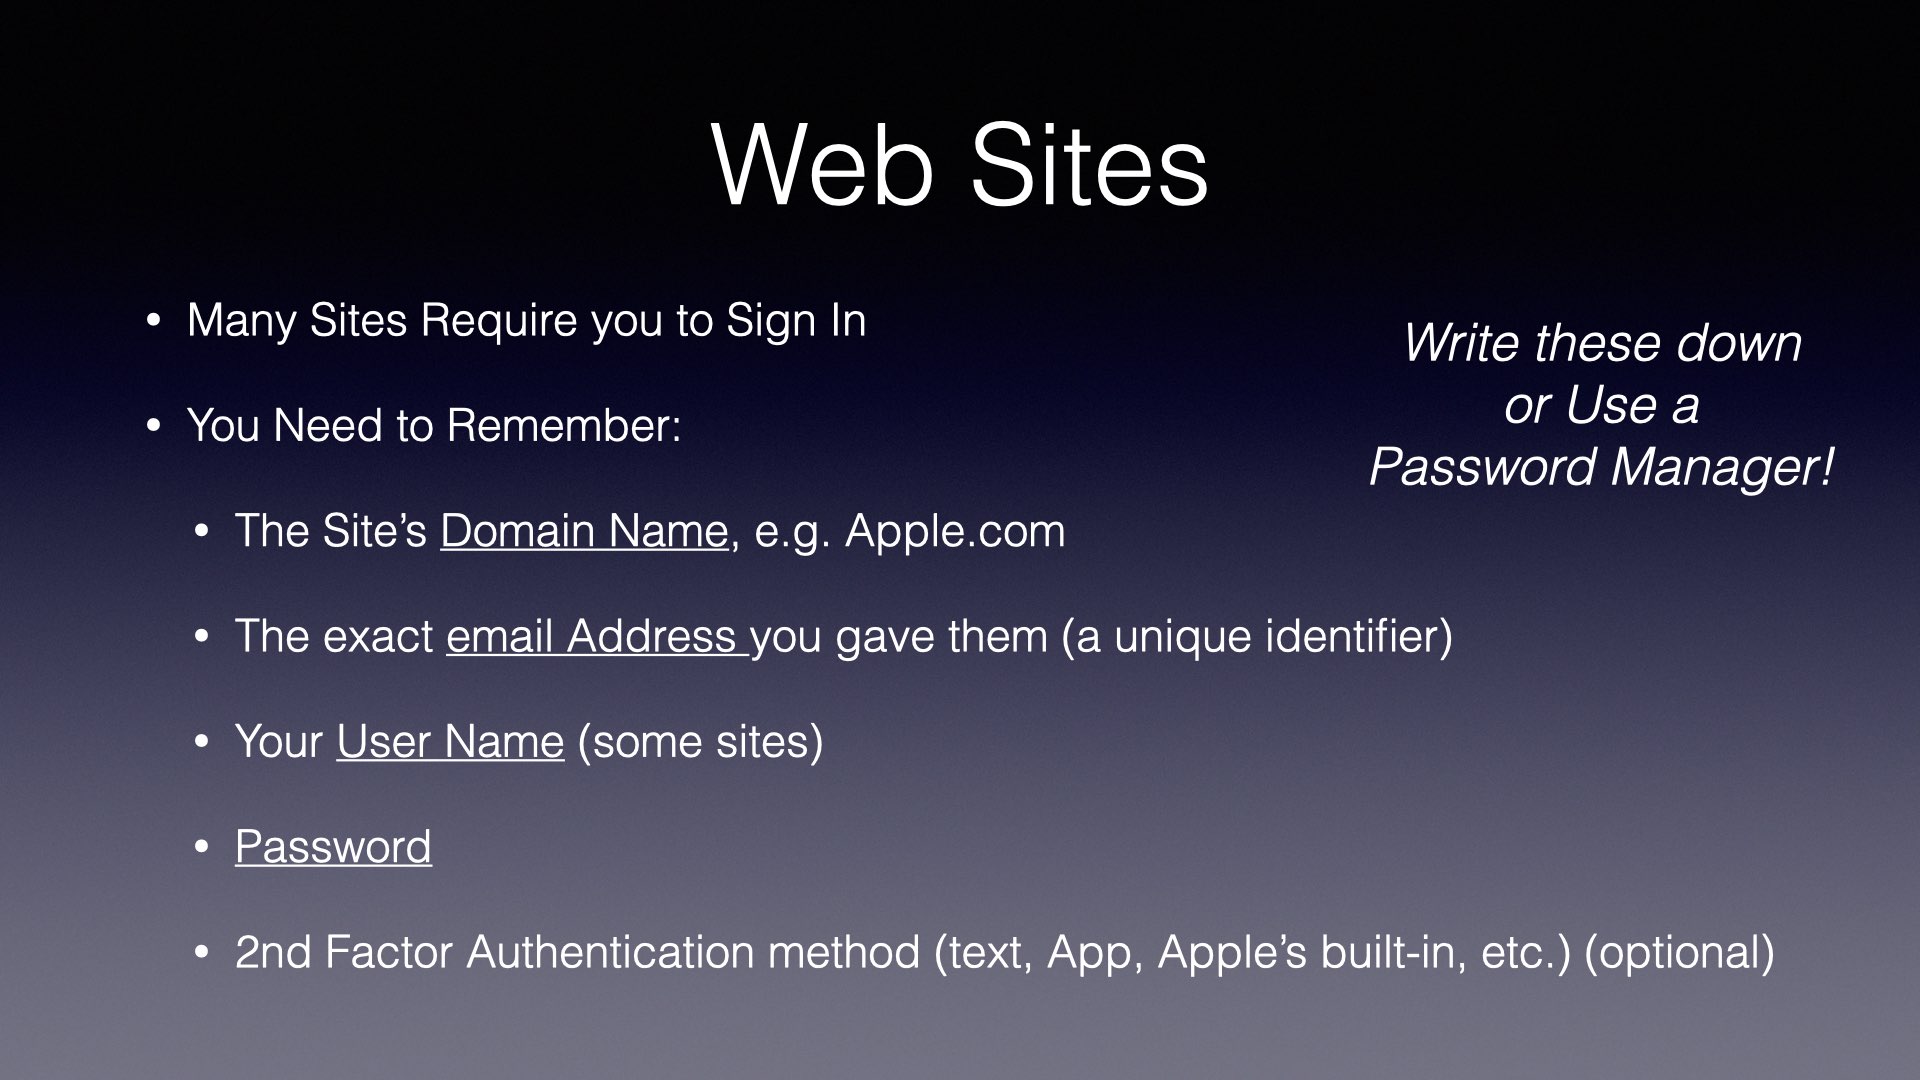
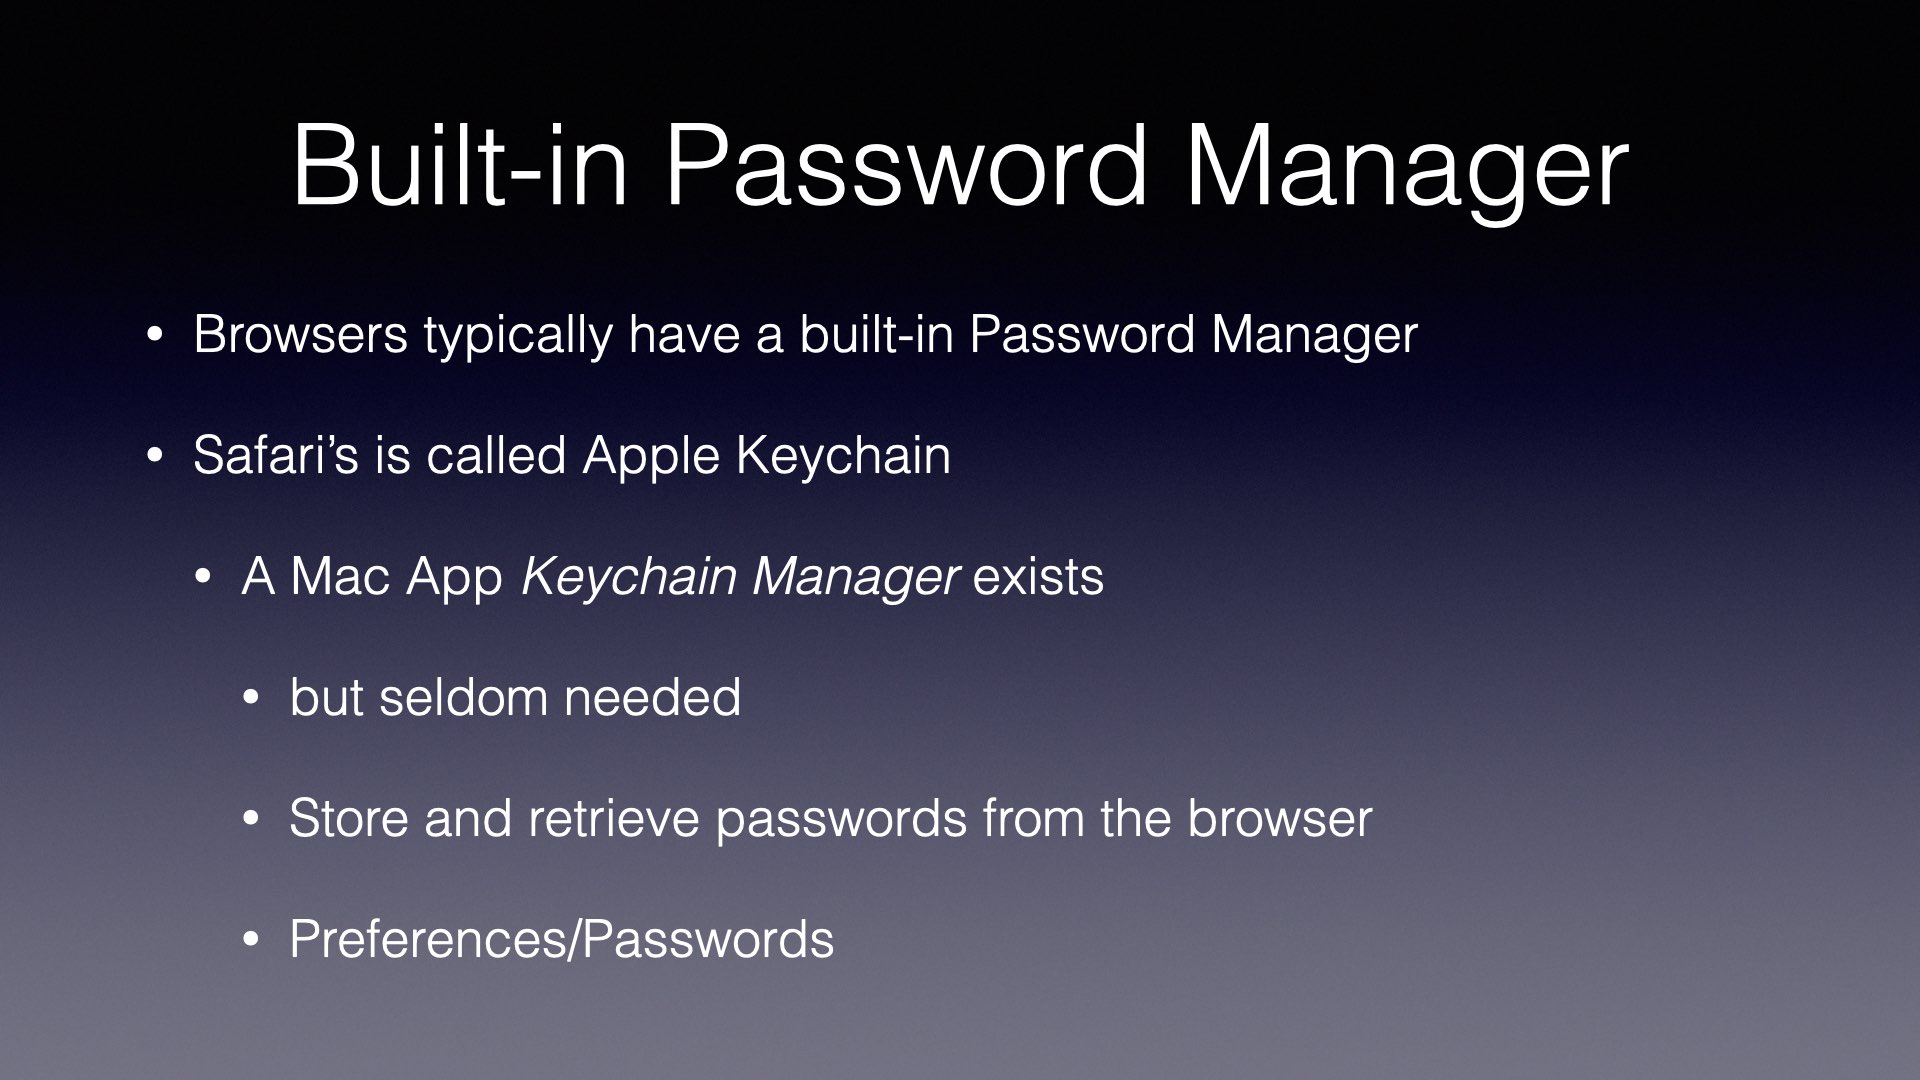
Web Browsers: Chrome, Edge, Safari, FirefoxSearch EnginesAnatomy of a URLTop Level Domain, e.g. .comDomain NameSubdomainYour Internet EnvironmentISP: Internet Service ProviderEmail ProviderWiFiWeb SitesPassword Manager: Apple Keychain
You had an important file, but now you can’t find it anywhere. In this article, we’ll look at tips for finding that lost file. First, for MacOS, and then for iOS/iPadOS.
Finding a file on MacOS
Searching with Spotlight
You might be tempted to search with Spotlight (the magnifying glass icon in your menu bar). Spotlight might find your file, but by default, it returns a lot of results other than files and folders. You might not be able to see the tree for the forest in your Spotlight results. If you visit Spotlight in System Preferences, you will see that Spotlight returns results in up to 20 selectable categories, many of which are not relevant. For instance if you had a file related to a jacket in size 42 long, you might search with Spotlight for 42L. Spotlight will unhelpfully inform you that 42L = 1.48 cubic feet.
Finder Search
You can perform a search in any Finder window by clicking the magnifying glass icon in the upper right of the window, and typing your search term. This is different than Spotlight, and it searches only files.
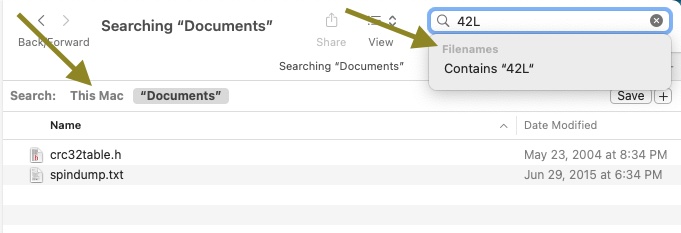
Beginning a Finder Search for 42L
In the example above, you have typed “42L”. You will see that it has found two files, neither of which actually have 42L in the filename. However, there are two clickable options here that you should consider. If you click the dimmed word Filenames, the search is restricted to only filenames. Otherwise it will find any file that contains the search term. To start with, the search only includes the folder you happened to start in. In this case, that is the Documents folder. If you click “This Mac”, then it will expand the search to your entire computer.
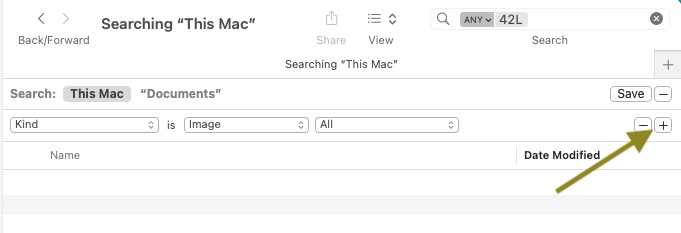
Also, if you click the + to the right side, next to Save, you will get the option to further restrict your search by Kind, Last Opened Date, Last Modified Date, and a great many other attributes. For example, you could select documents whose Kind is Image. That would find only photographs or drawings.
Searching This Mac for all Image files.
By clicking the column headers in the Finder you can sort by Name, Size, Kind, DateLast Opened, etc. This can help bring likely files to the top. Consider searching by Kind, Date, Size, etc., without using a search term. You may have forgotten what the file was named exactly, or it may have been accidentally renamed. By doing this, you may find a file whose name was mangled somehow. If the file is fairly recent, it pays to look at the Recents icon in the Finder sidebar. Maybe you will recognize your file in that list. Again, you might want to sort the list.
Don’t forget to check the Trash. Files in Trash should show up when searching This Mac, but it’s worth a look.
Check the Desktop. Don’t just look at your desktop on the screen. MacOS has a feature called Stacks, which tends to hide things on your desktop. You either need to expand each of those stacks by clicking on them, or else open a Finder window, and visit your Desktop folder directly.
Plan B: Other Places to Search
Maybe the file isn’t actually on your computer, but it exists somewhere else. For example, a lot of Apps like to save files on Cloud Storage of some kind. Here are some ideas of places to look:
iCloud Drive
Microsoft OneDrive
Google Drive
Evernote
Dropbox
Network-Attached-Storage (NAS)
USB Stick/Flash Drive
Your other computer or phone or tablet
Camera Memory Cards
Virtual Machines (files in a Virtual Machine won’t be found when searching outside that machine.)
The cloud storage services are often mirrored to your local system, but not always. So, you may need to sign into their web interface and browse the files there.
Plan C: Files in Transit
Think about where your file originated in the first place. Most of the files on your computer, you didn’t create. They came from somewhere else. If someone sent you that file, it may still be available. If it’s not too embarrassing, you can always ask the sender to send it to you again. Otherwise, check your messaging apps and services:
e-Mail Inbox(es)
Apple Messages App
Facebook Messages
What’s App
Hangouts
We Chat
Signal
The file may still be in the message by which it originally arrived. If you originally downloaded the file from the internet, it’s probably easiest to just find it again with Google and re-download it.
If you created the file locally, did you ever send it to anyone else? If so, a copy of the file may exist in your outbox on one of the above services. Or, you can ask a recipient to send you back a copy.
Searching for a lost email is another topic in itself to be covered in a later post.
Plan D: Recover from Backup
Maybe the lost file used to be on your computer, but it was accidentally deleted. This is the scenario where backups come in handy, especially Time Machine backups. You have been performing regular backups, right?? Well, even if you haven’t, there is a good chance that Time Machine has saved your bacon. By default, Time Machine keeps some backup versions of files on your local computer even if you have never performed a Time Machine backup to an external drive (like you should!).
To recover files from Time Machine, it helps if you have some idea where in your file system the file was located. If you’re not sure, you can start with the usual suspects like the Documents folder, the Desktop or the Downloads folder. Open that folder now, in the Finder. Attach your Time Machine backup drive if you have one. Make sure that your folder of interest is the active Finder Window.
Click the Time Machine icon in the menu bar (it looks like a clock). Select Enter Time Machine. This will open sort of a time-tunnel view of that particular Finder window.
You can navigate back to some older version(s) of that folder and look for your file. If you haven’t backed up to an external drive, there may be very few snapshots available for viewing.
Finding a File on iOS or iPadOS
The key place to look for files on iOS is the Files App. It has a blue folder icon. Like MacOS, it has a Recents view which can be helpful. It can show files stored directly on your device as well as files stored on iCloud Drive. You may also have various other cloud services folders under Files. There are also the Shared, Recently Deleted (Trash), and Downloads folders. These are all worth checking.
In iOS or iPadOS, you can search for a file by swiping down from the center of the home screen. This will bring a search text box onto the screen as well as an on-screen keyboard. You can then search by typing or by voice.
I hope you were able to find your lost file, or at least to find some hints useful for next time.
This article is part of a series on how to solve basic computer issues yourself.
Today’s article will help you with problems you may encounter on the web. A common problem is that some web site is misbehaving. Maybe you can’t logon, or maybe some feature or page of the site isn’t working properly.
In this scenario, you are probably thinking: I can’t believe that those idiots at major-fortune-500-company have a bug like this on their web site! If it’s this bad for everyone, no one can buy or use their product.
You’re probably right that if this problem was affecting everyone, it would already be fixed. So, there is probably something you can change on your computer to fix it.
After each step below, try accessing the problem site again, looking for any change or improvement.
Solution Steps
Keep Calm – computer problems don’t respond well to anger or curse words, but they can seldom resist an icy cool analysis.
Make sure you are visiting the correct site. Are you at goggle.com or giggle.com? Does the correct site name end in .com, .org, or something else?
Make sure your internet is working for other sites. Are you able to browse to other major web sites? Try Apple.com, for example.
Make sure your web browser is updated to the latest version:
Chrome: select Chrome/About Google Chrome
Safari: open the App Store and click Updates
Firefox: select Firefox/About Firefox
Open the affected site in a Private Browsing Window/ Incognito Window. This will disable extensions and ignore web history and fixes many issues:
Chrome: select File/New Incognito Window
Safari: select File/New Private Window
Firefox: select File/New Private Window
Clear your browsing history and cache. Sometimes outdated cache information breaks a site’s functionality. Note: This will log you out of all web sites, and you will have to re-login to all your favorite sites.
Chrome: select Chrome/Clear Browsing Data. Select All Time.
Safari: select Safari/Preferences. Click Privacy. Click Manage Website Data. You can choose to Remove All, or remove just the data for the affected site.
Firefox: select Firefox/Preferences. Click Privacy & Security. Scroll down to Cookies and Site Data. Click Clear Data.
Check your ad blockers and similar browser extensions. For example, if you have Ad Block+ installed, you may want to exempt your problem site to prevent accidental blockage of site features. You can try temporarily turning off extensions to troubleshoot. To see a list of your installed extensions:
Your Apple device didn’t come with a manual in the box, but they are available for free, and they are very nice.
Apple publishes manuals for all their hardware and software and makes them available in the Books App. The Books App is included on every Macintosh, iPad and iPhone.
There are very nice manuals for every model of Macintosh, iPhone and iPad, as well as Apple Watch, Home Pod and Apple TV.
There are users guides for iOS, Pages, Numbers, and Keynote.
Of course, there are many other books in the store about these subjects, by many different publishers, and most of them are not free.
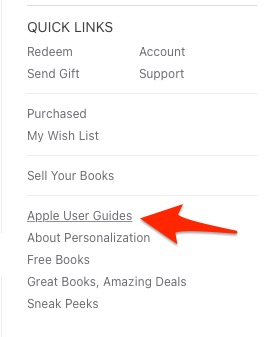
Once you’ve opened the Books App, to find the free, Apple-published items, look for the Apple User Guides link on the right hand side of the Books App, under Quick Links. The guides are usually named either User Guide or Essentials, for example, iMac Essentials, or iPhone User Guide.
In the Quick Links Section of the Books App, Click Apple User Guides
You will definitely learn something from these. Amaze your friends and family with your expertise — Read the Manual!
In our March virtual meeting, we talked about Continuity Camera and on-line user guides for Apple devices.
With Continuity Camera, you can use your iPhone to scan documents directly into apps on your Macintosh. It is particularly useful in Mail, Notes and Preview. If you scan paper documents into Notes in this way, they become searchable in the Notes app.
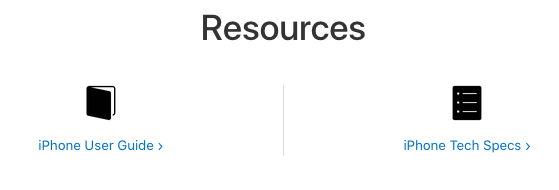
The answers to many questions about your device are contained in the user guide for your particular device, e.g. iPhone, iMac, or iPad. Apple has the user’s guides online. Apple doesn’t keep the user’s guides for older versions handy, so if you are planning to keep a device into vintage or obsolete status, download the applicable user guide before it goes out of date.
I will give you some links, but they are likely to go out of date. The consistent way to find the user’s guides is:
How can you help another computer user from a distance? I am going to show you a super easy way to help another Mac user using software that came with your computer.
Sometimes we get questions about computer problems from friends and family. It would be so easy if we were in the same room and could see and interact with their screen. But if they are far away, or in 2020, staying isolated because of Coronavirus, how do you help them?
If you and the other person both have Macs, and you can send and receive messages using the Messages app, then the answer is just a click away.
The Messages App
To connect to your friend’s computer, we are going to use the Messages App (formerly known as iMessage). This application comes with every Macintosh. It isn’t obvious, but the humble Messages app has a superpower. It can remote control a computer screen.
It might be good to first verify that you can send and receive messages to and from the remote computer. You must be connecting to your friend via their email address, which should be associated with their Apple ID.
If you see the blue text bubble(s) when messaging your friend, the next steps should go smoothly. If you see green text bubbles, or can’t send and receive messages at all, see the Difficulties section below.
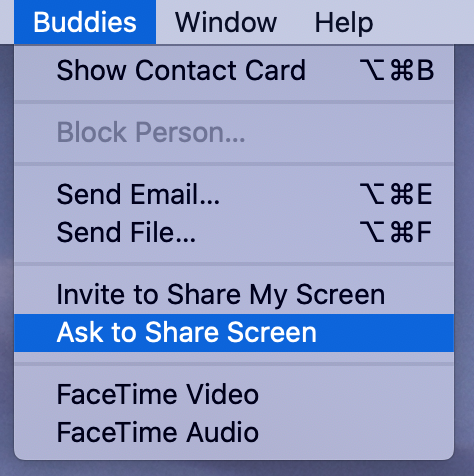
To begin screen sharing, make sure that the correct friend’s conversation is highlighted in the Messages window. Then, select Ask to Share Screen from Messages’ Buddies menu.
Ask to Share Screen menu item
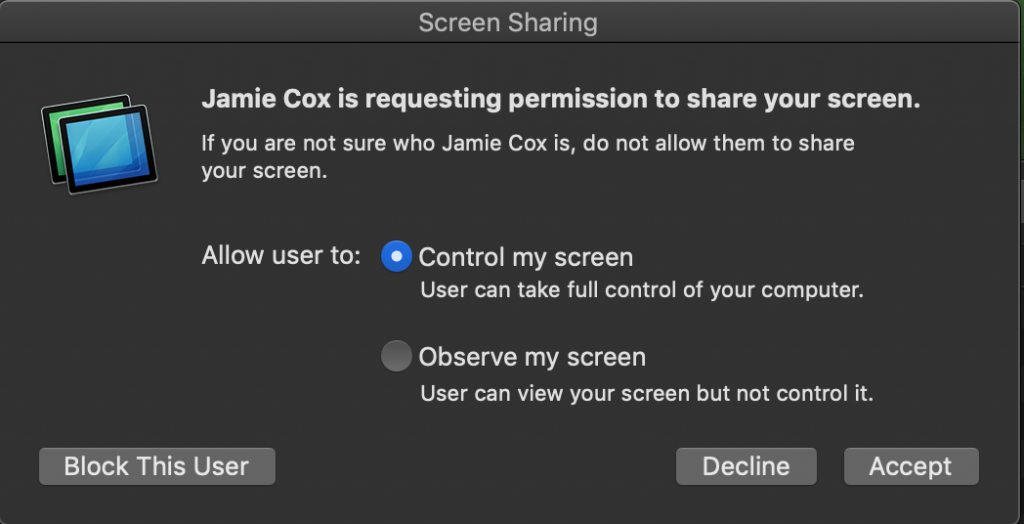
This will cause a message to appear in the upper right of your friend’s screen asking them to allow screen sharing:
Accept Screen Sharing
When they click Accept, they will get one more message:
Click Accept to allow remote control
For troubleshooting with a trusted friend, it is usually easier if the recipient allows you to control their screen as well as observe it. Control is the default.
Once they click Accept, screen sharing will begin.
Either party can end screen sharing. Remember that if the computer restarts, or if you quit the Messages app, screen sharing will end and need to be restarted.
I have successfully talked some very inexperienced computer users through this process on the phone. They only have to be able to see when they receive a text message, and then click Accept twice. After that, you will be able to help them.
You’ll probably be talking to your friend on the phone to get this started. When screen sharing starts, it also starts an on-line voice conversation. You should be prepared to end the phone call when this happens to prevent echo, feedback and confusion. You will still be able to speak to each other via the computer (if both computers have microphones and speakers — most do).
Difficulties
If this is not working as expected, check the following:
Both computers must be running MacOS
Both computers must be connected to the Internet
Both parties must have an Apple ID
Check that the email addresses being used for communication are listed in System Preferences/Apple ID under Name, Phone, Email in the Reachable at section. If not, they can be added there.
In their quest for help with their Apple gadgets, many users overlook the free resources provided by the Apple mothership.
Apple provides a number of helpful text and video tutorials on their support page. Either select your device or topic there, or use the search on that page to find what you are looking for. Most common tasks and questions are covered.
Apple also has a series of free eBooks covering many of their hardware and software products. To find these, open the Books app that came with your device. You will have to sign in with your Apple ID. (Your Apple ID is the same as your iCloud credentials, and is the one ID and password you use for all Apple services.)
You may find that you already have a User Guide for your devices in your Books library. There’s more available, though. If you click the Book Store icon, you can find more books to download. Any book which says Get instead of a price will be free. You can search for “Apple”, or “iPhone”, for example, to find applicable books. Note that there are often different versions of the same book for newer and older versions. Choose a version that matches what you have.
Here are links to some of these useful (free!) books. Enjoy.
We’re going back to basics in January with Apple’s email application Mail. We’re talking about both the Mac and iOS apps.� Here are the slides from tonight’s meeting in Keynote format. No note taking required!
When the new version of Numbers�for the Mac came out some features were dropped. Most of them have not been added back in. Reviews of the apps have been definitely mixed. Numbers only gets a 3-star rating on the App store (both versions).
Ratings for Numbers on the Mac App Store
Two-and-a-half to three stars�is a pretty terrible rating, especially for an Apple app. As you can see, the ratings are very mixed with most reviewers giving either one star or�five-star ratings. The ratings for the iOS version are very similar.
Guide to Star Ratings
The one-star reviews are mostly from people upset�about advanced features removed from the previous version. The five-star reviews tend to be�from people who have come to the application fresh, with no special expectations.
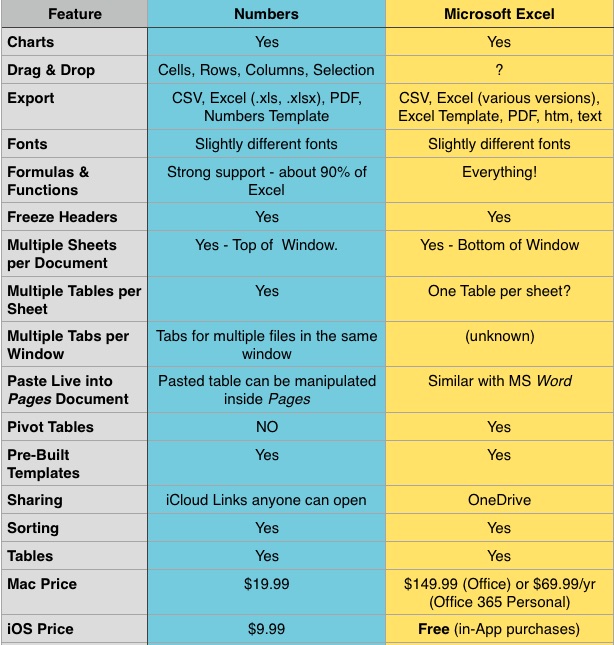
Numbers includes hundreds of distinct features. The chart below highlights just a few�of my�favorite features as compared with Microsoft Excel.
Comparison of Features Between Numbers and Microsoft Excel
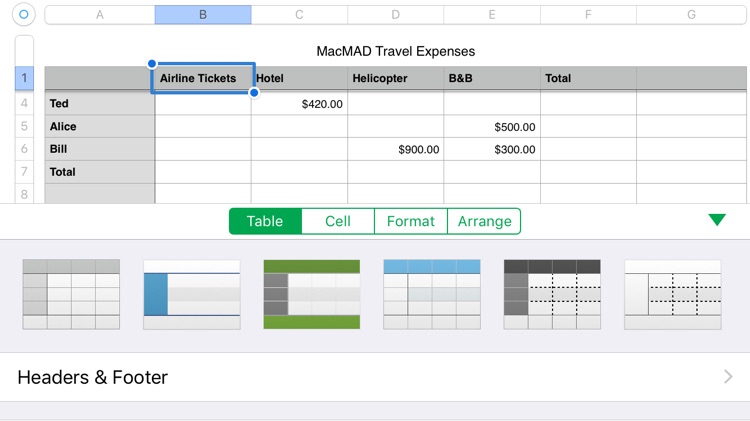
Documents, Sheets and Tables
Numbers documents can have multiple sheets. Each sheet can have multiple tables. When you create a new Numbers document, it has one sheet with one table on that sheet.
If you have used Excel, having multiple sheets should be familiar. The main difference is that the sheets appear at the top of the window instead of at the bottom.
The concept of having multiple tables on a single sheet may be new to users of older spreadsheet programs. It is a very nice feature, which allows you to separate groups of data or �formulas which are of different types instead of lumping them all into the same grid of rows and columns. You can arrange the tables on the page however you like.
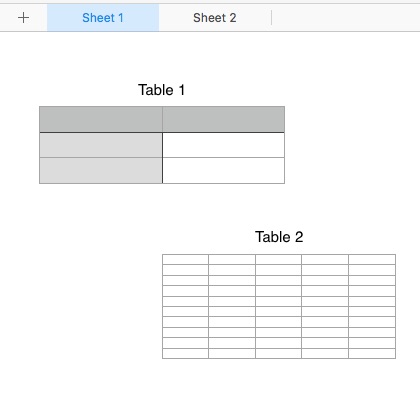
This document has two sheets. Sheet 1 has two tables.
Formatting Controls
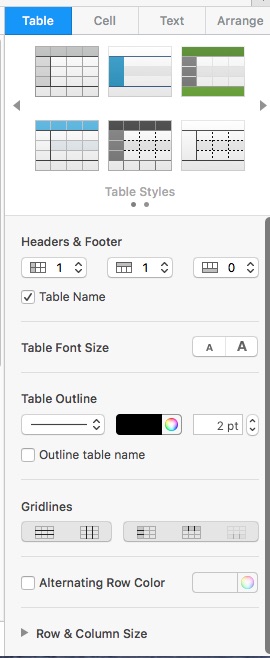
Table Style Controls
Numbers uses a consistent set of formatting controls very similar to those in the Pages word �processor we discussed last month. These are presented �in a pane on the right hand side of the window. These controls look simple, but all together, they have a lot of power. In addition to the pre-defined Table and Text styles, you can create and save your own preferred styles.
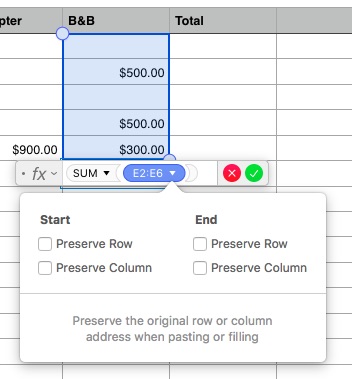
Formula Editing
Type an equals sign to enter formula editing mode for a cell. Color coding appears showing the source cells used in your formula. This �makes it easier to understand if your formula is correct or to see the source �of errors.
When you copy or fill a formula into additional cells, Numbers automatically adjusts cell references relative to the current cell. If you want to override that to select an absolute row, �absolute �column, or absolute cell, you can use the Preserve Row/Preserve Column options.
The Numbers Formula Editor
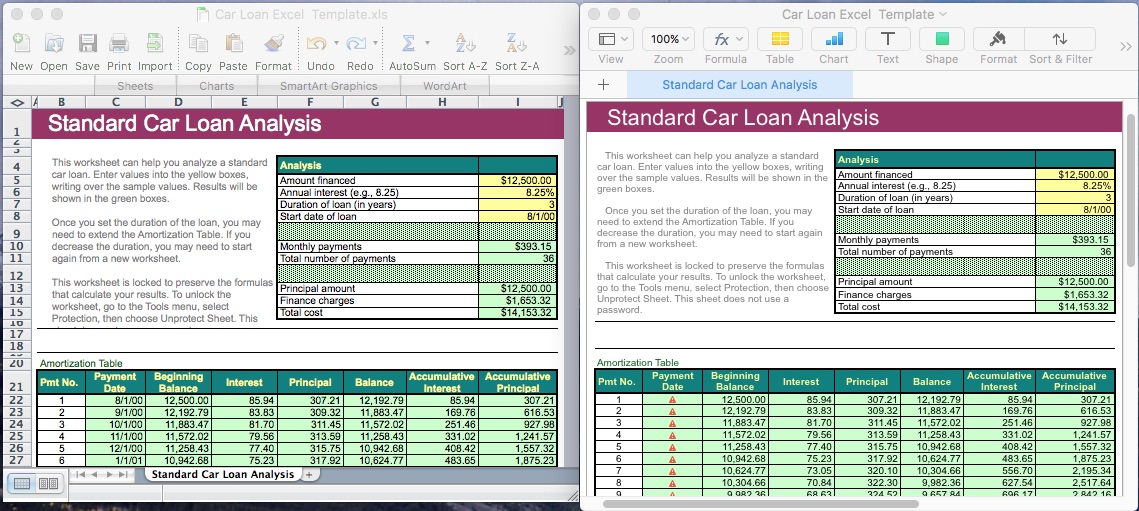
Importing Files From Excel
A common task in Numbers would be to open an Excel document created�by someone else. This can work fairly well, but is not completely painless.
Original Excel Template on left, Numbers Import on right
This imported okay, and the amortization calculations agreed, but the date formulas were not imported correctly and would have to be re-done in numbers.
Large Files
One of our members asked how Numbers was at handling large files imported from Excel. To test this I created a large spreadsheet in Excel with 40,000 rows and about 14 columns. The file size in Excel was 3.7 Megabytes. Numbers opened it without complaint, but it took about 30 seconds. When saved as a native Numbers document, its size increased to 6.3 Mbytes, but the native document opened in Numbers in about five seconds.
Although I didn’t get any warnings in Numbers, I did get one “Not enough memory” message in Excel while cutting, pasting and filling to create the document. Excel handled it gracefully without crashing.
iOS Numbers App
The Numbers app on iOS is deliberately very similar to the version for �Macintosh.
Numbers App on iPhone
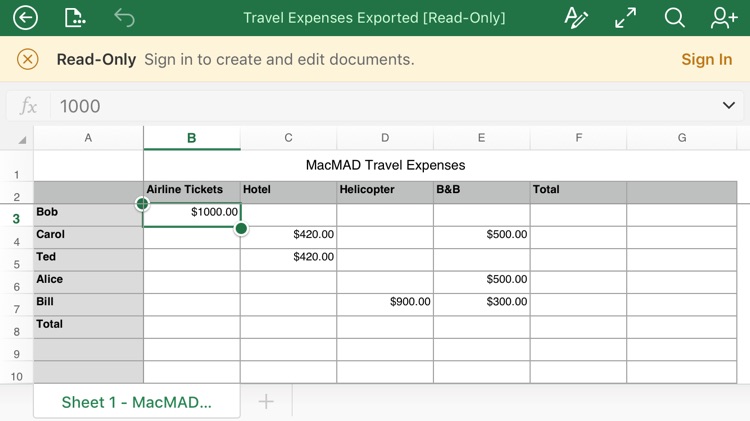
FYI, Excel also has an iOS app which is free in the App store. It looks like this:
Excel on the iPhone
The Excel app is apparently read-only until you register for and log in to a Microsoft Office 365�account.
�Conclusion
If you want a spreadsheet program to perform the usual tasks of calculation, sorting and organizing, and you don’t have much prior experience with spreadsheets, �you will find Numbers a very useful application. It’s especially easy to learn because of�consistent controls across Mac and iOS versions and consistency with Pages and Keynote.
If you know what a pivot table is, or have a lot of spreadsheets already in Excel format, you may be dissatisfied with the limitations of Numbers.