Settings for Seniors

MacMAD Meeting Topic September, 2026

Our Apple devices have literally hundreds of settings, most of which you have likely never changed or maybe even seen. We’re going to explore a few of those that might be helpful as we get older. Maybe your eyesight isn’t what it used to be, or maybe you find these devices to be just too darn complicated.

You may find some of these hints useful. These are mostly for iPhone, with a few for Mac and iPad.

Screenshots in this article are from iOS 26 and iOS27 beta. Some features may move or change in future releases.

Navigating Settings

The hard part might be finding the setting you want to change. Settings are arranged into groups of related settings, so it’s not just one big list.

If, in the settings app, you see a little arrow to the right like >

That means that there is a settings sub-section there. Some sub-sections have additional nested sections below them. Think of it like nested folders.
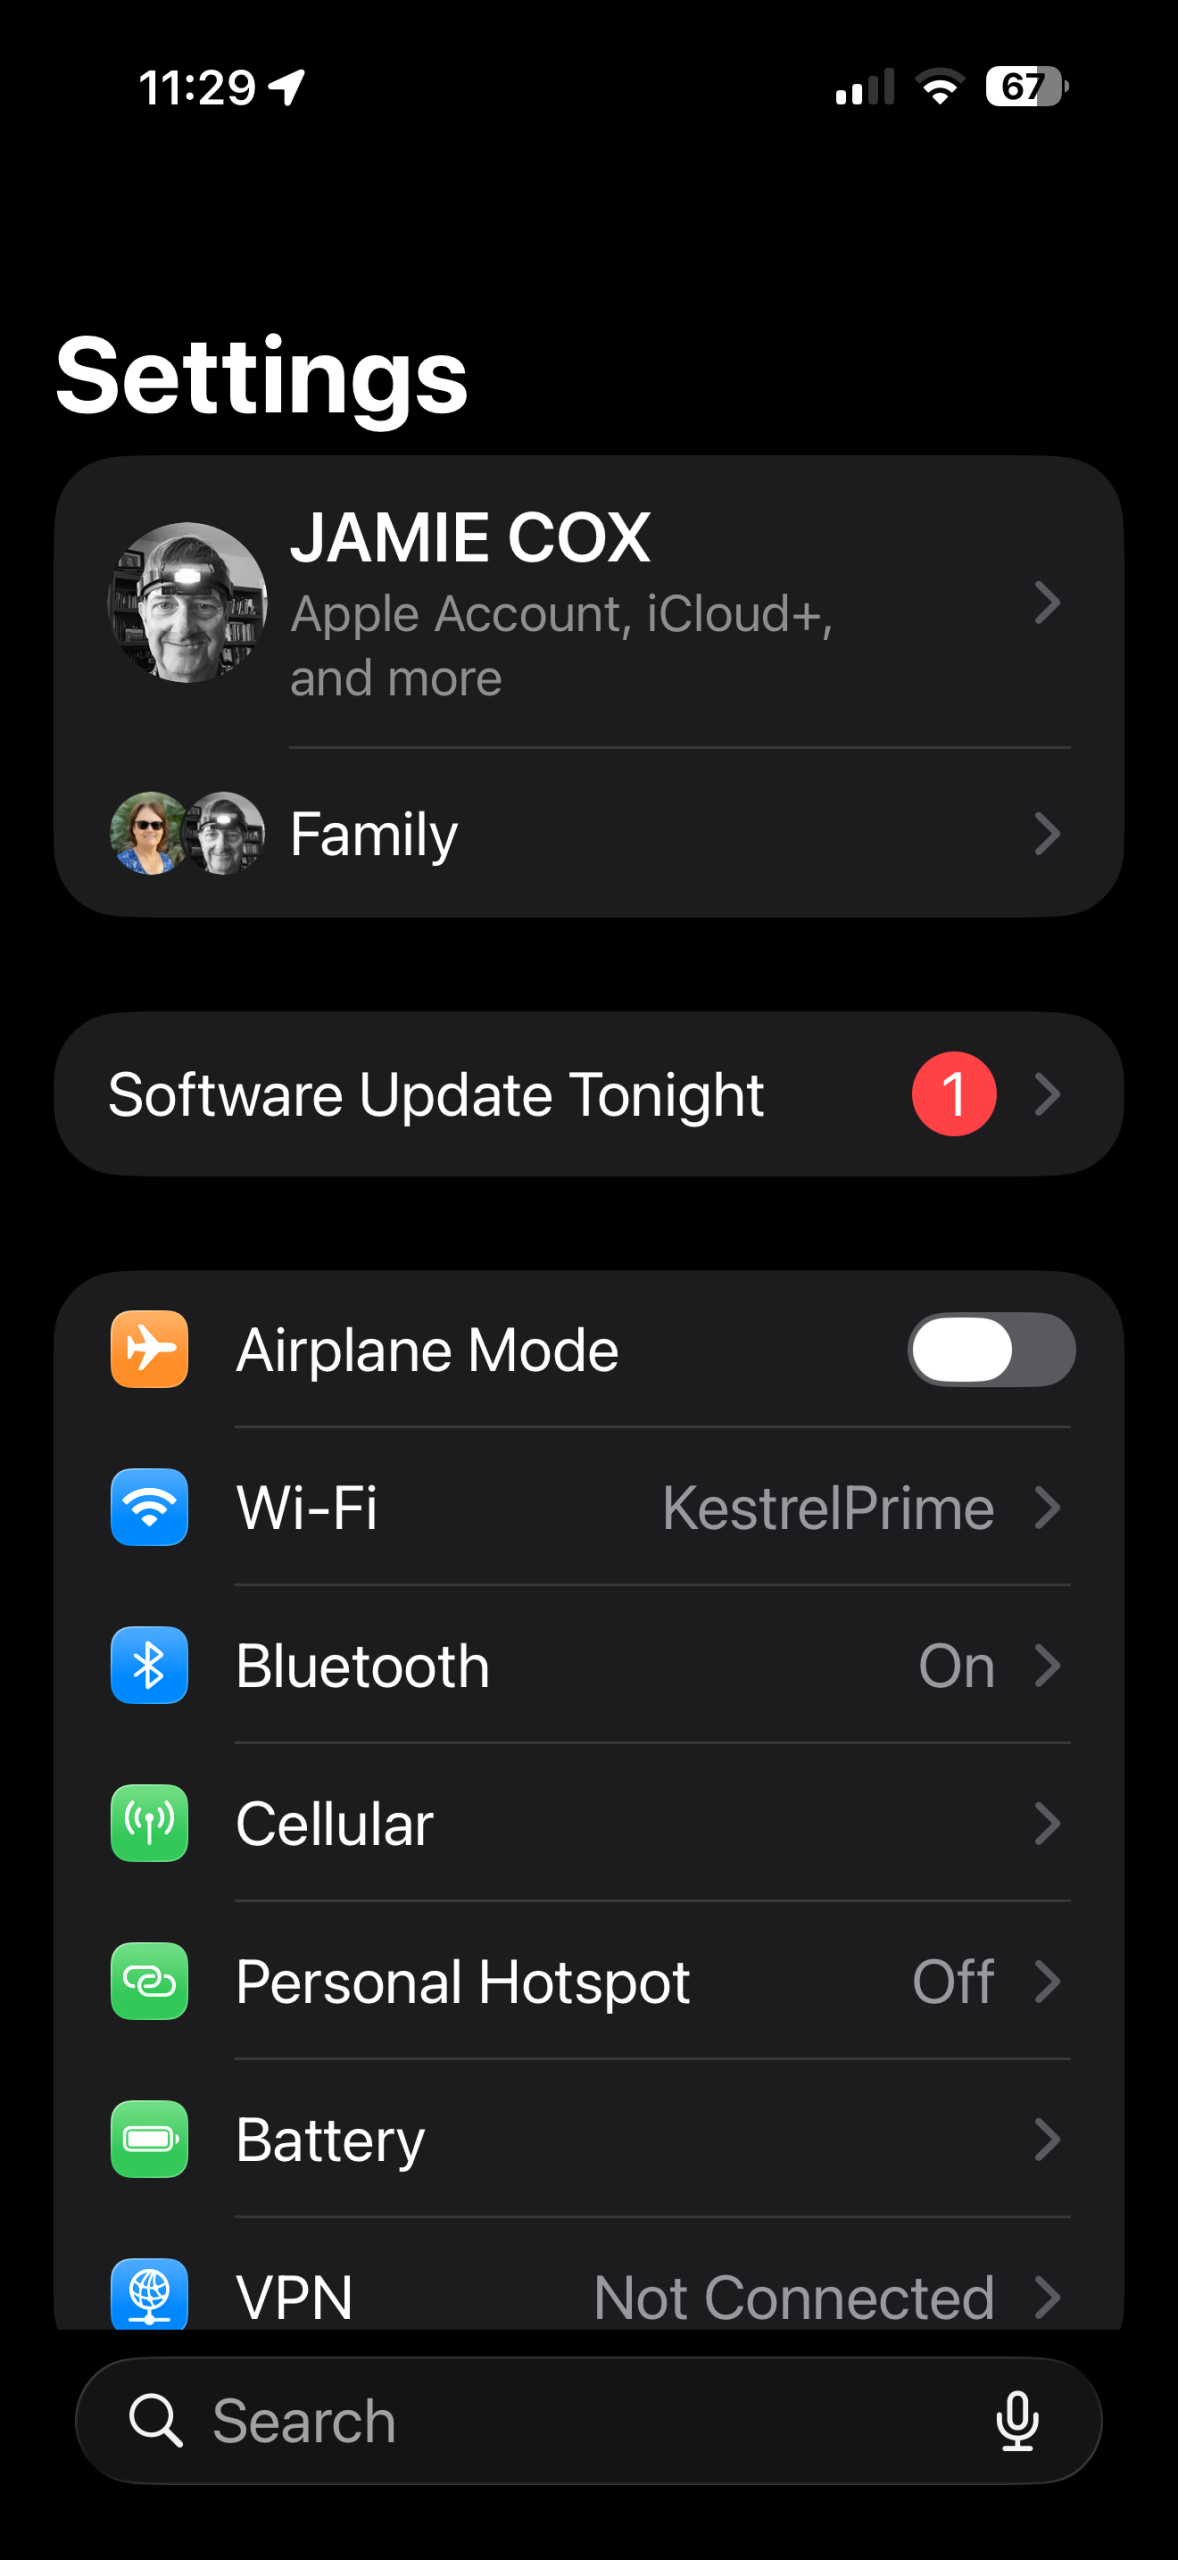
iPhone Settings Screen

Fortunately, Apple has provided a search function to help navigate all these settings. The search field is at the bottom of the screen in recent versions.
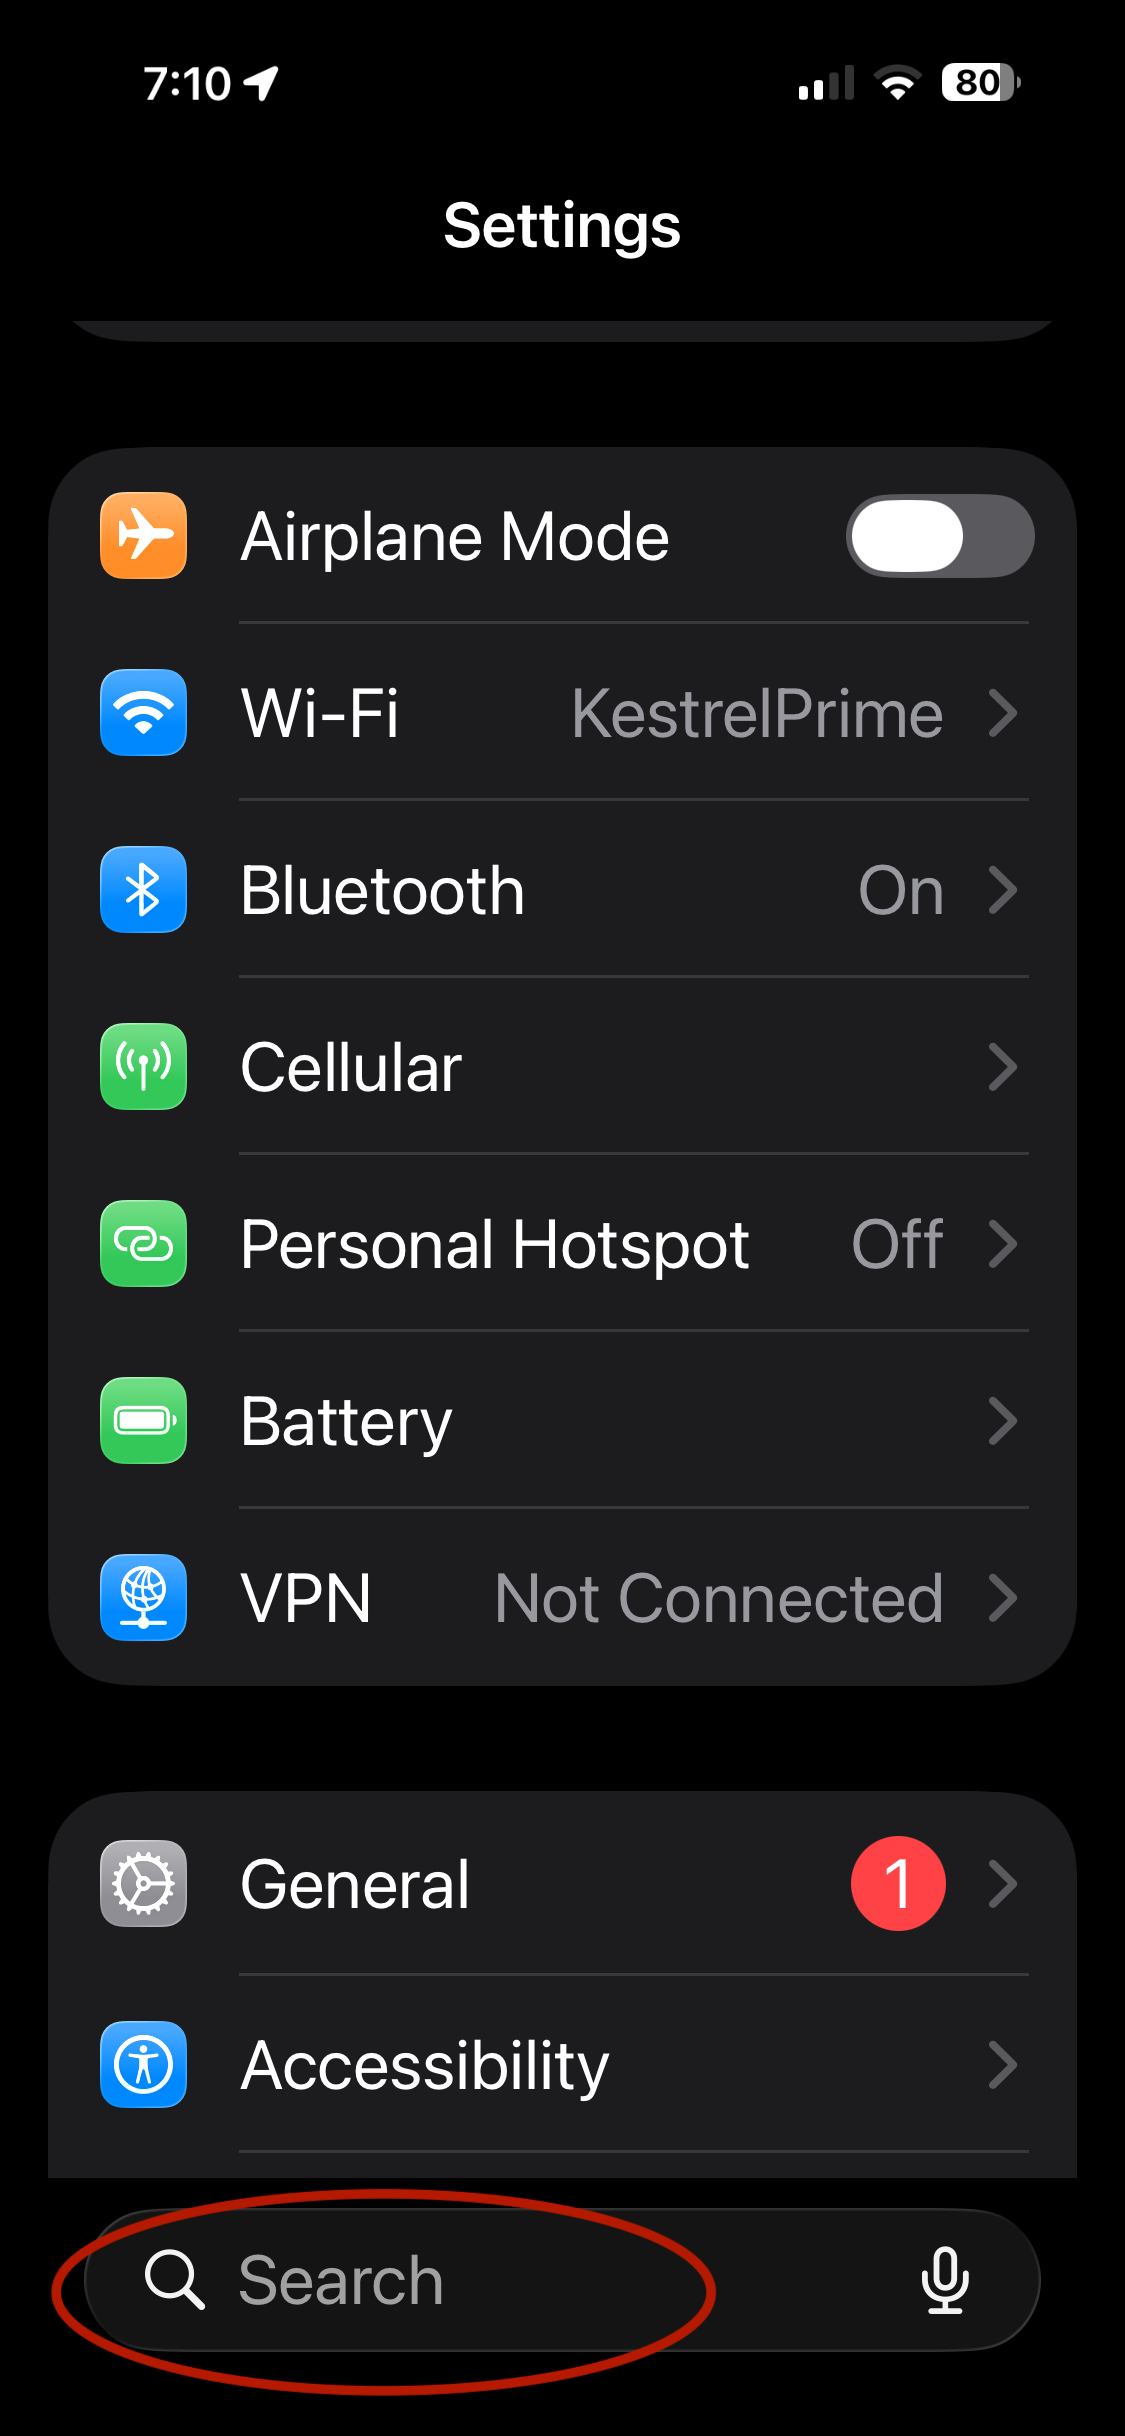
Here’s an example of searching the settings for “Assistive”.
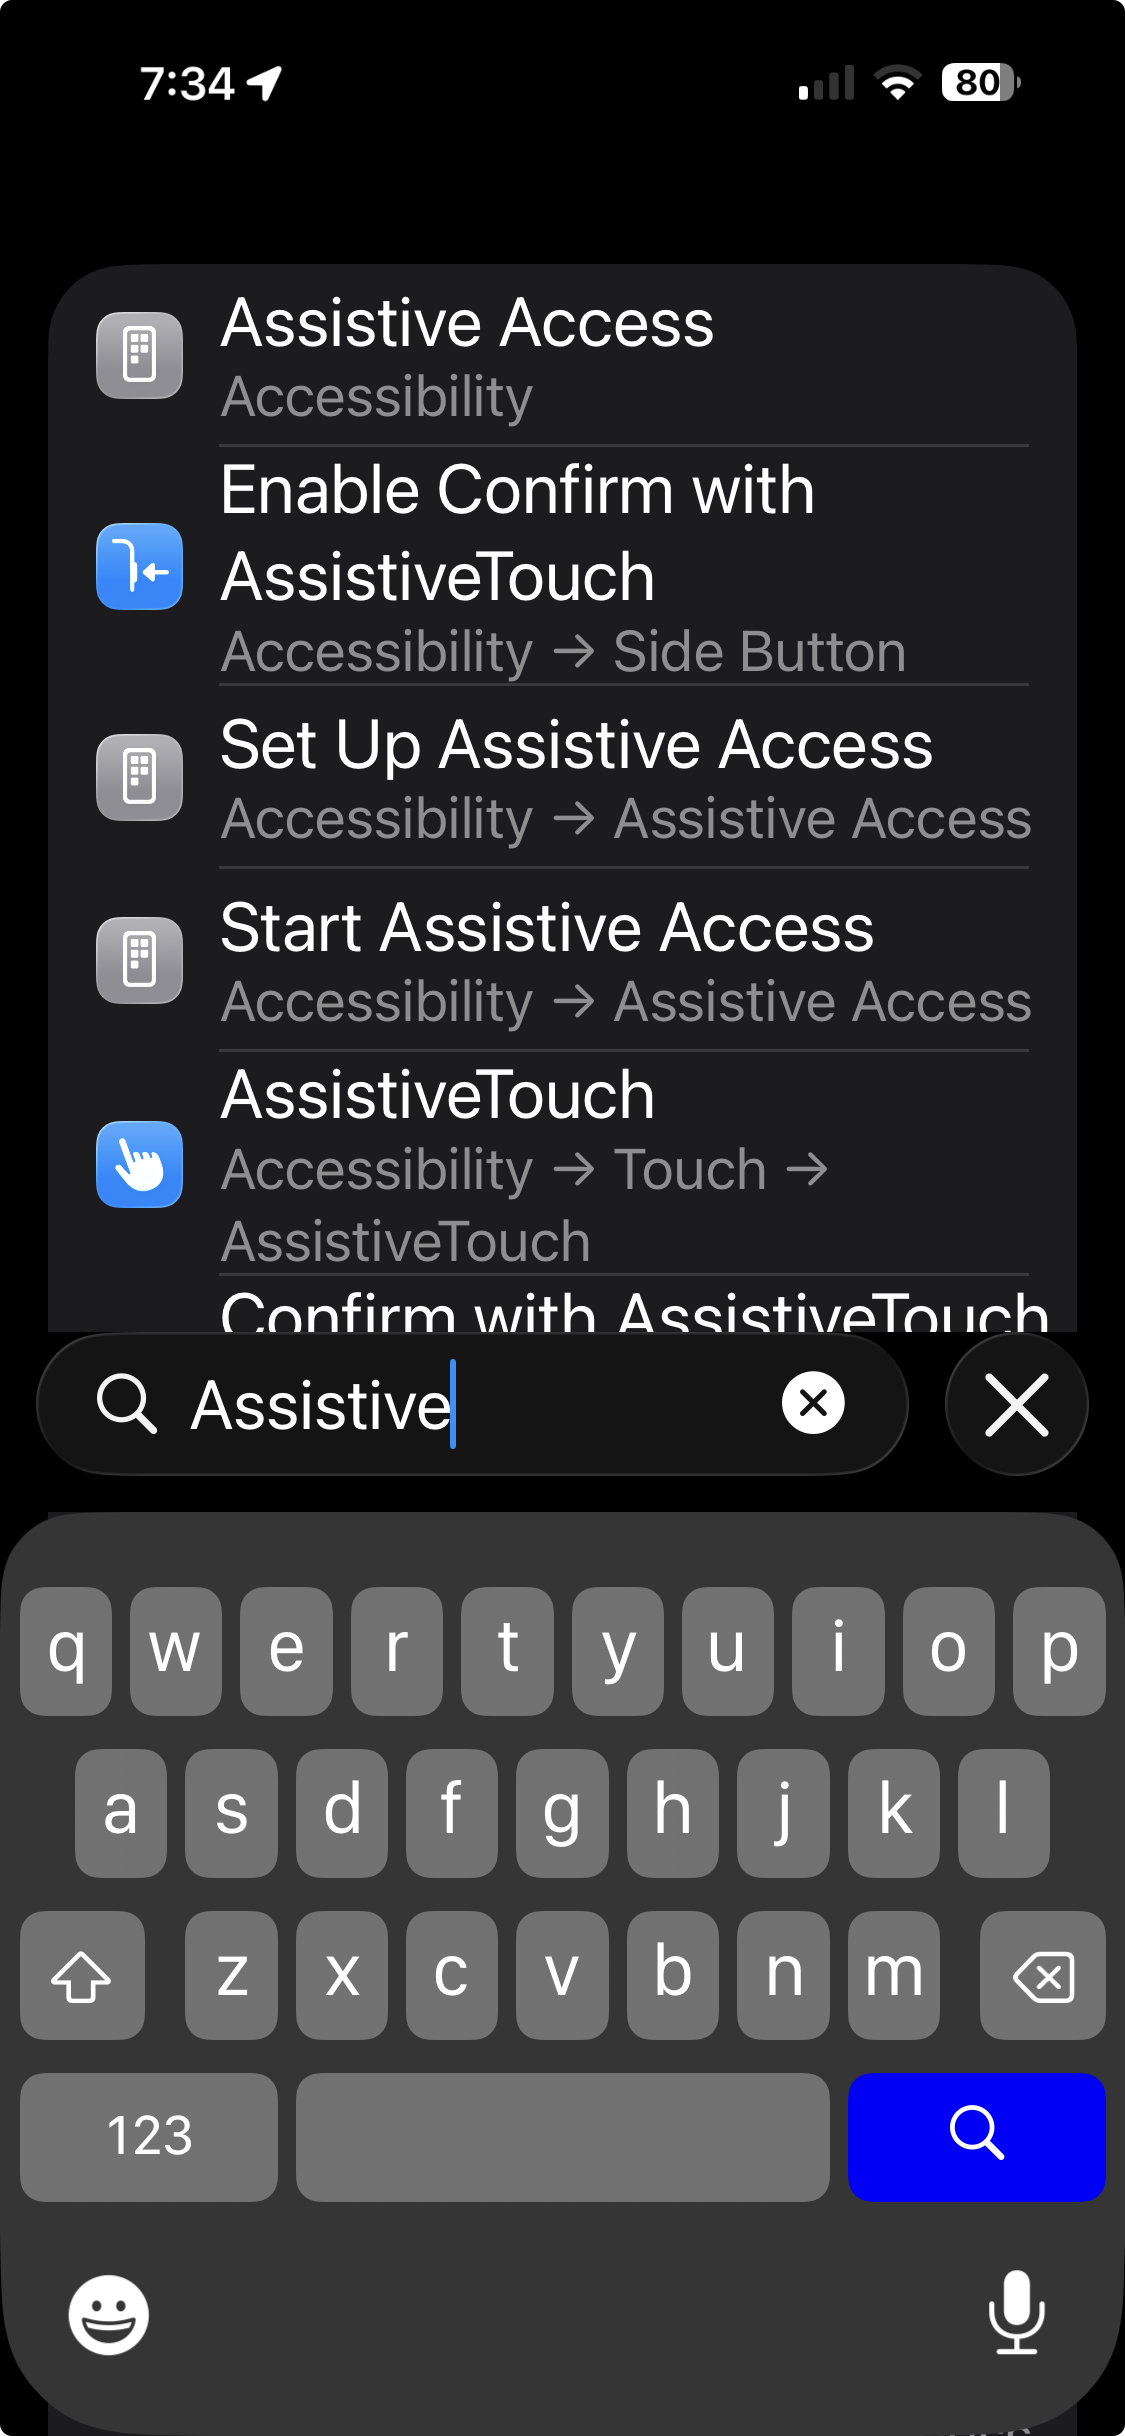
Admittedly, the hard part is knowing the exact name of the feature you are searching for.

Assistive Access

Assistive Access is for someone who needs or wants a phone but doesn’t have the desire or ability to deal with all the complexity of iOS. It reduces the user experience down to a few apps with big buttons.

Assistive Access makes iPhone or iPad extremely simple! It’s the best option for someone with cognitive impairment or someone who just doesn’t need 90% of the features. Also good for parental control scenarios. Assistive Access is intended for scenarios where there is a caregiver and a user. But, You could set it up for yourself.

It’s not real simple to set up. You need to create a new 4-digit Assistive Access passcode for entering and exiting Assistive Access. You also need to choose the Apps and features that will be available from a long list.

In my testing, I had trouble waking the iPhone in Assistive Access mode, and always had to sign in using the passcode although the phone was set up with Face ID. Your results may vary.
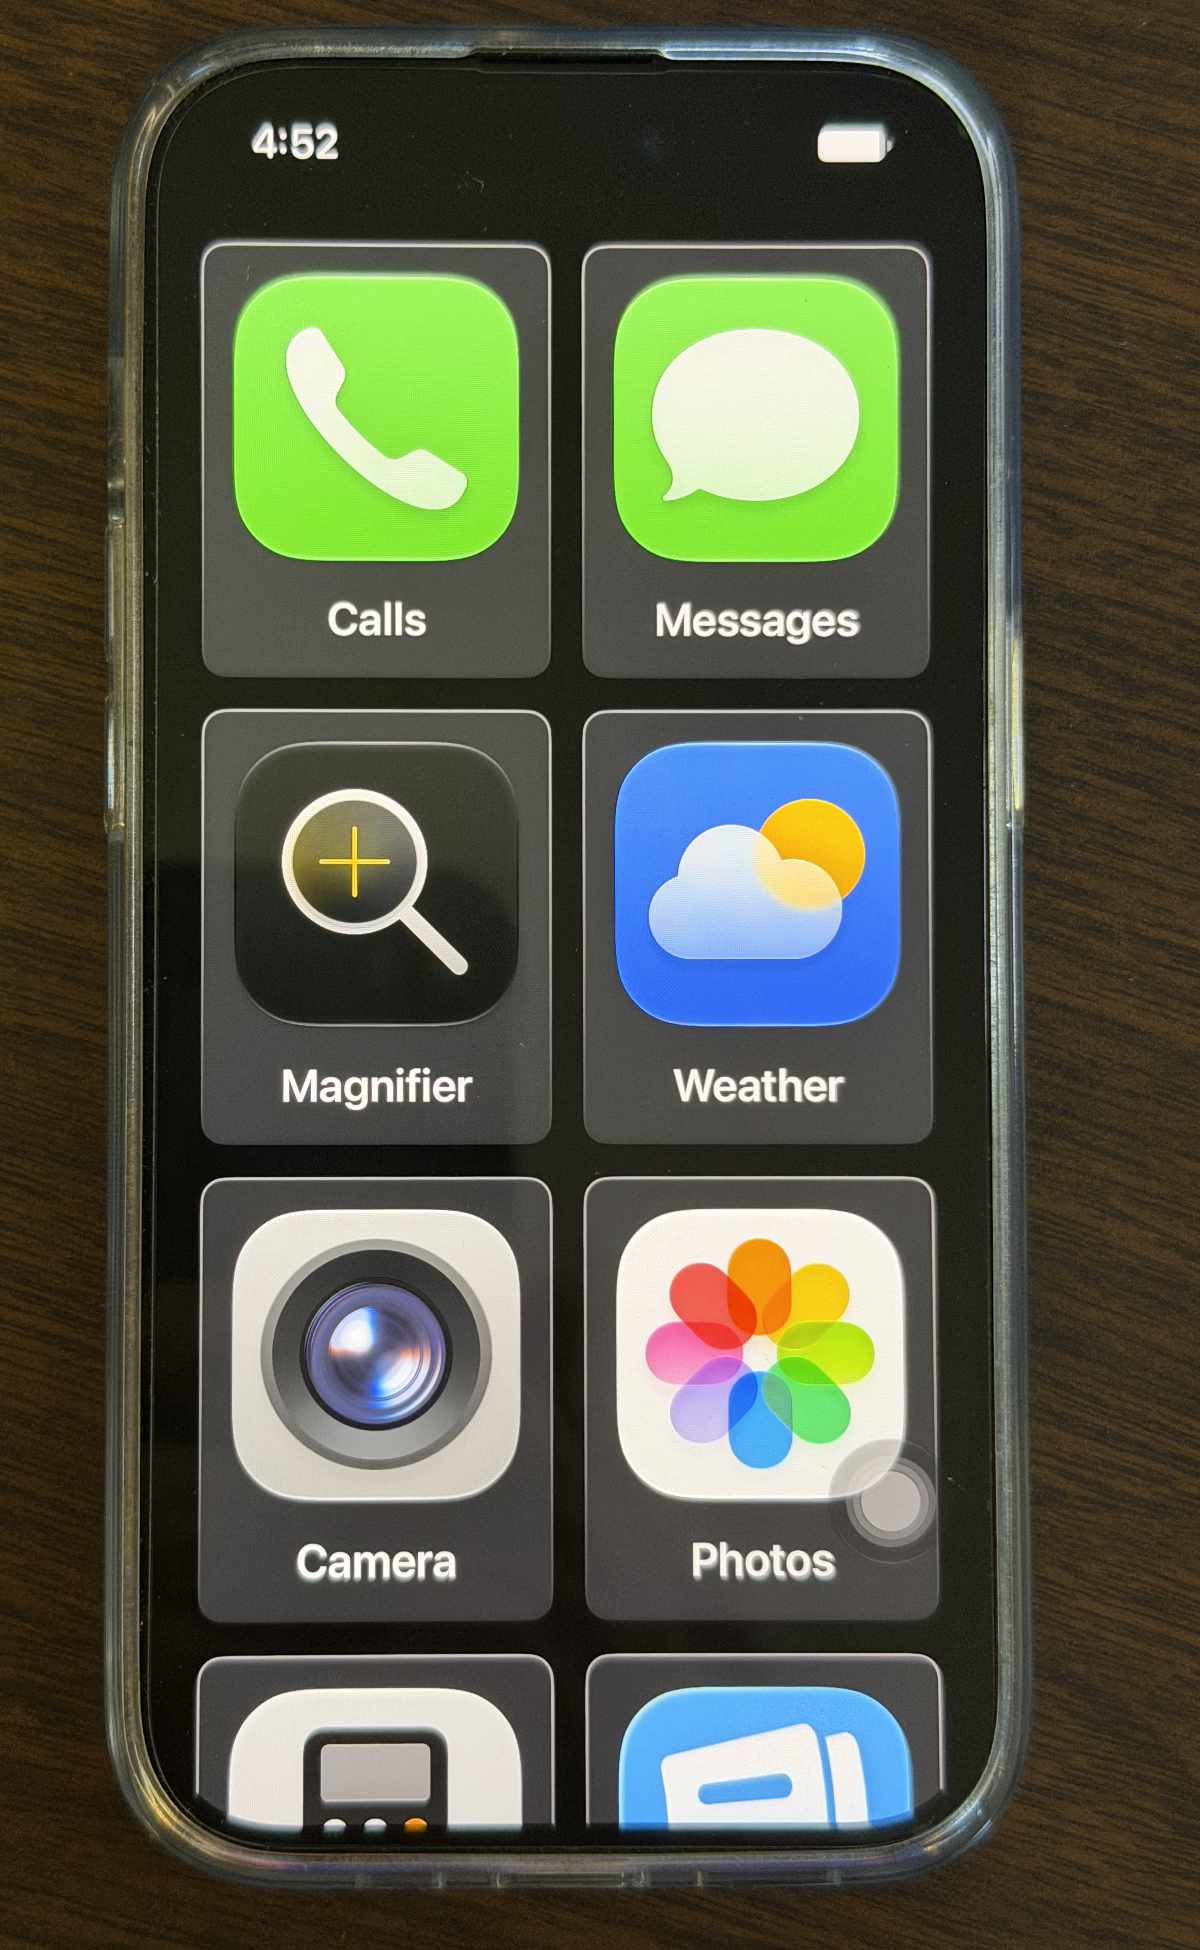
Assistive Access Screen showing 8 large App Icons.

In general, the Assistive Access user can only use the Apps present on the home screen, and cannot install new apps or change the settings. Only by entering the 4-digit Assistive Access passcode can a user escape the protective environment of Assistive Access.

Assistive Touch

Assistive Touch helps iPhone and iPad users who have trouble remembering or executing the gestures defined by iOS and iPadOS. Many older users cannot reliably do the special swipes and other gestures to access the Control Center, Notifications, Siri, the App Switcher, etc.

When Assistive Touch is turned on, a gray dot appears on the edge of the screen. (The Assistive Touch control can be seen towards the lower right of the previous image of Assistive Access.) Tapping that dot reveals the special Assistive Touch menu. The Assistive Touch dot can be dragged to any edge of the screen by the user in case it is interfering with something else on screen.
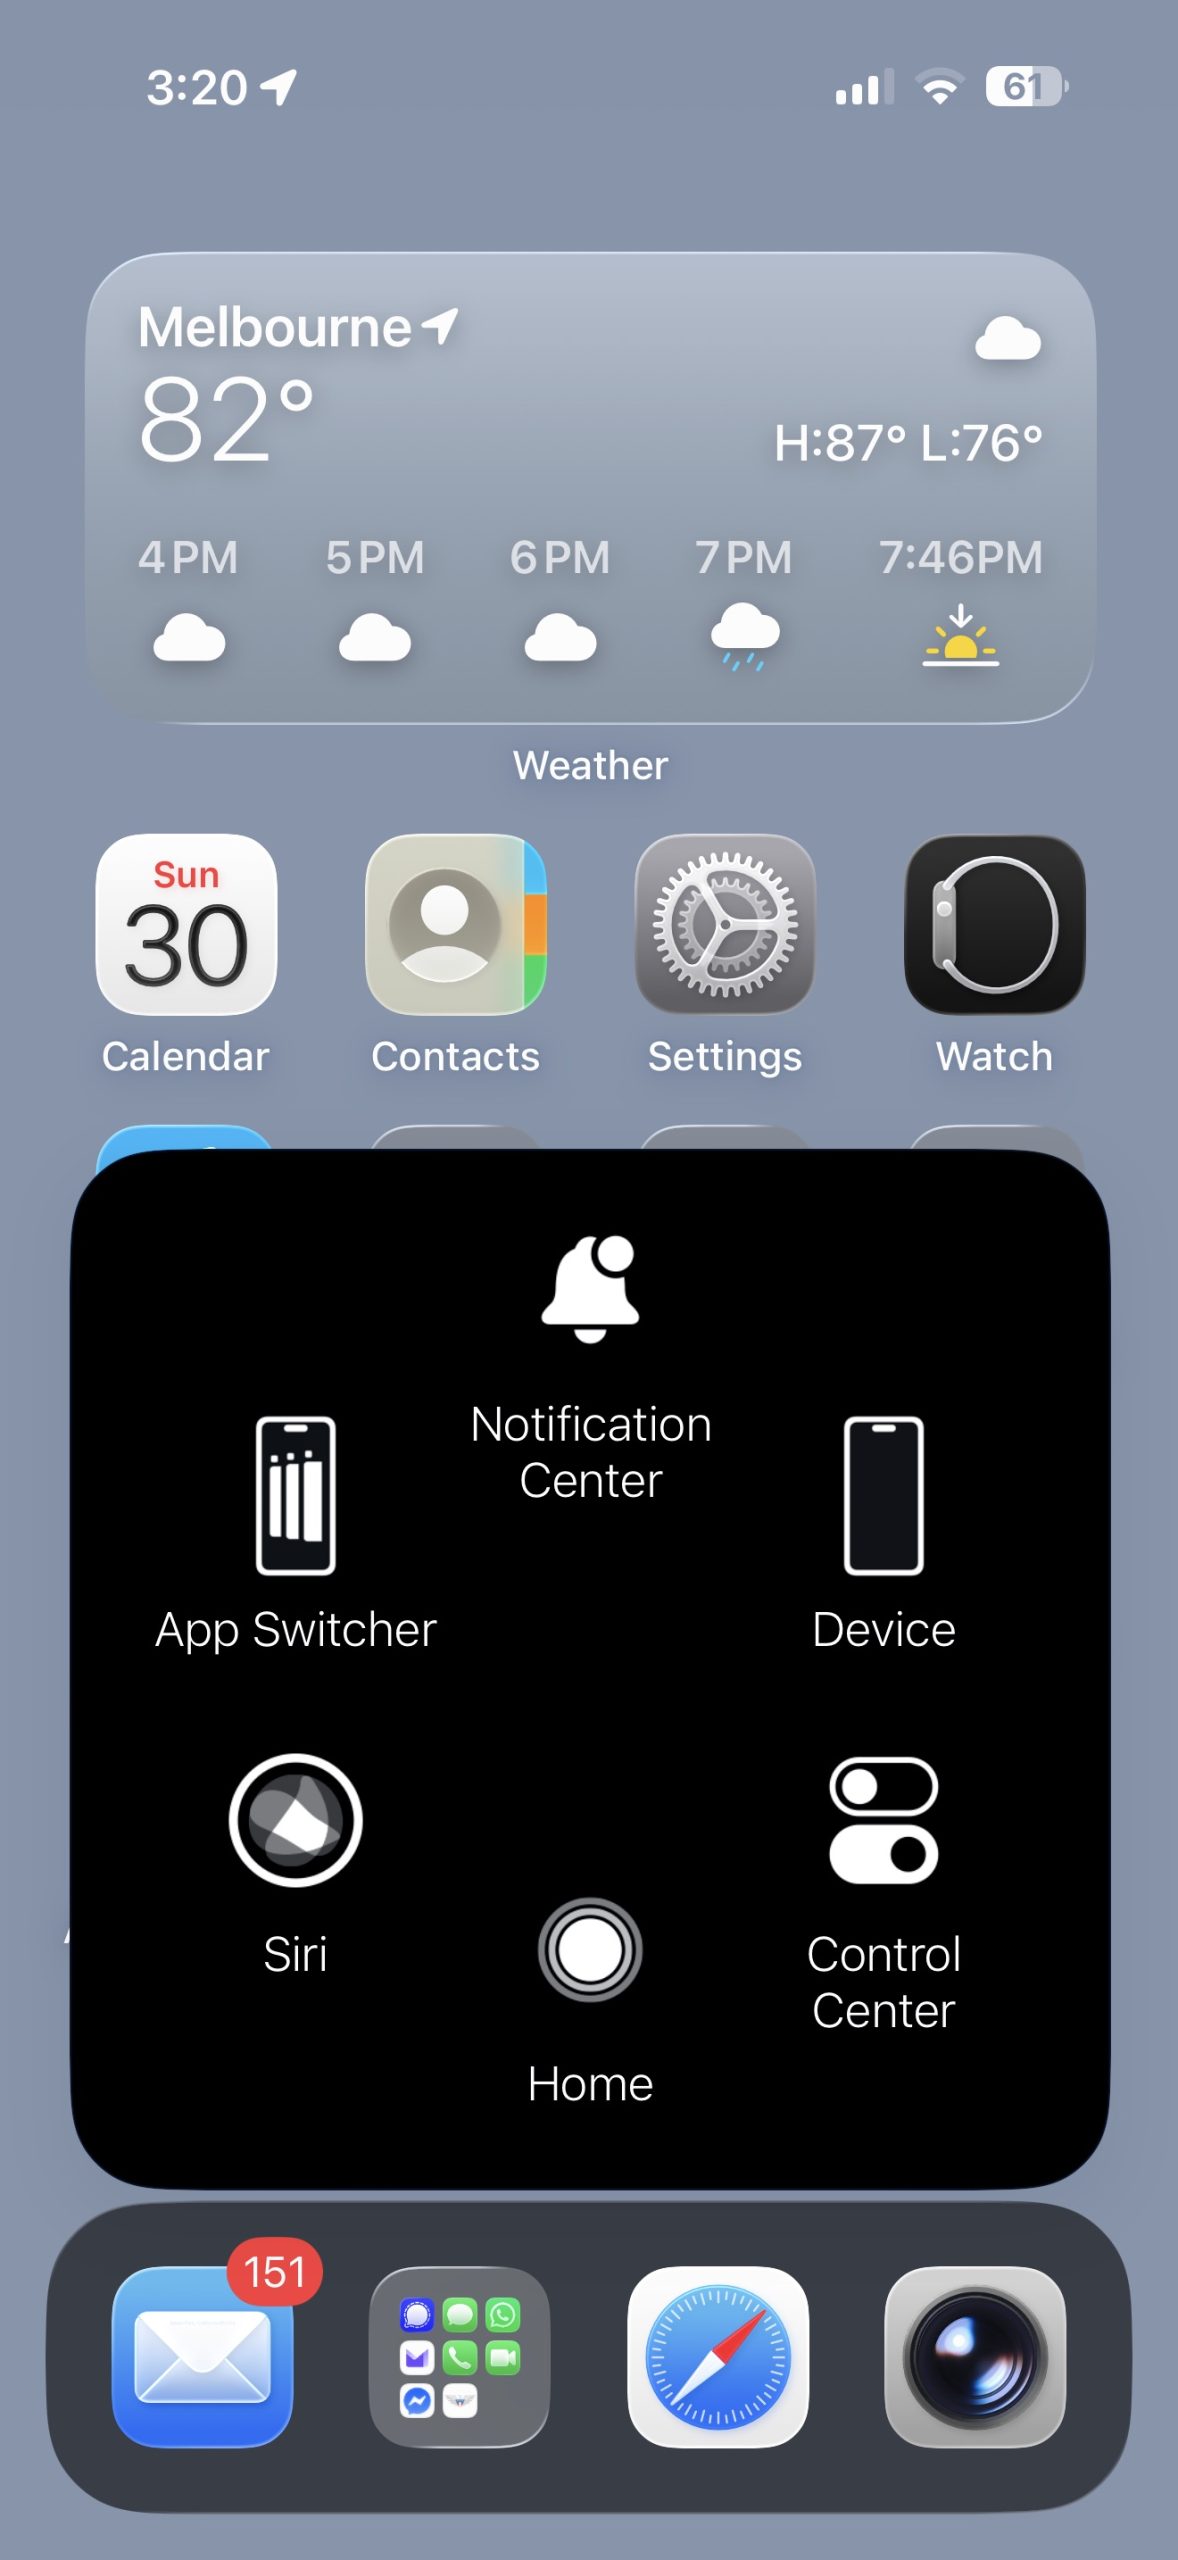
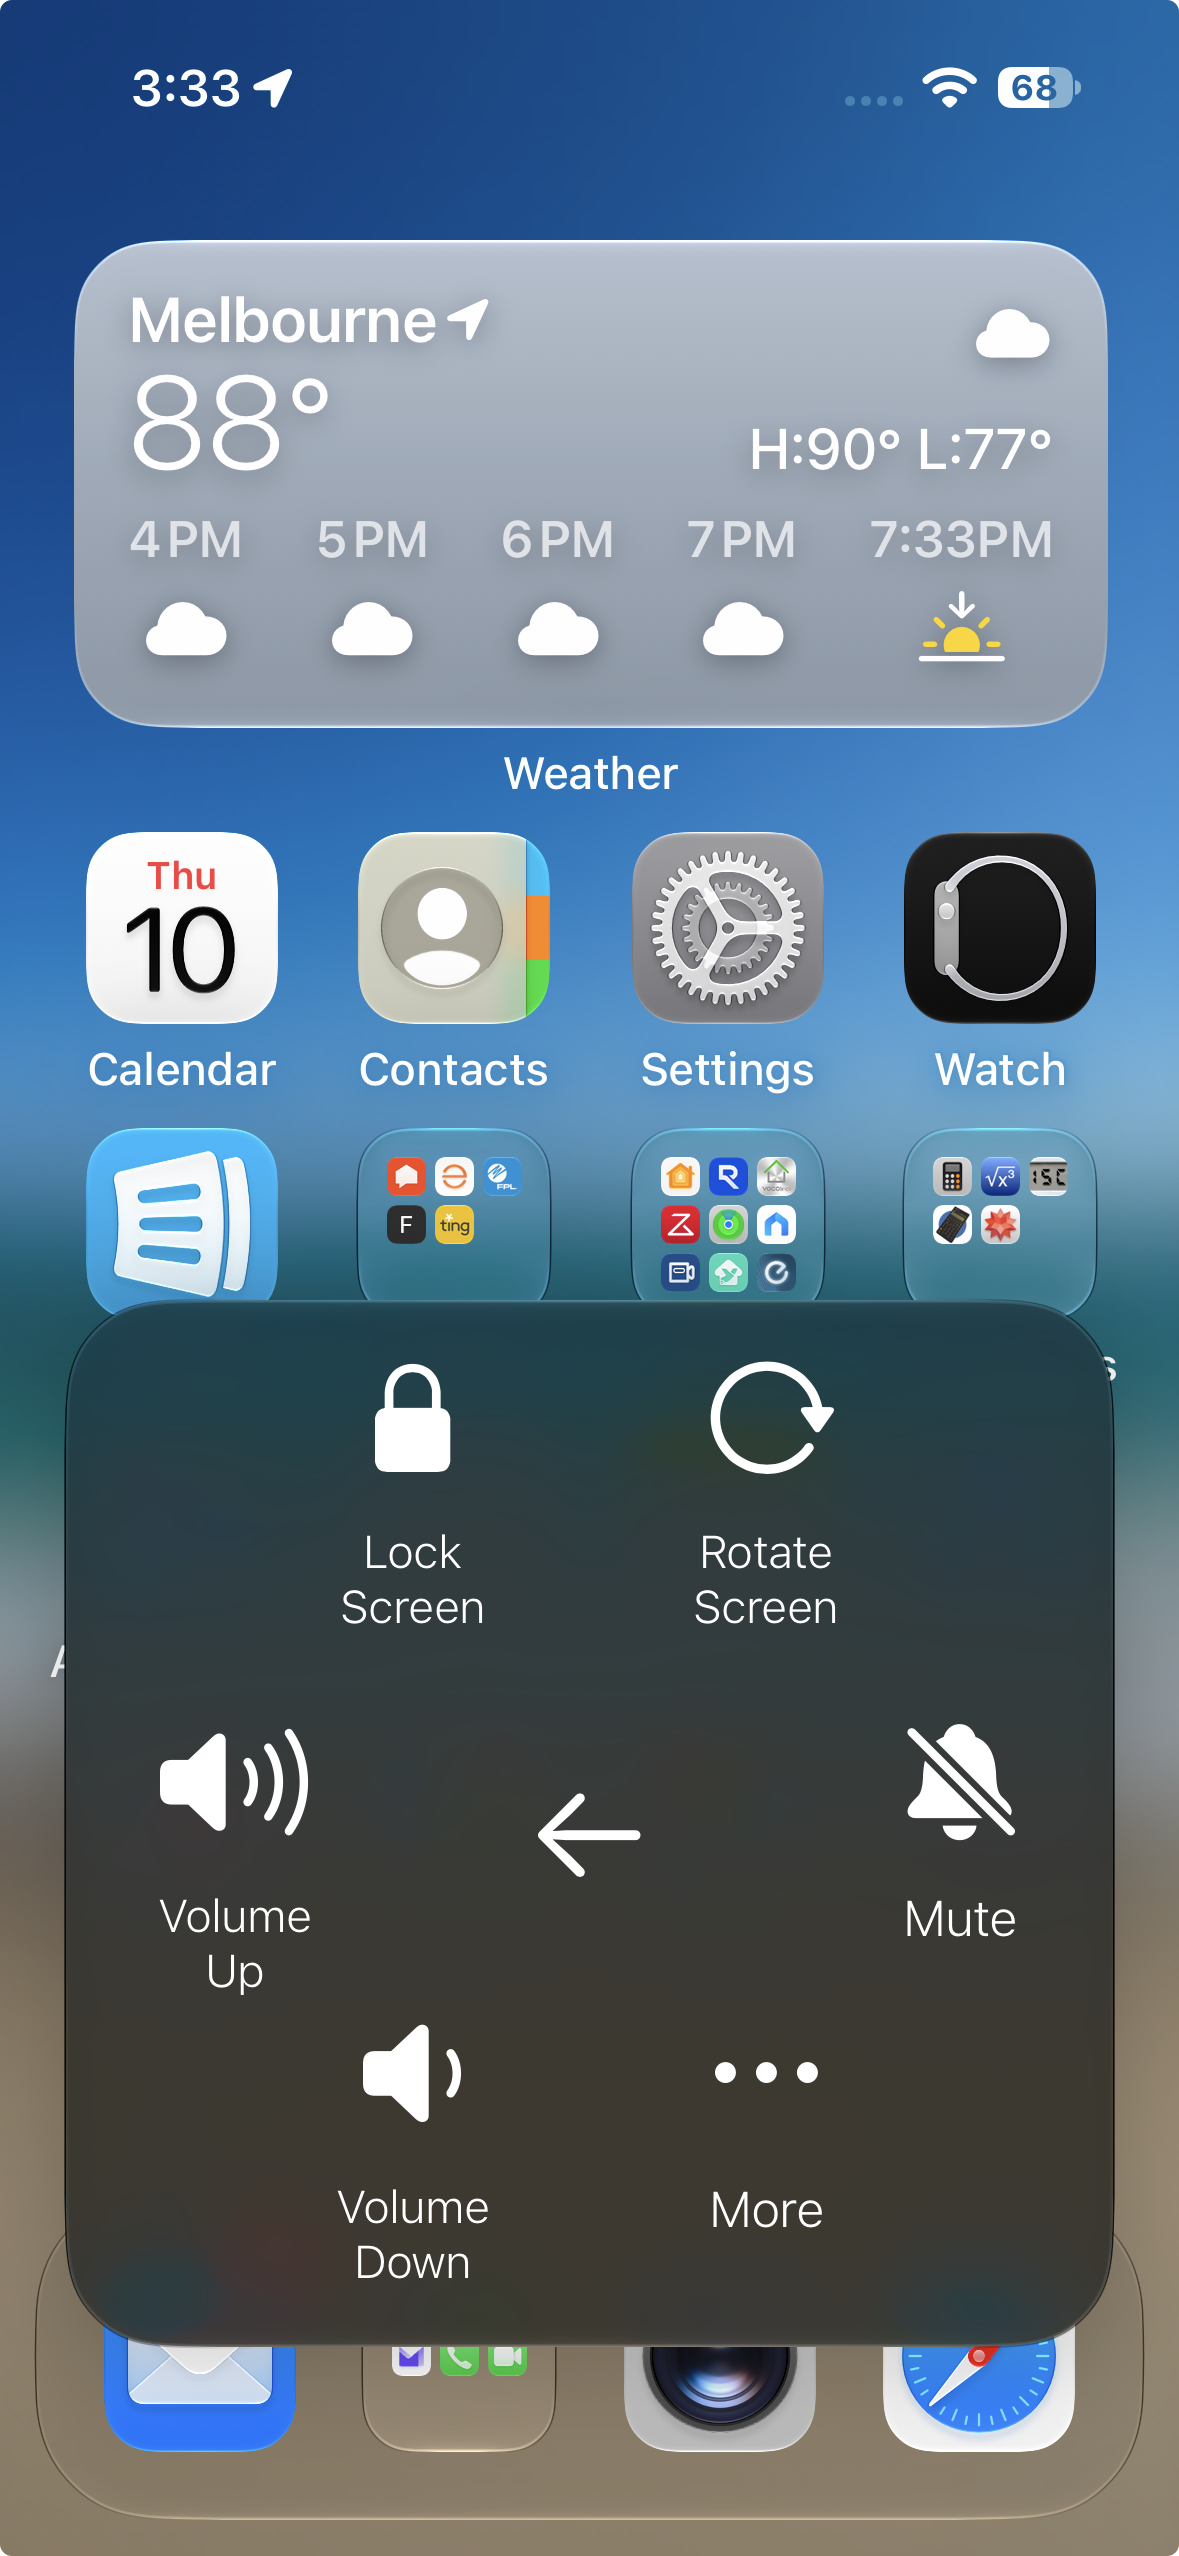
Tapping the “Device” button leads to more options shown below:
The features of Assistive Touch are customizable:
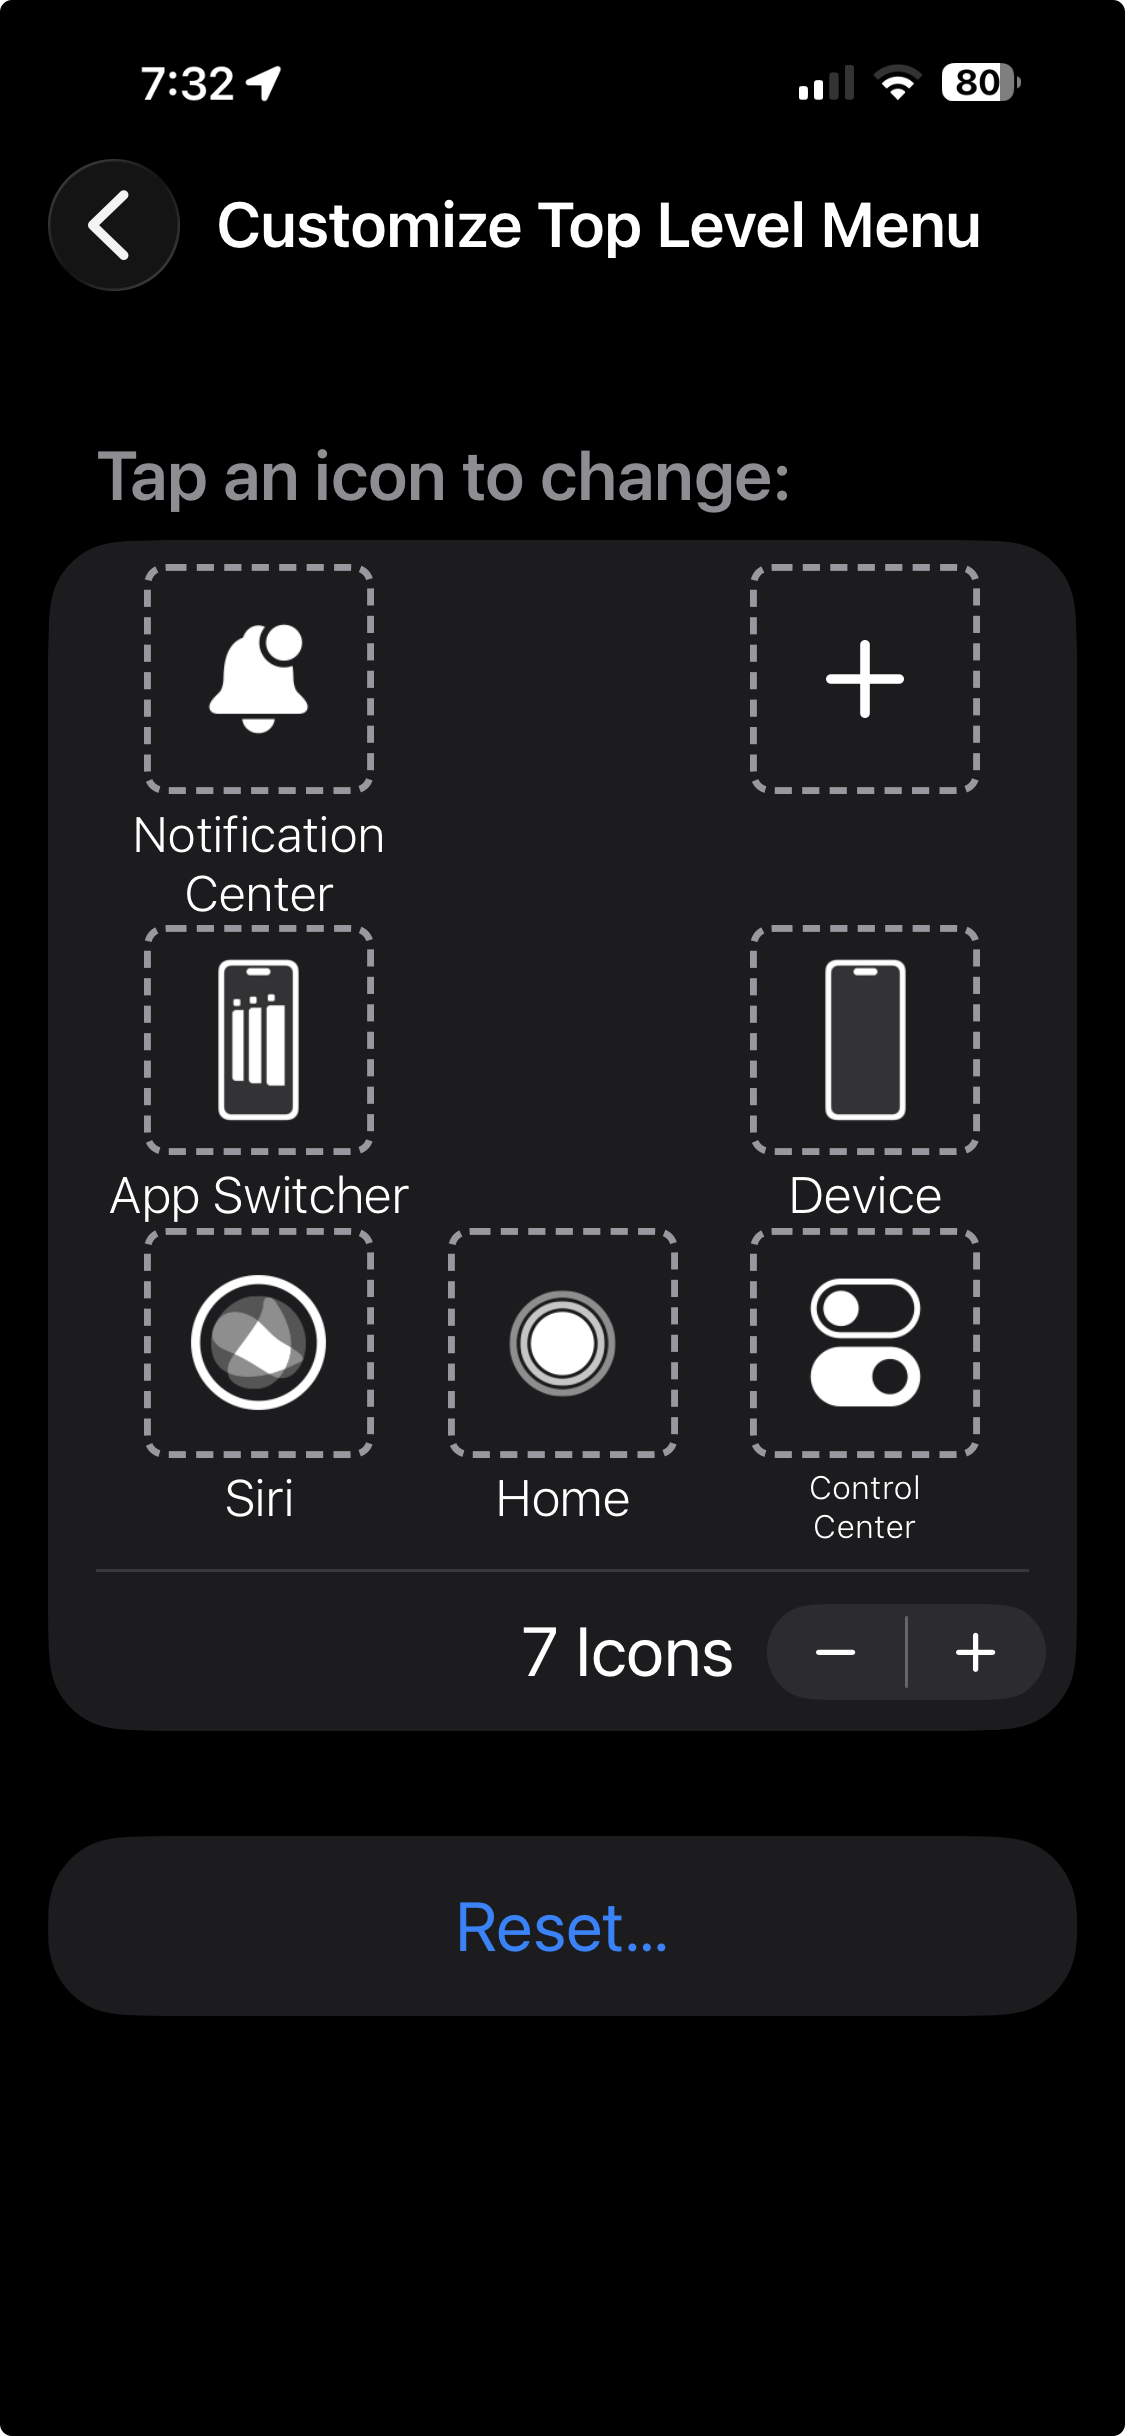
Assistive touch is a simple feature that can make your device easier to use with very little penalty. There’s no reason not to give it a try. Assistive Touch can be turned on in Settings->Accessibility->Touch->Assistive Touch.

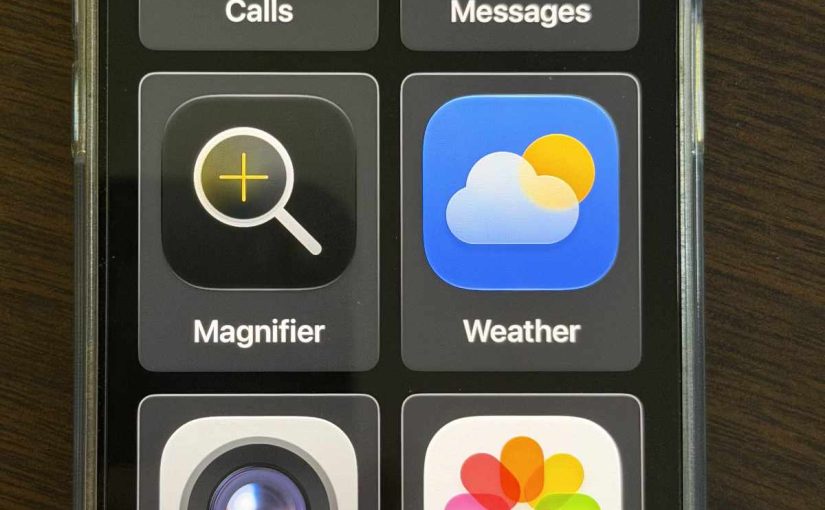
The Magnifier

The Magnifier is not really a setting, but an App that exists in the Control Center.

The Magnifier uses your camera to magnify nearby objects. It’s great for reading the small menu print in a dark restaurant. Besides enlarging the image, it also makes it brighter, thus easier to see.

The Control Center is Customizable so the Magnifier may not appear in your Control Center unless you add it, or it may appear in a different location than shown here.
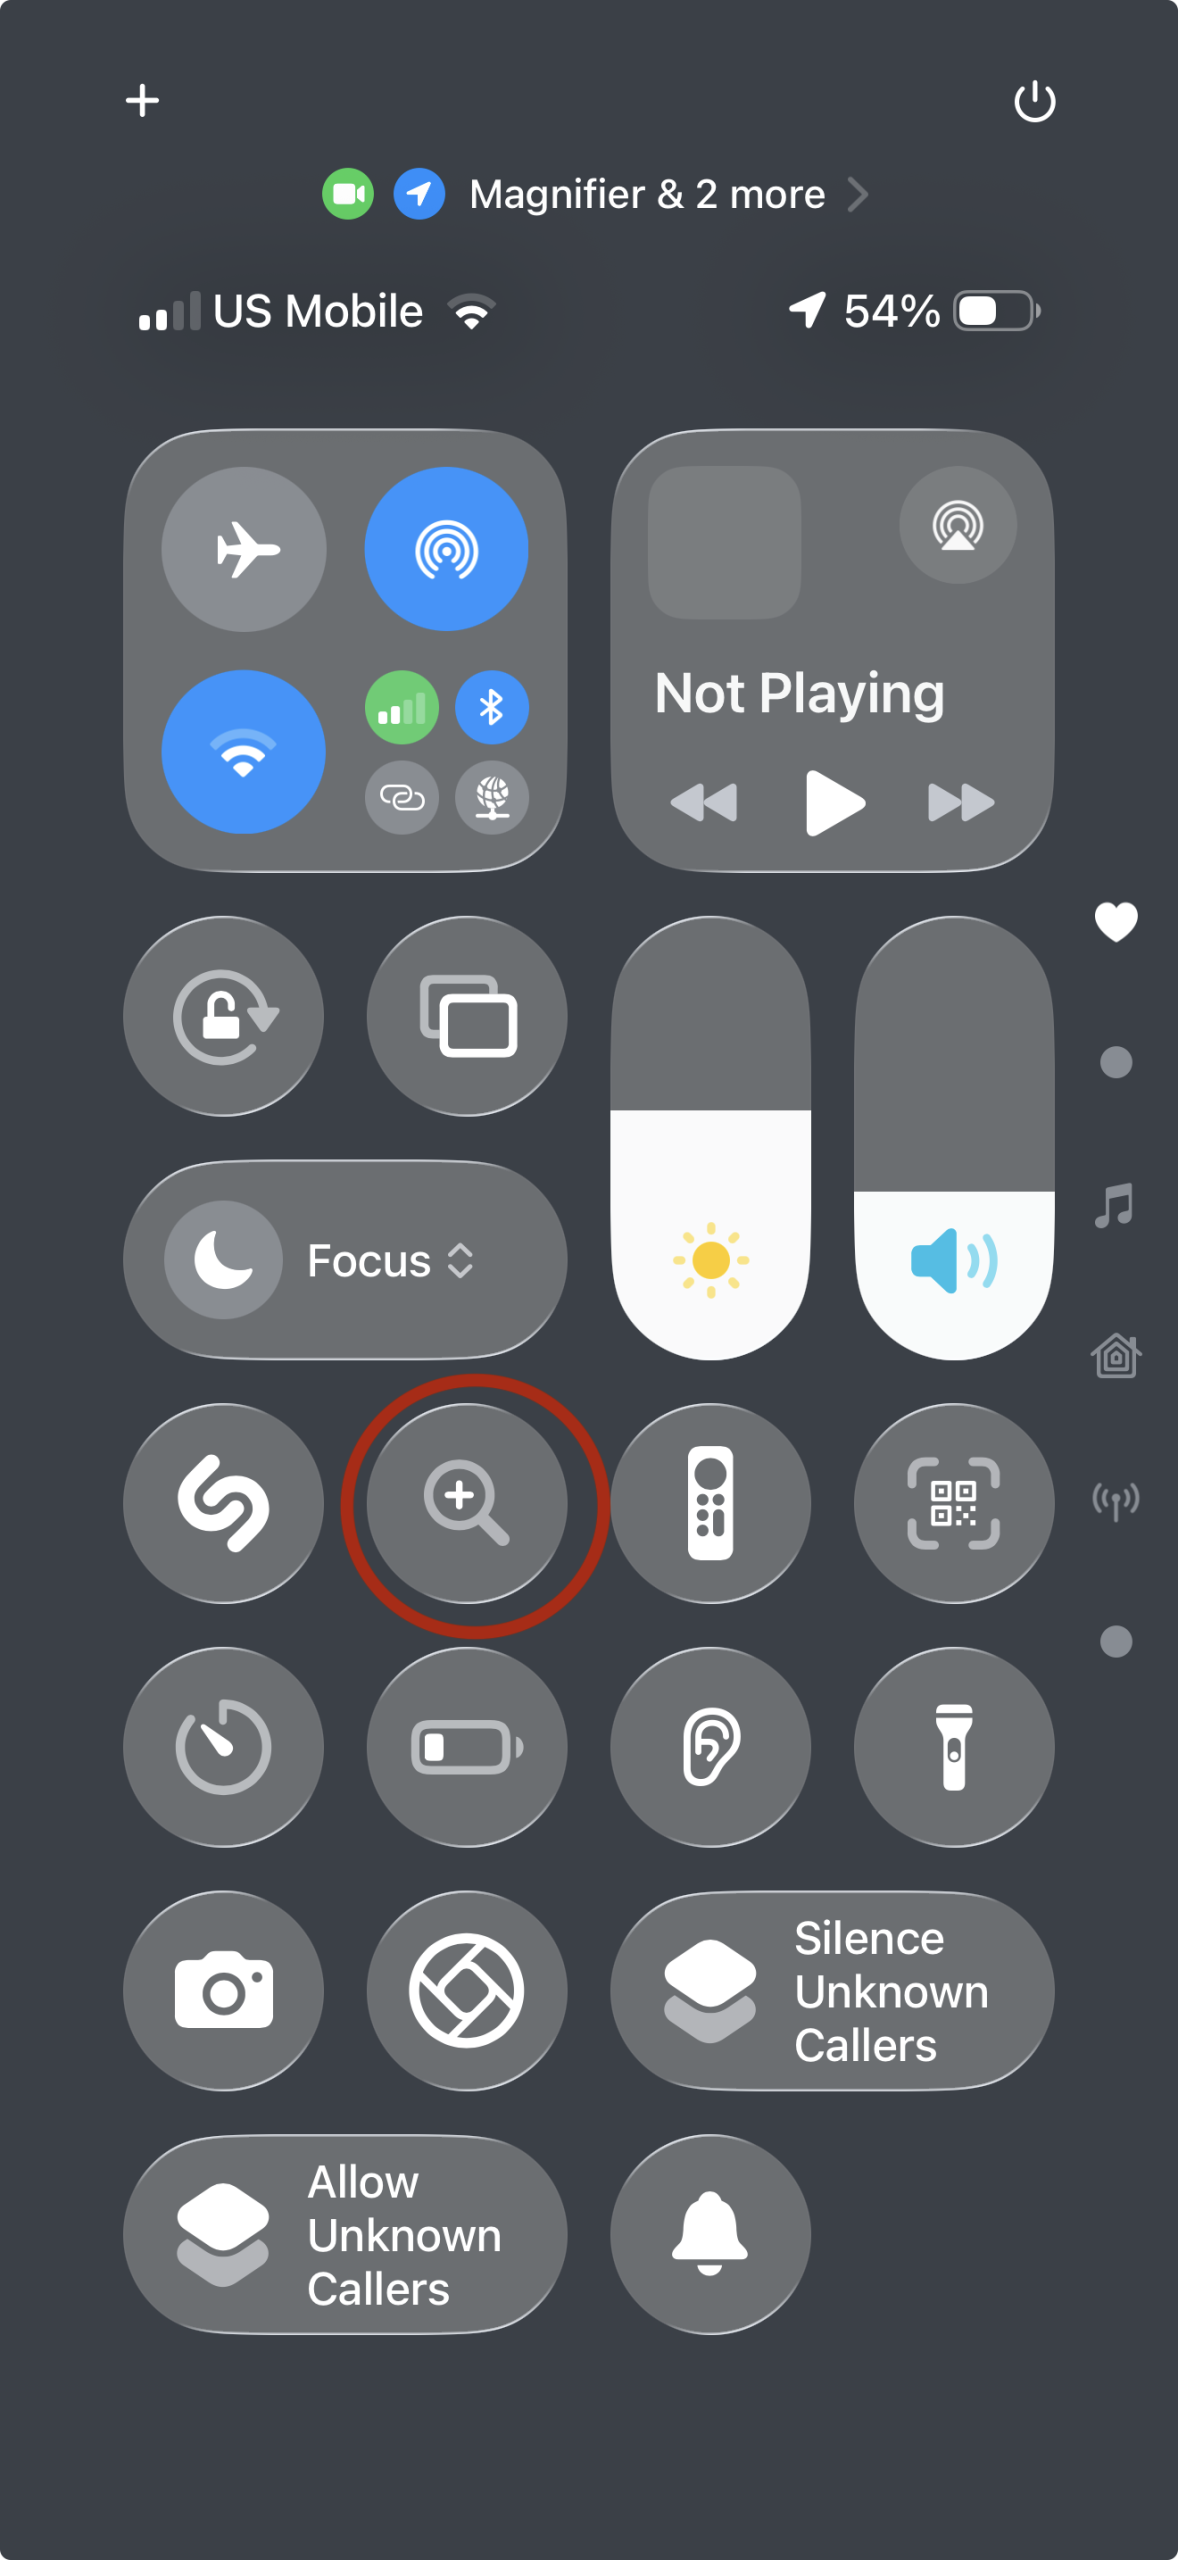
iPhone Control Center – Magnifier Icon in Red

The Control Center can be accessed by swiping down from the extreme upper right of your screen (for devices with Face ID). For devices with a home button, Control Center appears when you swipe up from the very bottom of the screen.

Below is the magnifier in use shown examining some obsolete coins.

Magnifier View of Pennies

Zoom

The Zoom feature magnifies items on screen. Settings->Accessibility->Zoom, then Double Tap with three fingers to invoke or dismiss.

Wikipedia page on Steve Jobs with region of magnified text.

Text Size

You can adjust the size of text in most Apps with Settings->Display & Brightness->Text Size. This size control is further extended to even larger text in Settings->Accessibility->Display & Text Size->Larger Text.
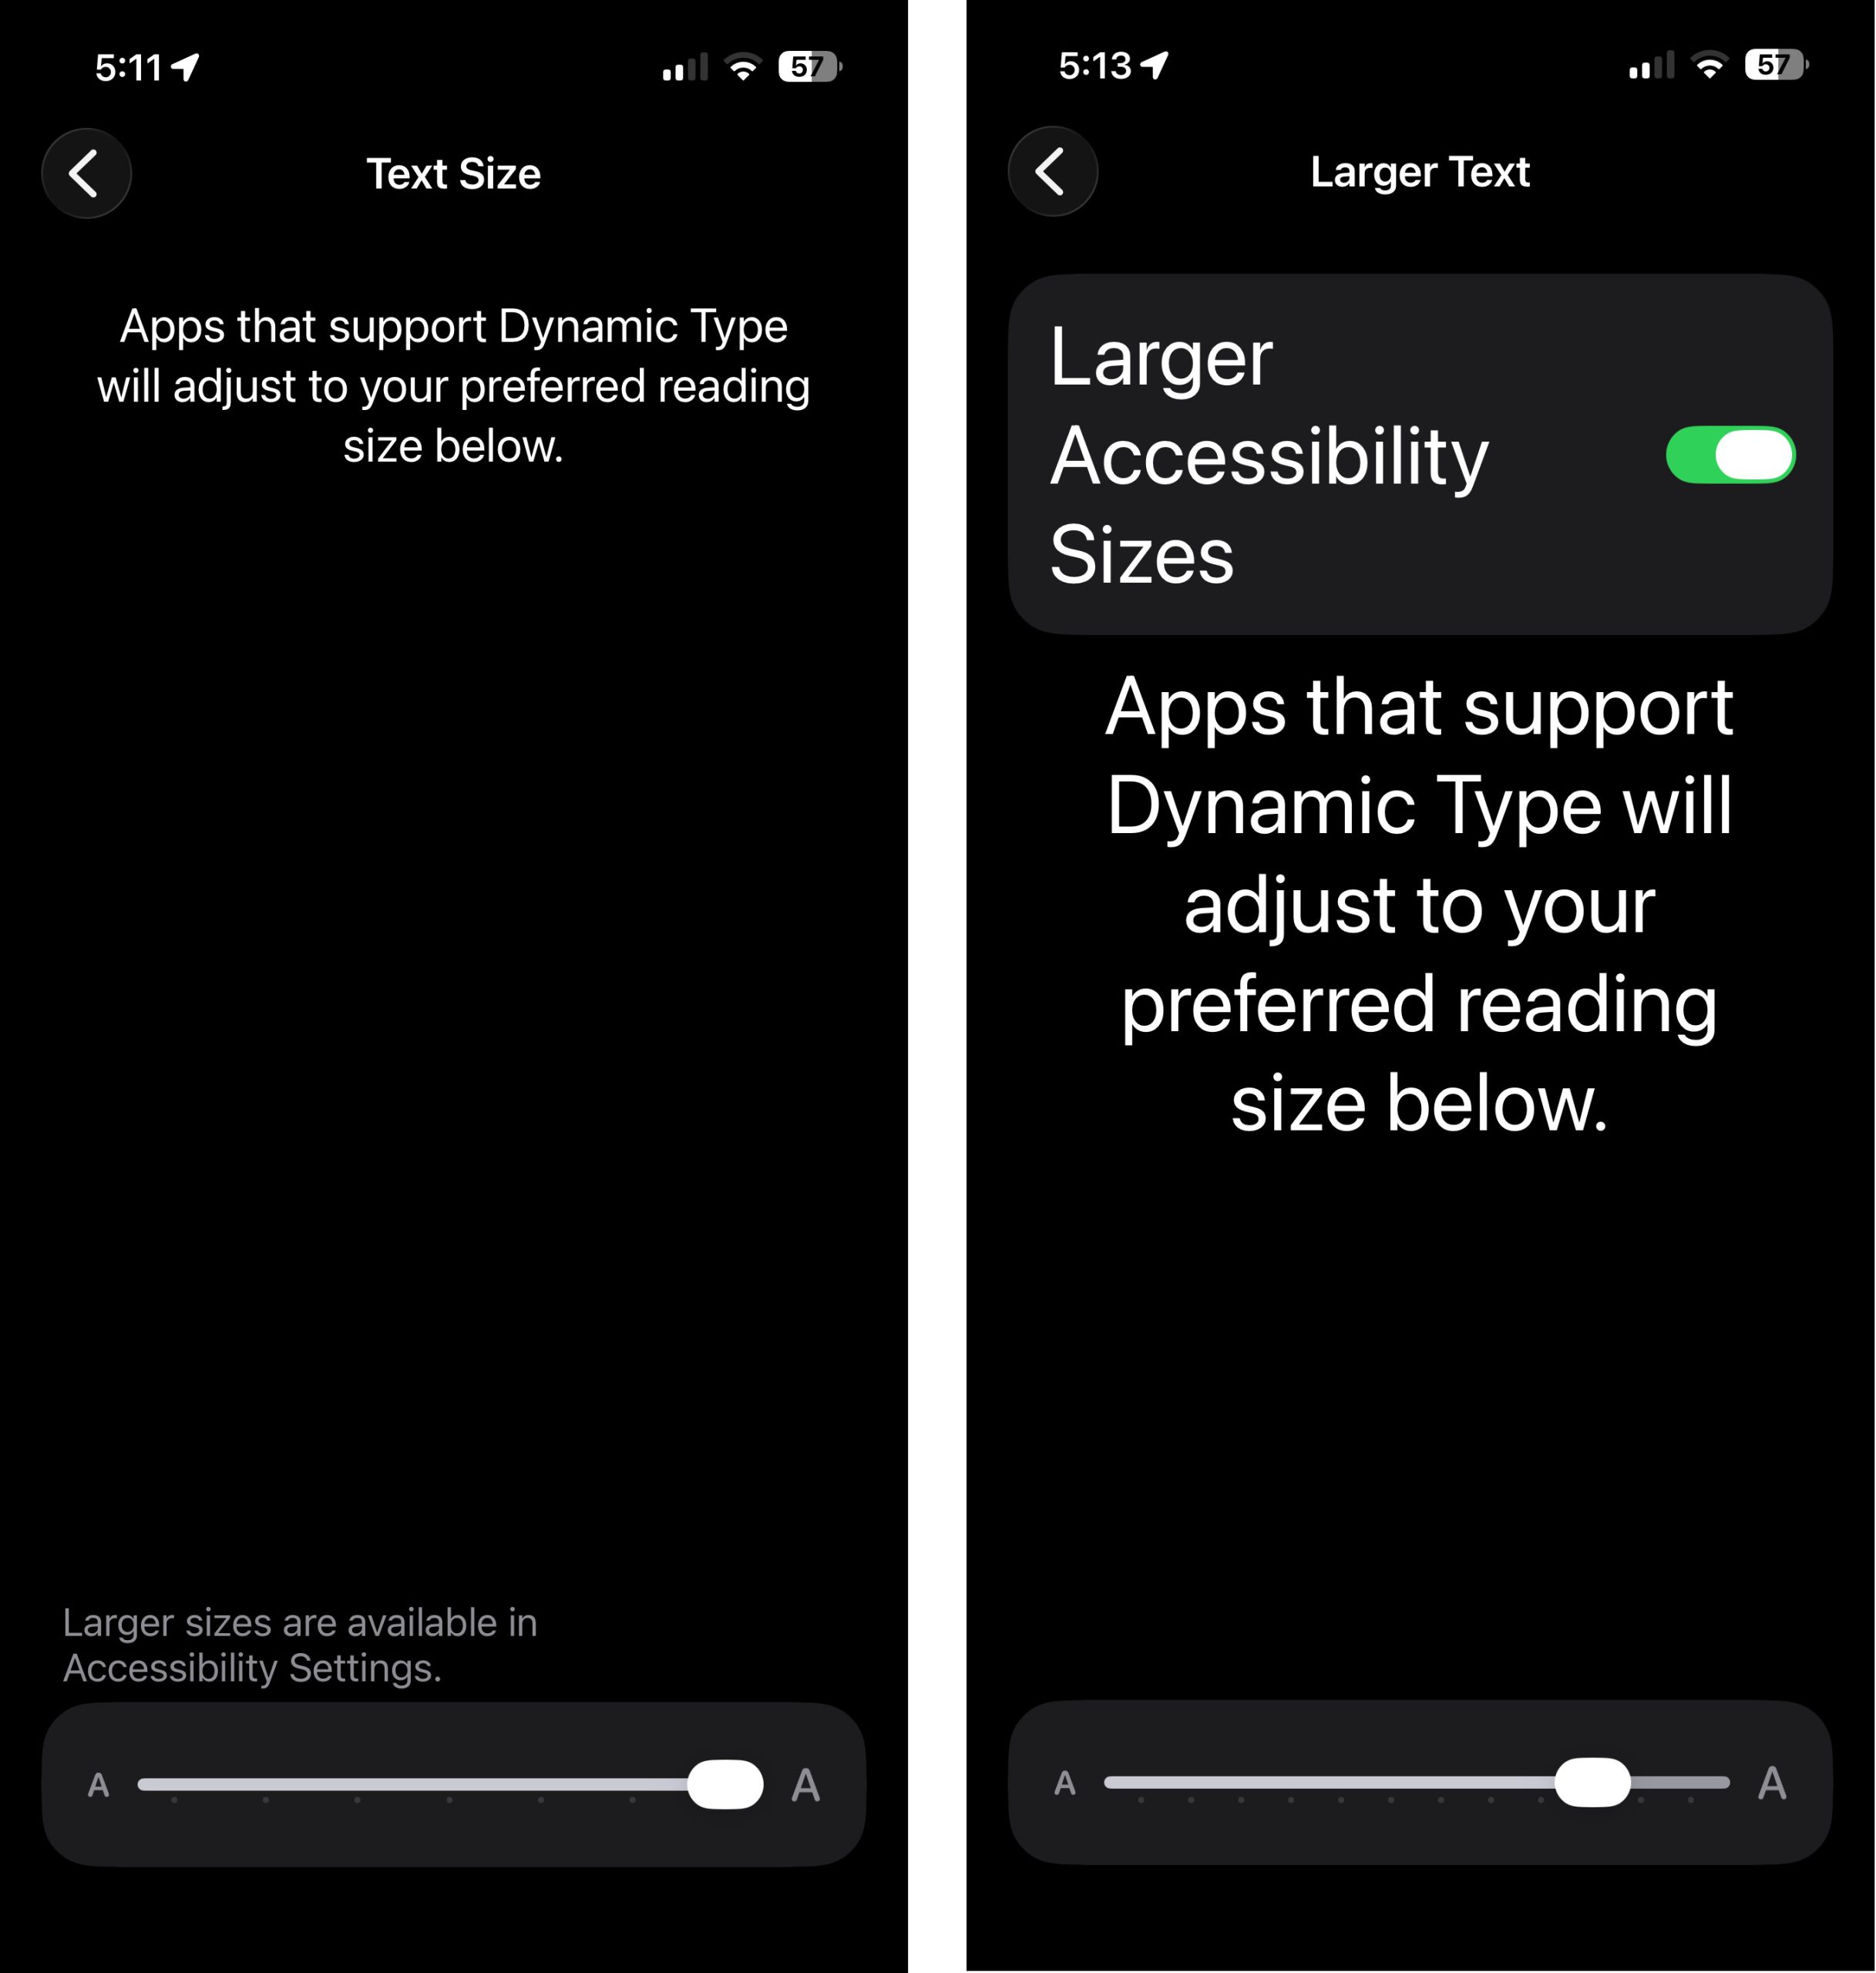
Text Size and Larger Text Settings

Display Zoom

Hey Siri, make everything bigger than everything else.

On iPhone or iPad Display Zoom has two options, Default or Larger Text. This is misleading, because it doesn’t only affect text. What Larger Text does is resize the entire screen, making most everything look bigger.

I liked the Larger Text option right away. Everything is just a bit bigger and clearer, with very little penalty. On the iPhone 17 Pro Max, the screen resolution changes from 2868 x 1125 to 2436 x 1125. That makes everything 17% larger in each dimension, while showing you 85% of the pixel count in each dimension.

This seems like a quite reasonable tradeoff and it just makes everything a little easier to see, at the expense of super fine detail, which older eyes probably can’t see anyway.

Your results will vary with the model of iPhone or iPad. The system claims that your iPhone will need to restart for this change, but in practice I didn’t see a restart — the screen just went blank for a few seconds.

Unless you have great eyesight, or great reading glasses, this will make a nice improvement for you, and you won’t notice those slightly larger pixels.
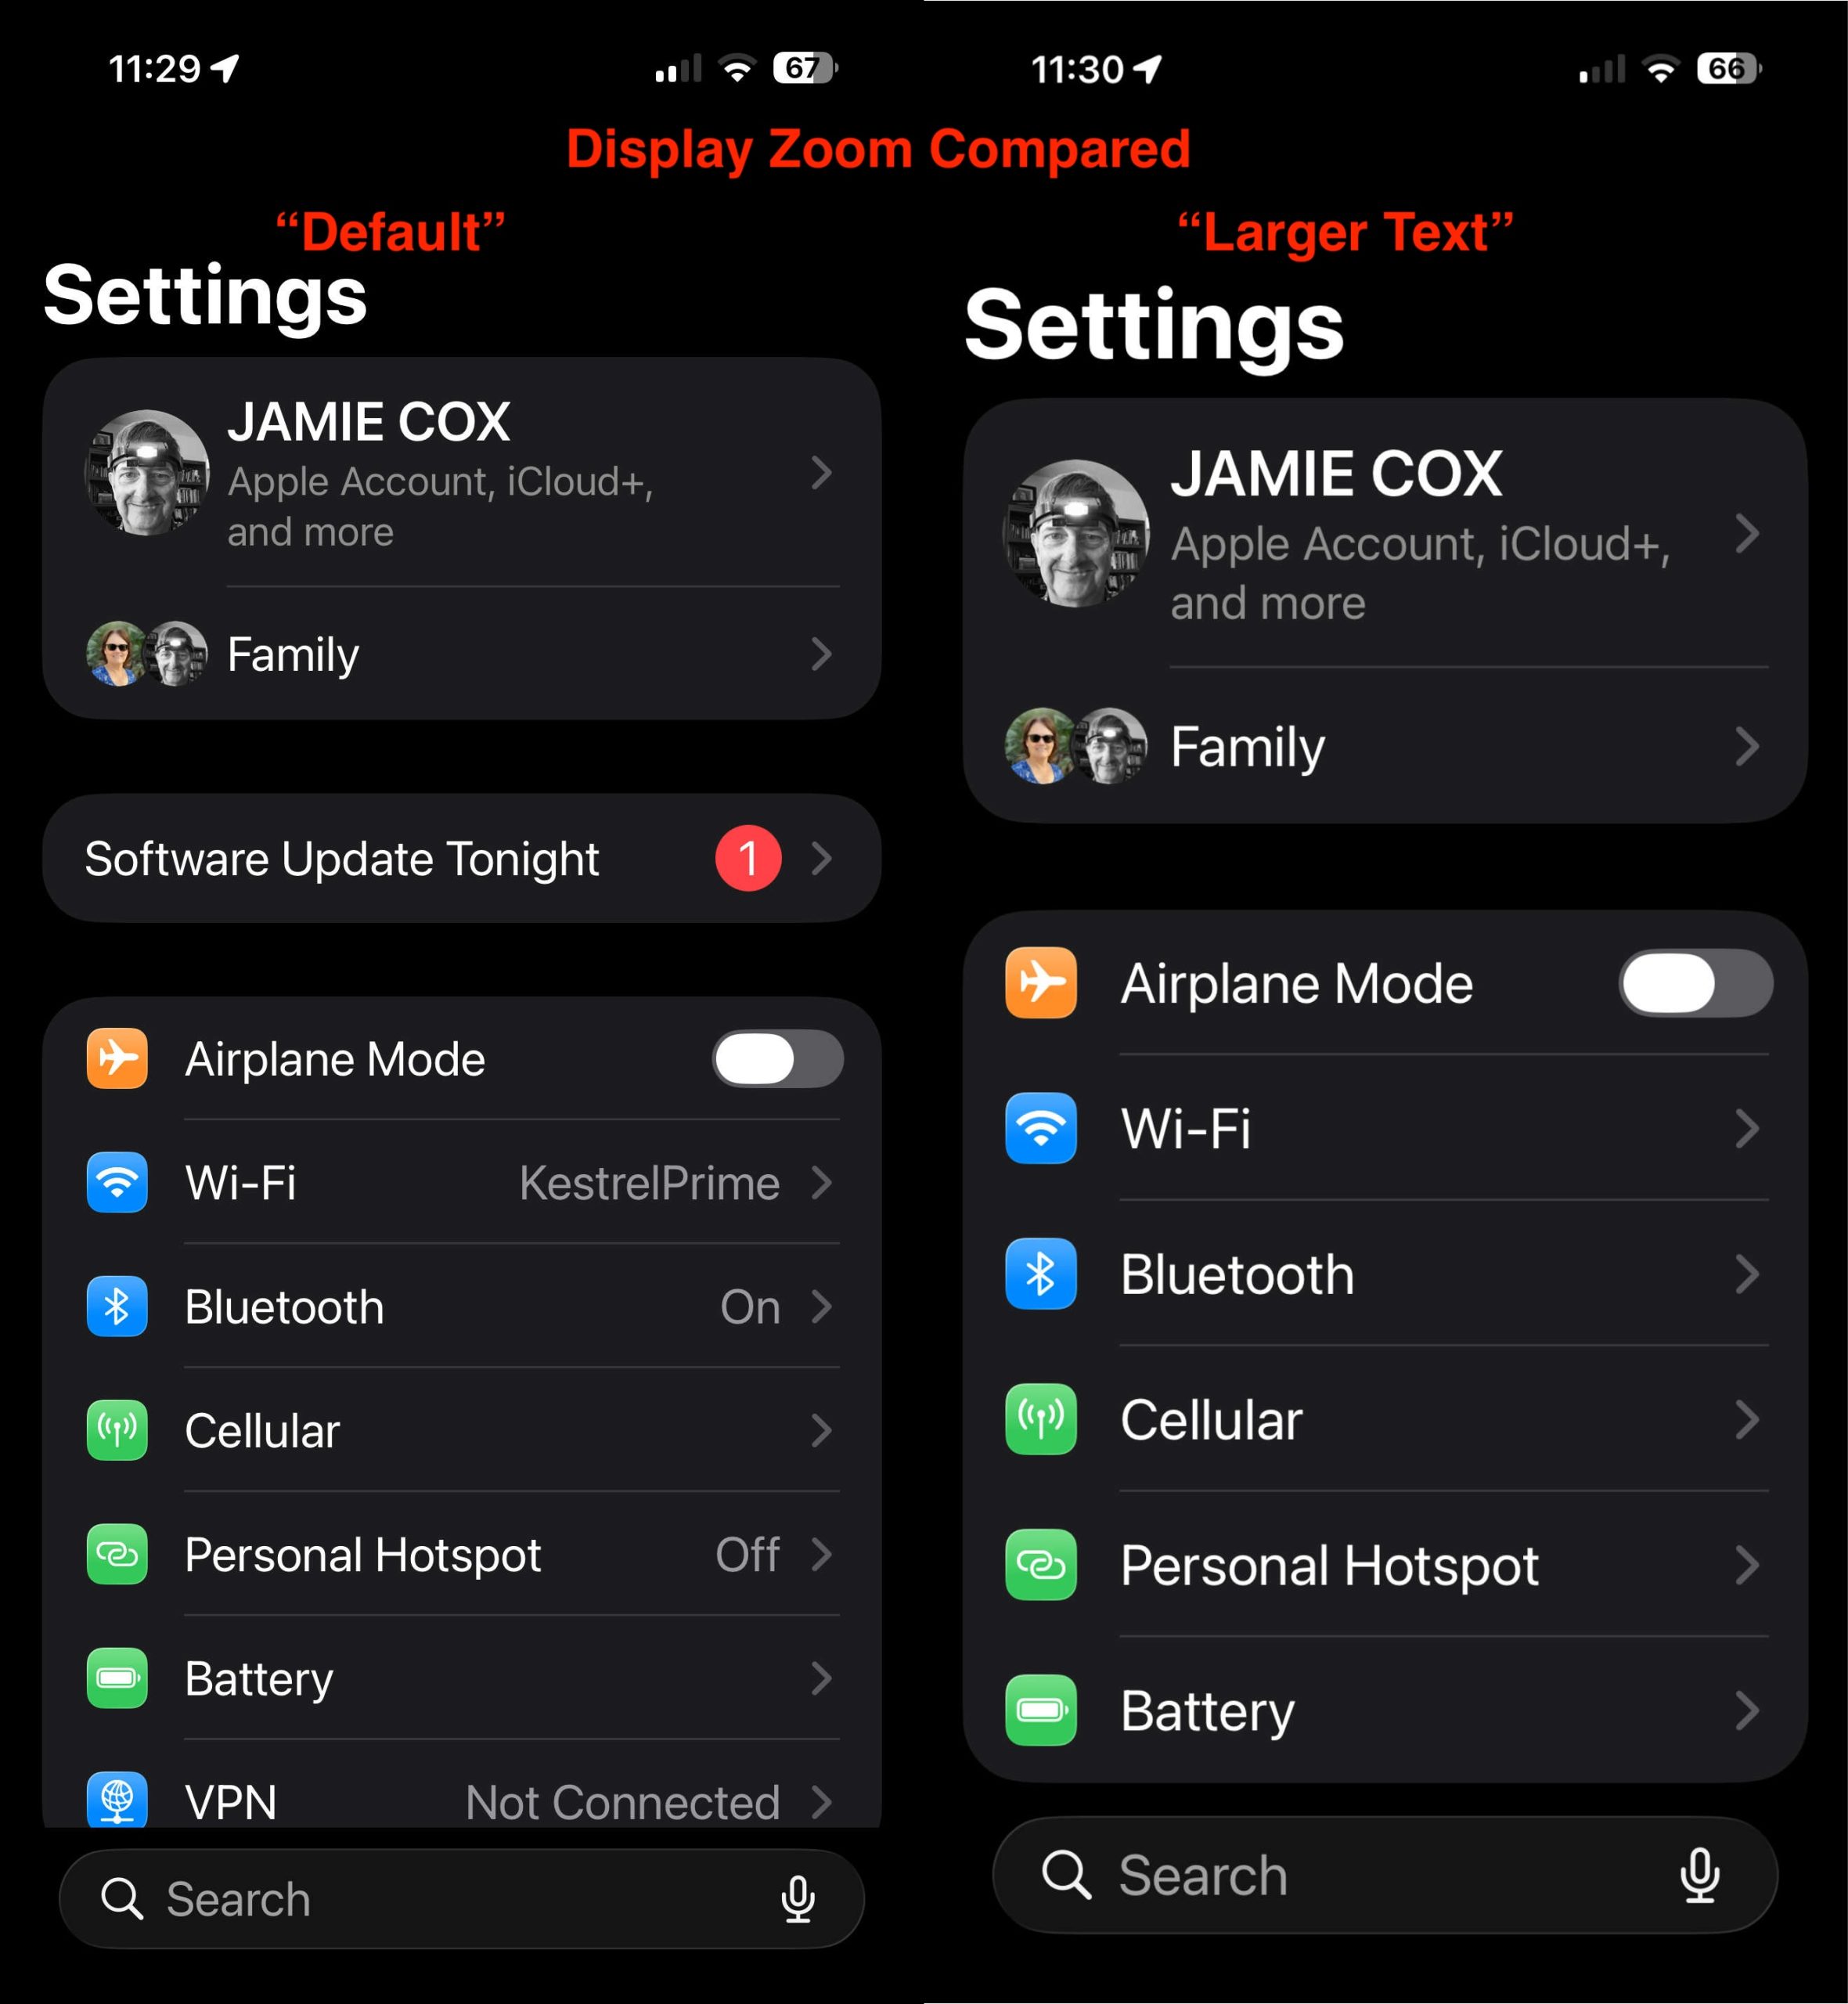
Above is a side-by-side comparison of the settings screen with Display Zoom set to “Default” text (Left), and “Larger Text” setting on the right.

MacOS Display Resolution

Display Zoom on iOS is similar to the long-standing Display Resolution setting on MacOS. Found under Settings->Displays, this option makes everything on your Mac screen larger or smaller. If you have more than one monitor, you will have to make separate adjustments for each.
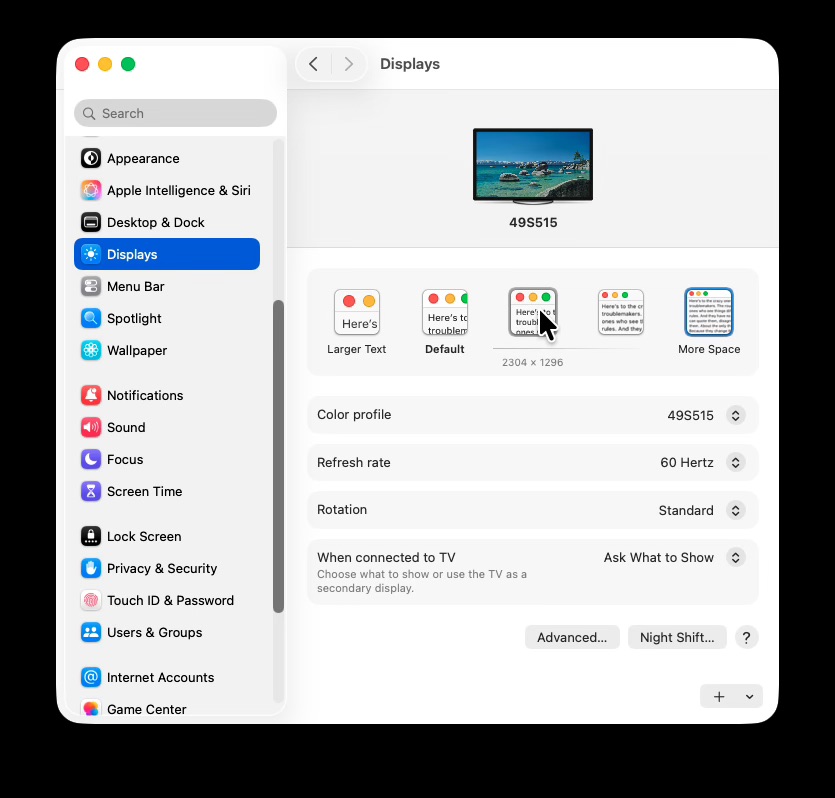
When you hover your mouse over the display size options, you will see the pixel dimensions displayed for that choice. Depending on your monitor setup, you may find some of those scaling options don’t look so great.

Again, one of the options is labelled “Larger Text”, but it make everything larger — not just text.

Bonus Tip – Use Keyboard with iPhone or iPad

Many people may have never thought of using a keyboard with their iPhone. You can connect a USB or Bluetooth keyboard to your iPhone or iPad.
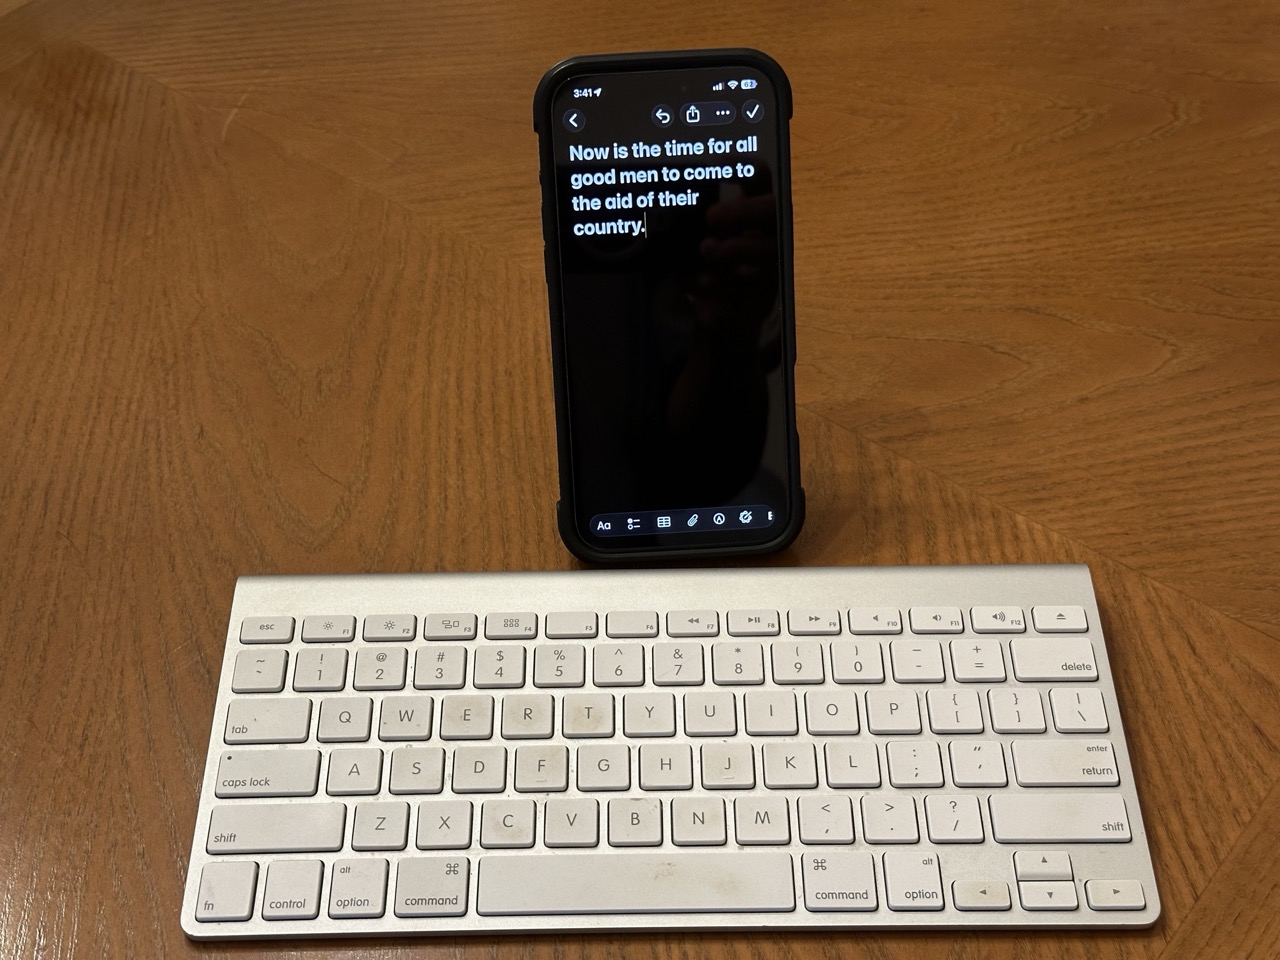
If you have a spare keyboard around, you may be able to save a lot of frustration typing on the tiny iPhone on-screen keyboard. Besides typing text, the keyboard can operate many of the functions of your iPhone. I was able to change brightness & sound volume, switch between Apps, navigate the home screen, take a screenshot and similar actions using only the keyboard.

Like many features on iPhone, you can dig deeper into Accessibility settings to find even more functionality. This article goes into extreme detail of all the buttons and functions that can be performed using a keyboard with iPhone.
Assistive Access – July 2025

Last night we talked about Assistive Access, a greatly simplified operating mode for iPhone and iPad. Here are links to Assistive Access info:

We’ve already gotten an important question on Assistive Access: How do I turn it off, and get out of Assistive Access? You can exit Assistive access by triple-clicking the side button (power button). This brings up the option to exit. You’ll need to enter the 4-digit assistive access code that you originally setup to exit back to your usual user interface.

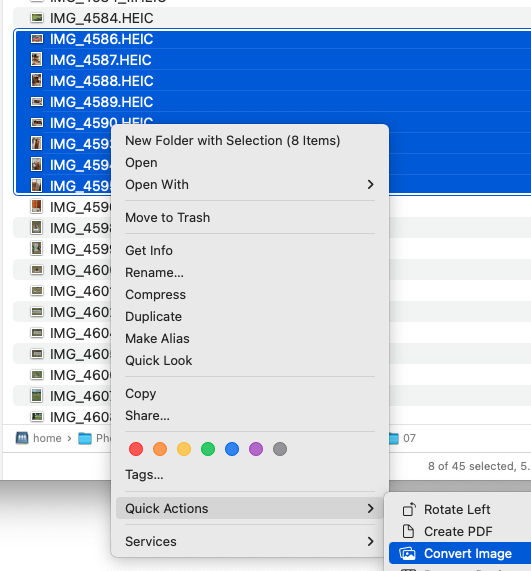
Also, a question came up about converting a lot of photos. Here is the solution we showed in the meeting:

Turn Any macOS Folder into an Image Converter (Mac Rumors)

Also, the macOS Finder has a convenient way to convert multiple images at once. Select some files, then right-click, or Ctrl-click to bring up the contextual menu. Then go down to Quick Actions and select Convert Image. You will see options to convert to JPEG, etc.

Several people asked questions about photo albums in Photos on the iPhone. One tip that might help you make albums appear more prominantly for you:

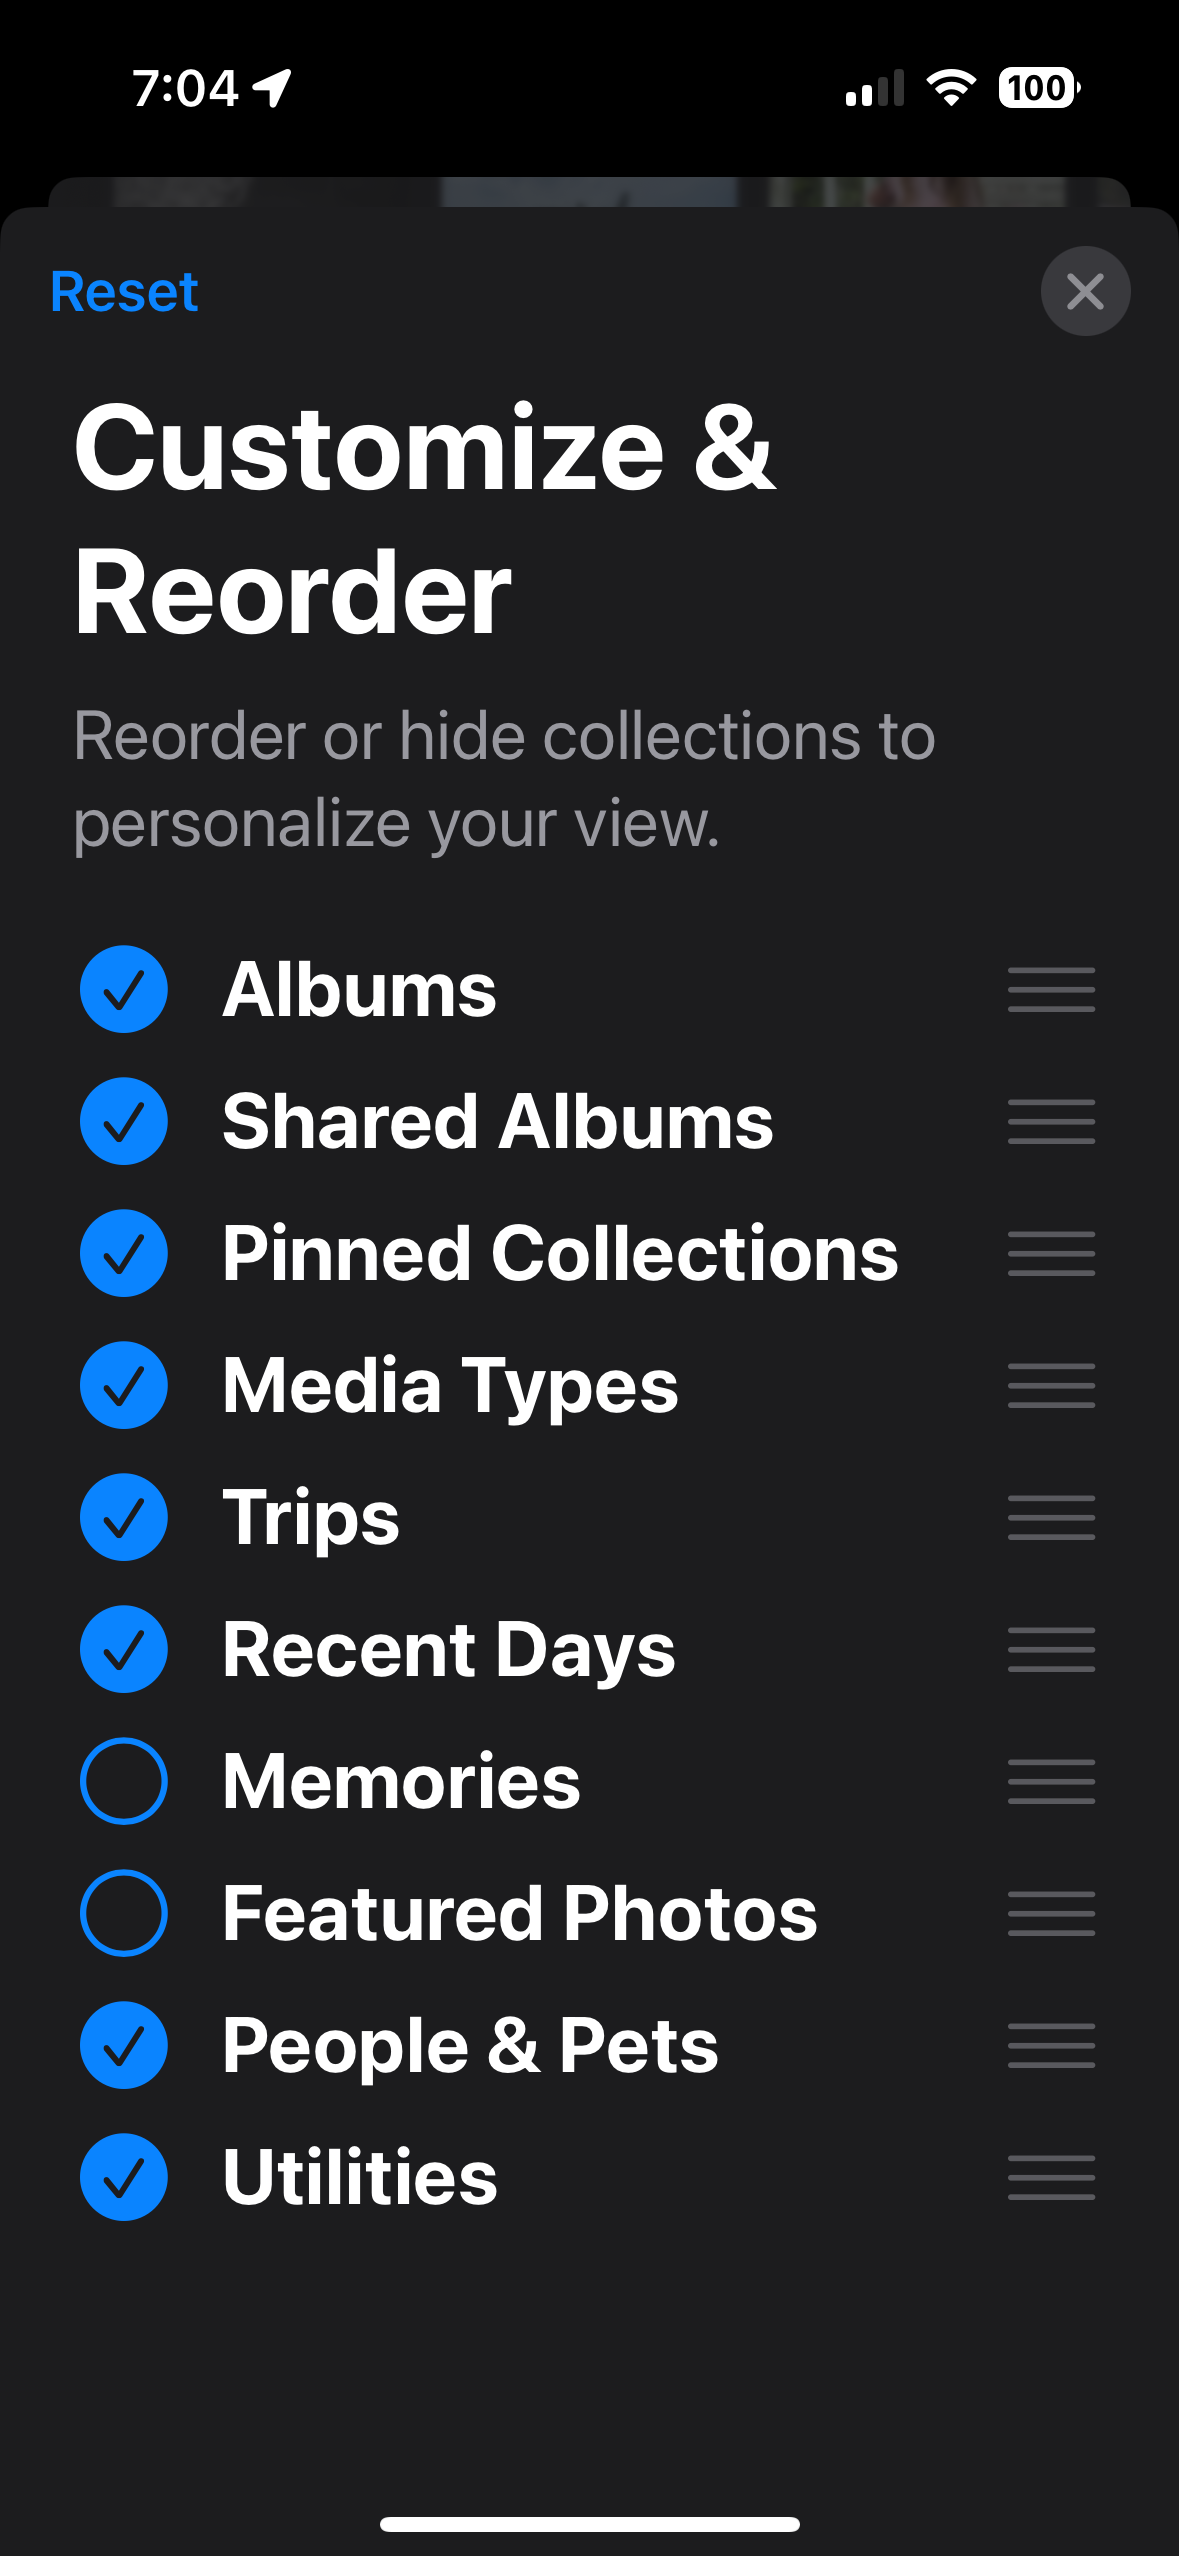
In Photos, scroll all the way to the bottom where you will eventually see Customize & Reorder.

On that screen, you can select which views of your photos you want to appear in Photos, and drag them into the order you prefer. I have put Albums at the top here, and turned off Memories and Featured Photos. It’s entirely personal preference, and you can adjust this as you like.

As always, here’s the complete iPhone User’s Guide from Apple. On that page, either use the search, or click Table of Contents to get started. If you read that, you’ll be ahead of everybody in understanding the iPhone. Note that the User’s Guide is always for the latest version of iOS. If you are using an older version, it won’t be exactly applicable.

Settings and Control Center Basics

This is the MacMAD Meeting topic for March, 2025, as of iOS 18.3.2.

Settings is a big topic. I’m going to mostly talk about iOS (iPhone) settings. There are literally thousands of separate items in the Settings app for iPhone.

Terminology

Settings for iOS are located in the Settings app. Settings for MacOS are in System Settings, formerly known as System Preferences.

Expect it: There’s a Setting for That

Settings affect everything you do with your device. Many behaviors we know and expect from iOS are optional and can be turned on, off, or adjusted.

One of my favorite rules of thumb for working with computers and smart phones is: It probably already does what you want and if not, it can be adjusted to do that. If you are wishing for a feature every time you use your device, you are probably not the first. The designers and developers also have to use these devices and they have included many of the features that they want as users.

Expect a lot, and you’ll get a lot.

How Settings are Organized

Search is at the top. That’s good because Search is often the easiest way to find the setting you want.

Next comes the Apple Account / Apple ID / iCloud settings. I think of this as being first because it’s important to Apple’s bottom line. Encouraging people to use their Apple account ultimately contributes to Apple’s income, so they put that right at the top.

Take a look at the Subscriptions section to find everything you are subscribed to, not only from Apple, but from any Apps in the App Store. You might find you are subscribed to something you no longer need.

After the Apple Account settings come about 27 system settings that seem randomly organized. They are divided into sections which each seem to mostly be in alphabetic order, but not always. This disorder is one of the reason many users throw their hands up and despair of ever finding anything in Settings.

At the end of the list comes the Apps section. Inside the Apps settings, everything is strictly in alphabetic order, which is good, because you may have dozens or hundreds of Apps installed, each with their own settings. The exception is hidden apps, which appear in a special section at the end of the list.

A Few Favorite Settings

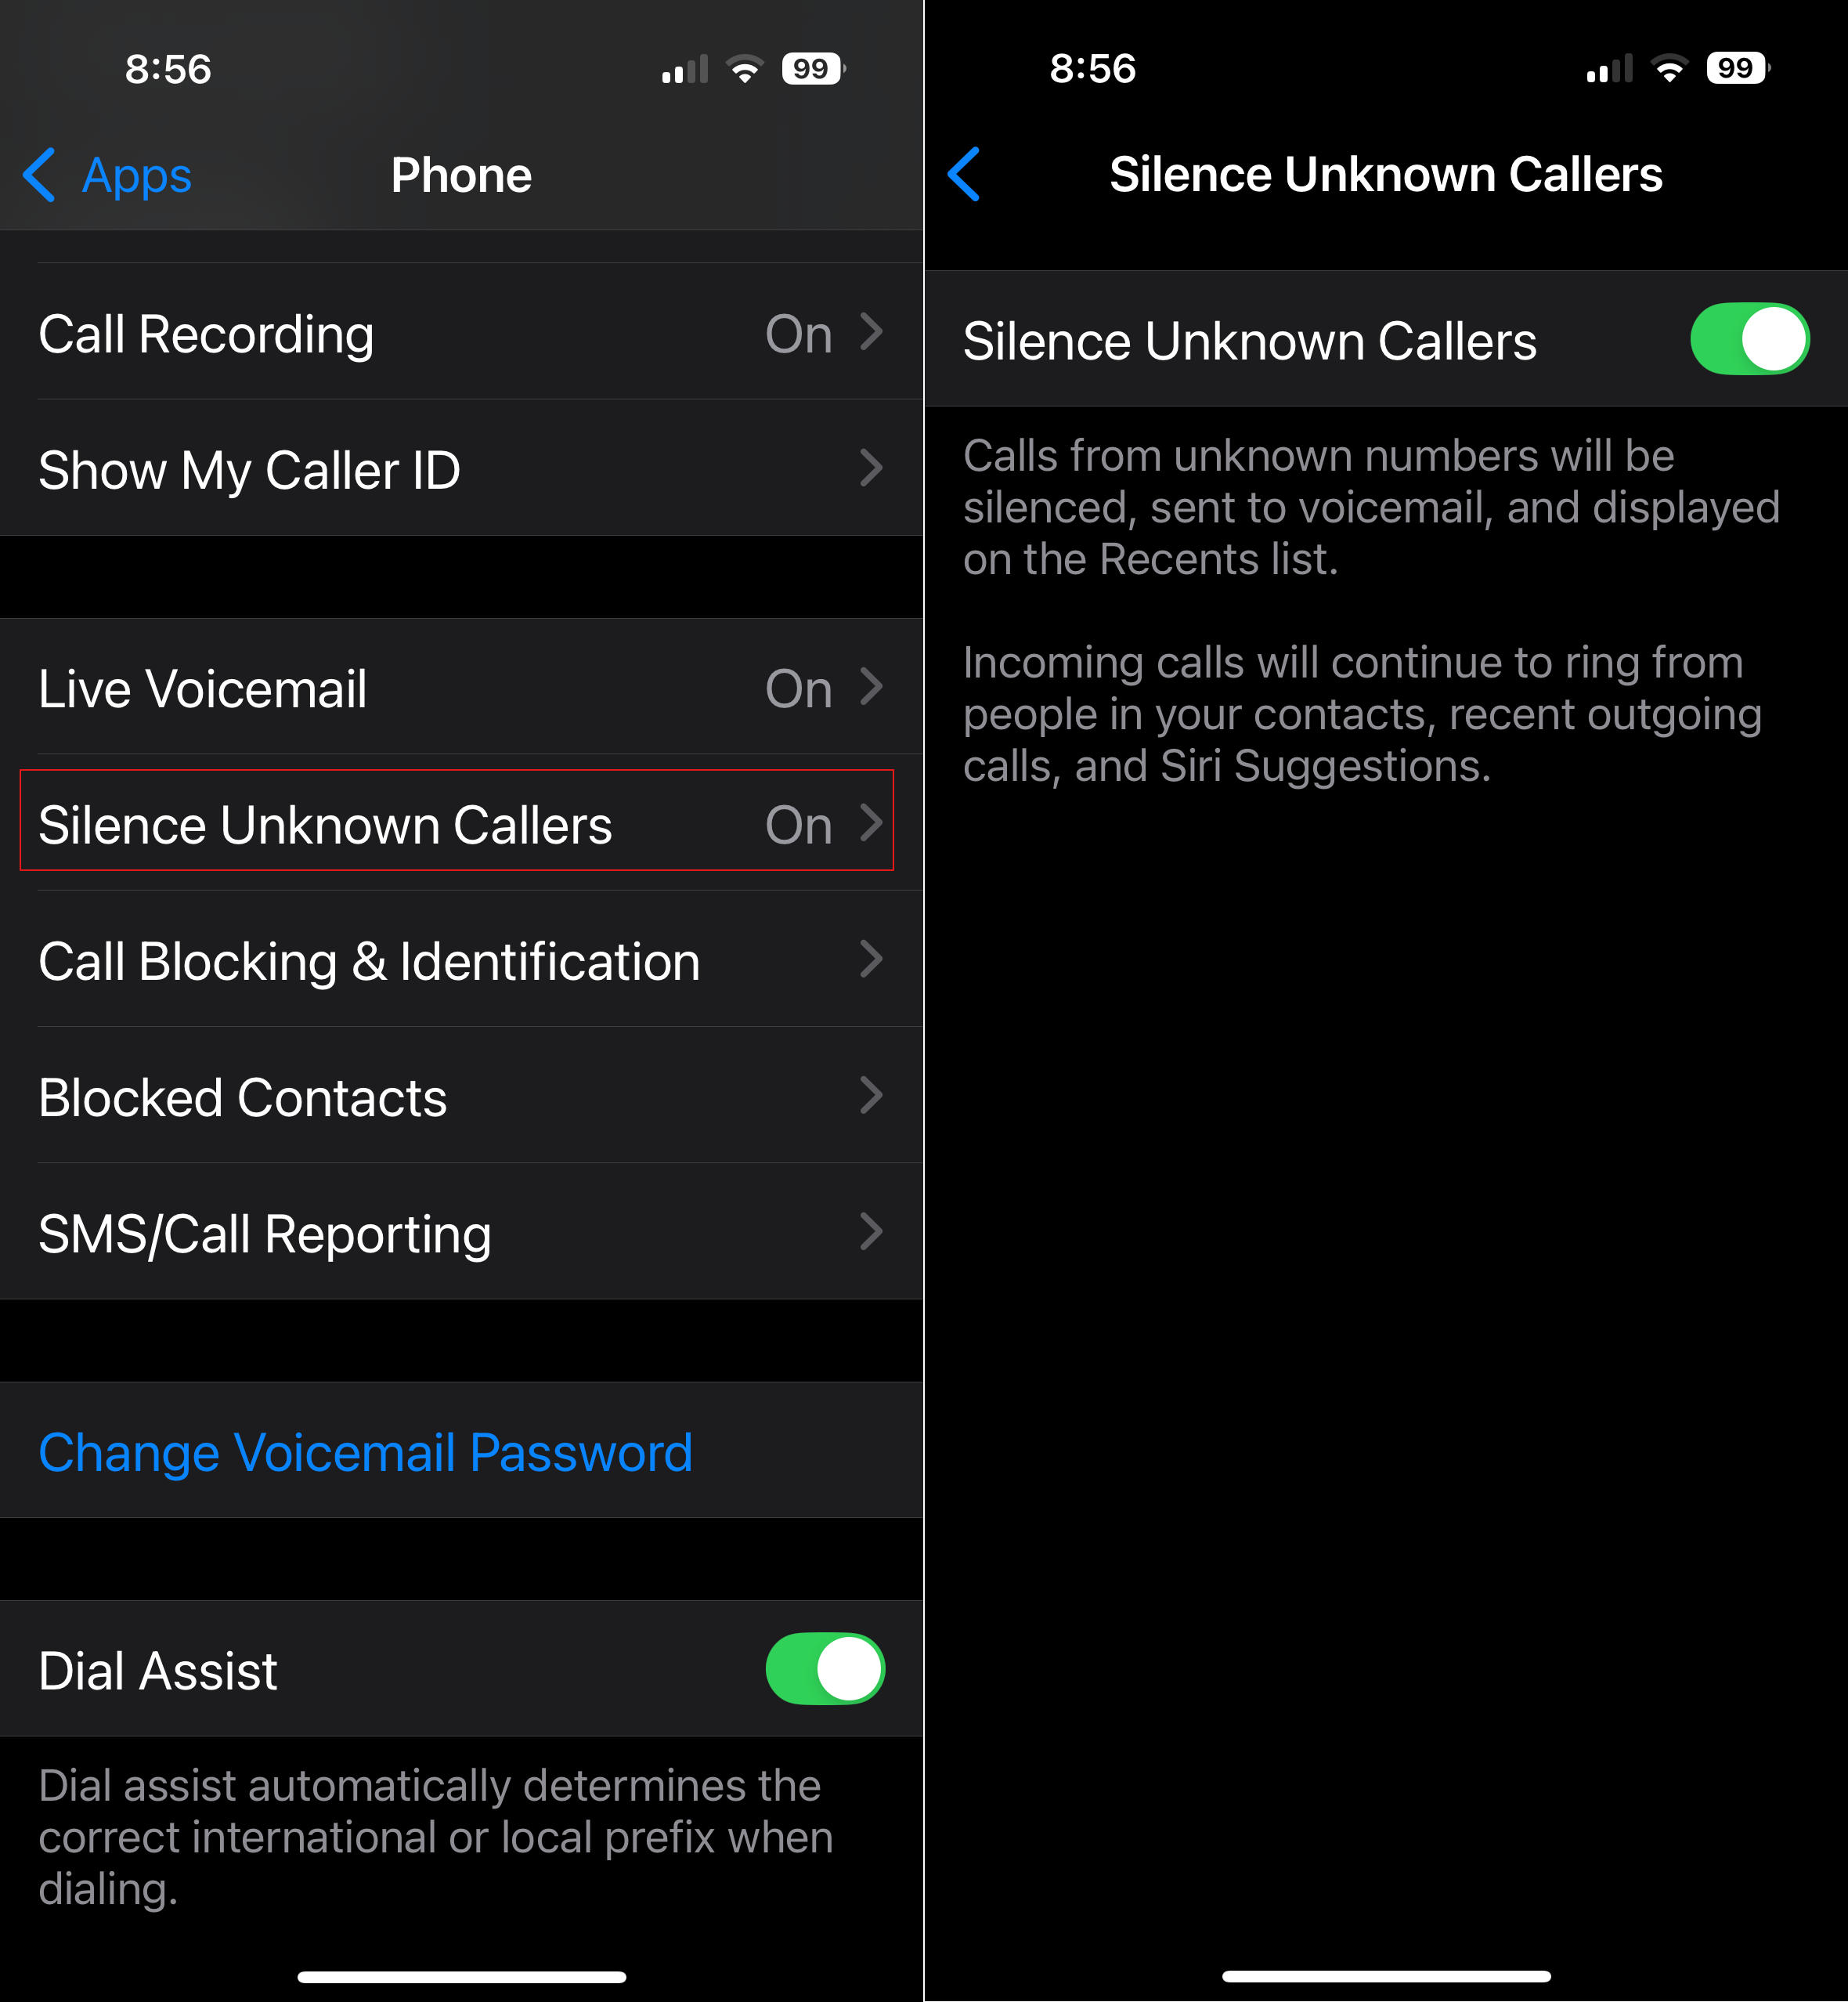
Silence Unknown Callers – This is in Apps ->Phone->Silence Unknown Callers. If you turn this on, it sends calls from numbers which are not in your contacts straight to voicemail. Your phone won’t ring. Also, notice Apps->FaceTime->Silence Unknown Callers. This one is lesser known, and spammers have started using FaceTime lately.

Screenshot

General -> About This often-overlooked section has lots of useful information and controls. What model of phone do I have? It’s in there. When does my Apple warranty expire? It’s in there. How full is my phone’s storage?

Accessibility – This (large) section is mostly for people with some sort of disability of sight, hearing, motor control, etc. But there are some gems in here that might be useful to everyone. Accessibility -> Face ID & Attention -> Require Attention for Face ID. This seems more like a security feature. I have this turned on which makes it less likely my phone will be unlocked without me knowing it.

Accessibility -> Side Button -> PRESS AND HOLD TO SPEAK (Siri). I have Siri selected here. When I hold the side button, the Siri Icon appears, and I’m speaking directly to her without having to say her name first.

Settings -> Notifications – Here’s the answer to those frequent questions like “How do I get rid of those red numbers on my App icons?” and “How can I get rid of all these popups on my screen from Facebook?”

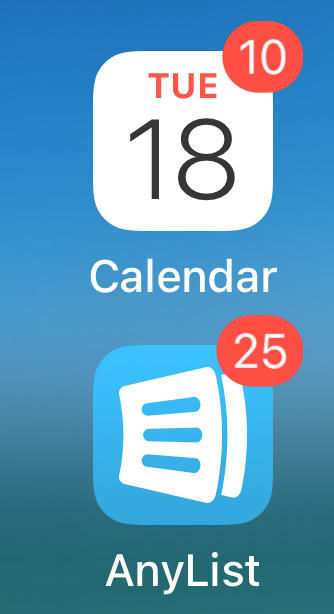
Those numbers on App icons are called badges. They are a form of notification. You can turn those on or off for each App individually in the Notifications section of Settings.

App Icons with Badges

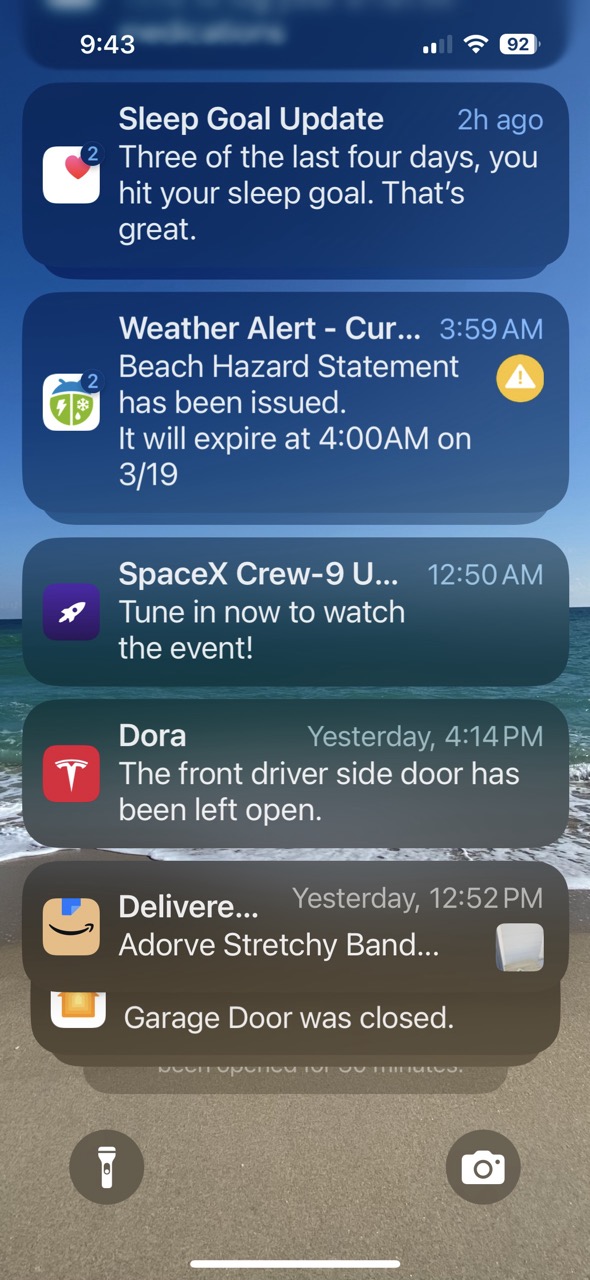
We live in a marketplace of attention. Companies with Apps typically want you to pay attention to their app. Your attention is worth money to them. So they often try to capture your attention with lots of notifications. Of course, this becomes overwhelming when you have dozens or hundreds of Apps clamoring for your attention. iOS allows you to selectively enable or disable notifications from Apps.

Notifications in Notification Center

For many of the worst offenders, like Facebook or other social media apps, your best option is to turn off notifications for those Apps altogether.

Control Center

Control Center is a quick way to access settings and other features of your phone.

Control Center “Favorites” Screen

Pull down from upper right to open Control Center on iPhones with Face ID. Swipe up from the bottom of the screen on iPhones with a home button.

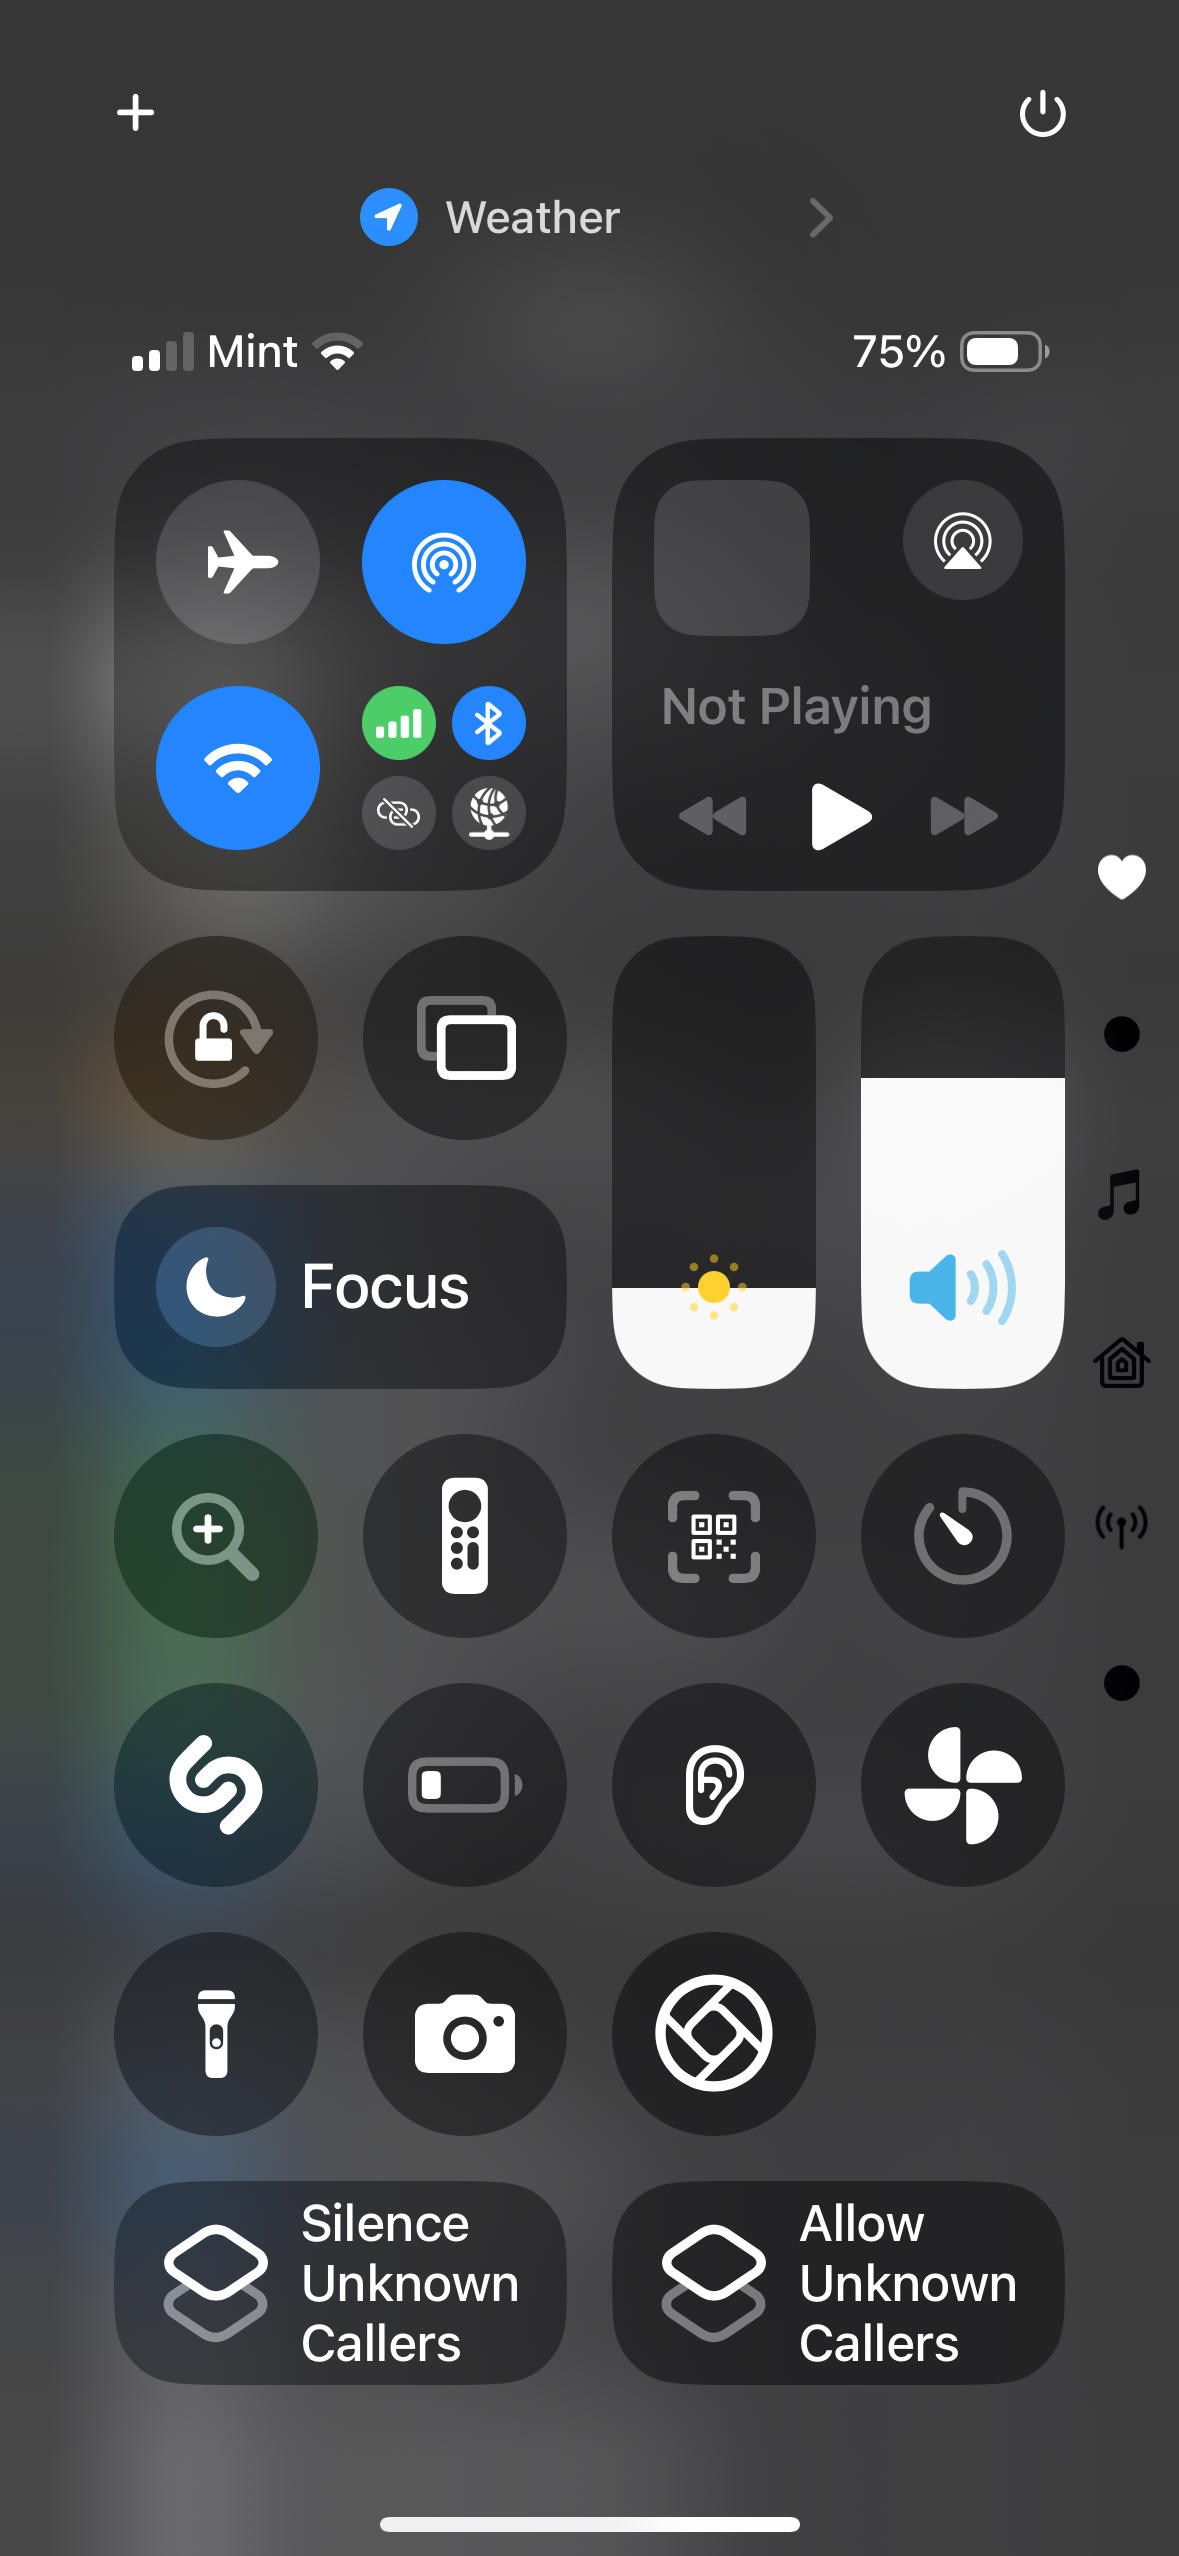
Some of my favorites here are the Magnifier, Apple TV Remote and QR Code Scanner.

Screenshot

You can customize Control Center with your preferences, including controls to launch your favorite Apps, and controls that use Shortcuts to accomplish other tasks, like the “Silence/Allow Unknown Callers” buttons above.

Mac OS Keyboard Commands

Also on the program tonight was Mac OS Keyboard commands. Here is a copy of Eric’s slides on Keyboard Shortcuts.

See Also

Apple’s Complete iPhone User Guide

Complete Diagram of Settings (iOS 11) created by Podfeet.com

Back To Basics for iPhone & iPad

MacMAD Presentation Meeting for Tuesday, September 17, 2024

Helpful Basics On-Line

Tonight’s meeting is primarily an on-line demo. But, here are some supplementary on-line references oriented towards the basic iPhone or iPad user.

iOS 18 and iPadOS 18 have just been released, so the User’s Guides will probably be updated accordingly. For the beginning user, the biggest difference is probably that the Control Center looks slightly different now.

Workflows

On-Line Demos of common tasks.

Use Settings to:

  • See your device’s model (is this an iPhone 11 or iPhone 12?)
  • See your device’s warranty status
  • See how much of your device storage you are using
  • See how much of your iCloud storage you are using
  • Sign in to iCloud – You are probably already signed in.

Note – Almost ALL iPhone & iPad owners have an iCloud account, whether you know it or not. If you are paying any amount monthly for iCloud, you have an iCloud+ account.

More On-Line Demos

  • Take a photo and send it to someone via eMail or text (e.g. sharing with family)
  • Open an email and add the sender to your contacts.
  • Open a contact and send them email.
  • Open a contact and navigate to their address.
  • Buy and install a new App from the App store.
  • Add a credit card to Apple Wallet .. Pay someone with Apple Wallet
  • Visit a Website. Bookmark it. Create a login at a web site. Log out and back in. (iPad)
  • Create a Calendar Appointment for a recurring event

The Meeting Slides (Keynote format)

1Password Bookmark Tip for Mobile Safari

Dennis showed the group this tip at this month’s meeting, and promised that the details would be on our web site.

This tip is for iOS (iPhone or iPad) users. Create a bookmark in Safari called “Open in 1Password”. Replace the URL for the bookmark with this snippet of Javascript:

javascript:window.location=’op’+(window.location.href);

When you visit a page in Safari, and realize you would rather open it in 1Password, so it can fill in your logon information for you, invoke the bookmark and the page will re-open in 1Password. The ‘op’ in the script stands for One Password.

This trick only works with the new version of 1Password. Version 4, I believe.