MacMAD Meeting Topic September, 2026
Our Apple devices have literally hundreds of settings, most of which you have likely never changed or maybe even seen. We’re going to explore a few of those that might be helpful as we get older. Maybe your eyesight isn’t what it used to be, or maybe you find these devices to be just too darn complicated.
You may find some of these hints useful. These are mostly for iPhone, with a few for Mac and iPad.
Screenshots in this article are from iOS 26 and iOS27 beta. Some features may move or change in future releases.

Navigating Settings
The hard part might be finding the setting you want to change. Settings are arranged into groups of related settings, so it’s not just one big list.
If, in the settings app, you see a little arrow to the right like >
That means that there is a settings sub-section there. Some sub-sections have additional nested sections below them. Think of it like nested folders.
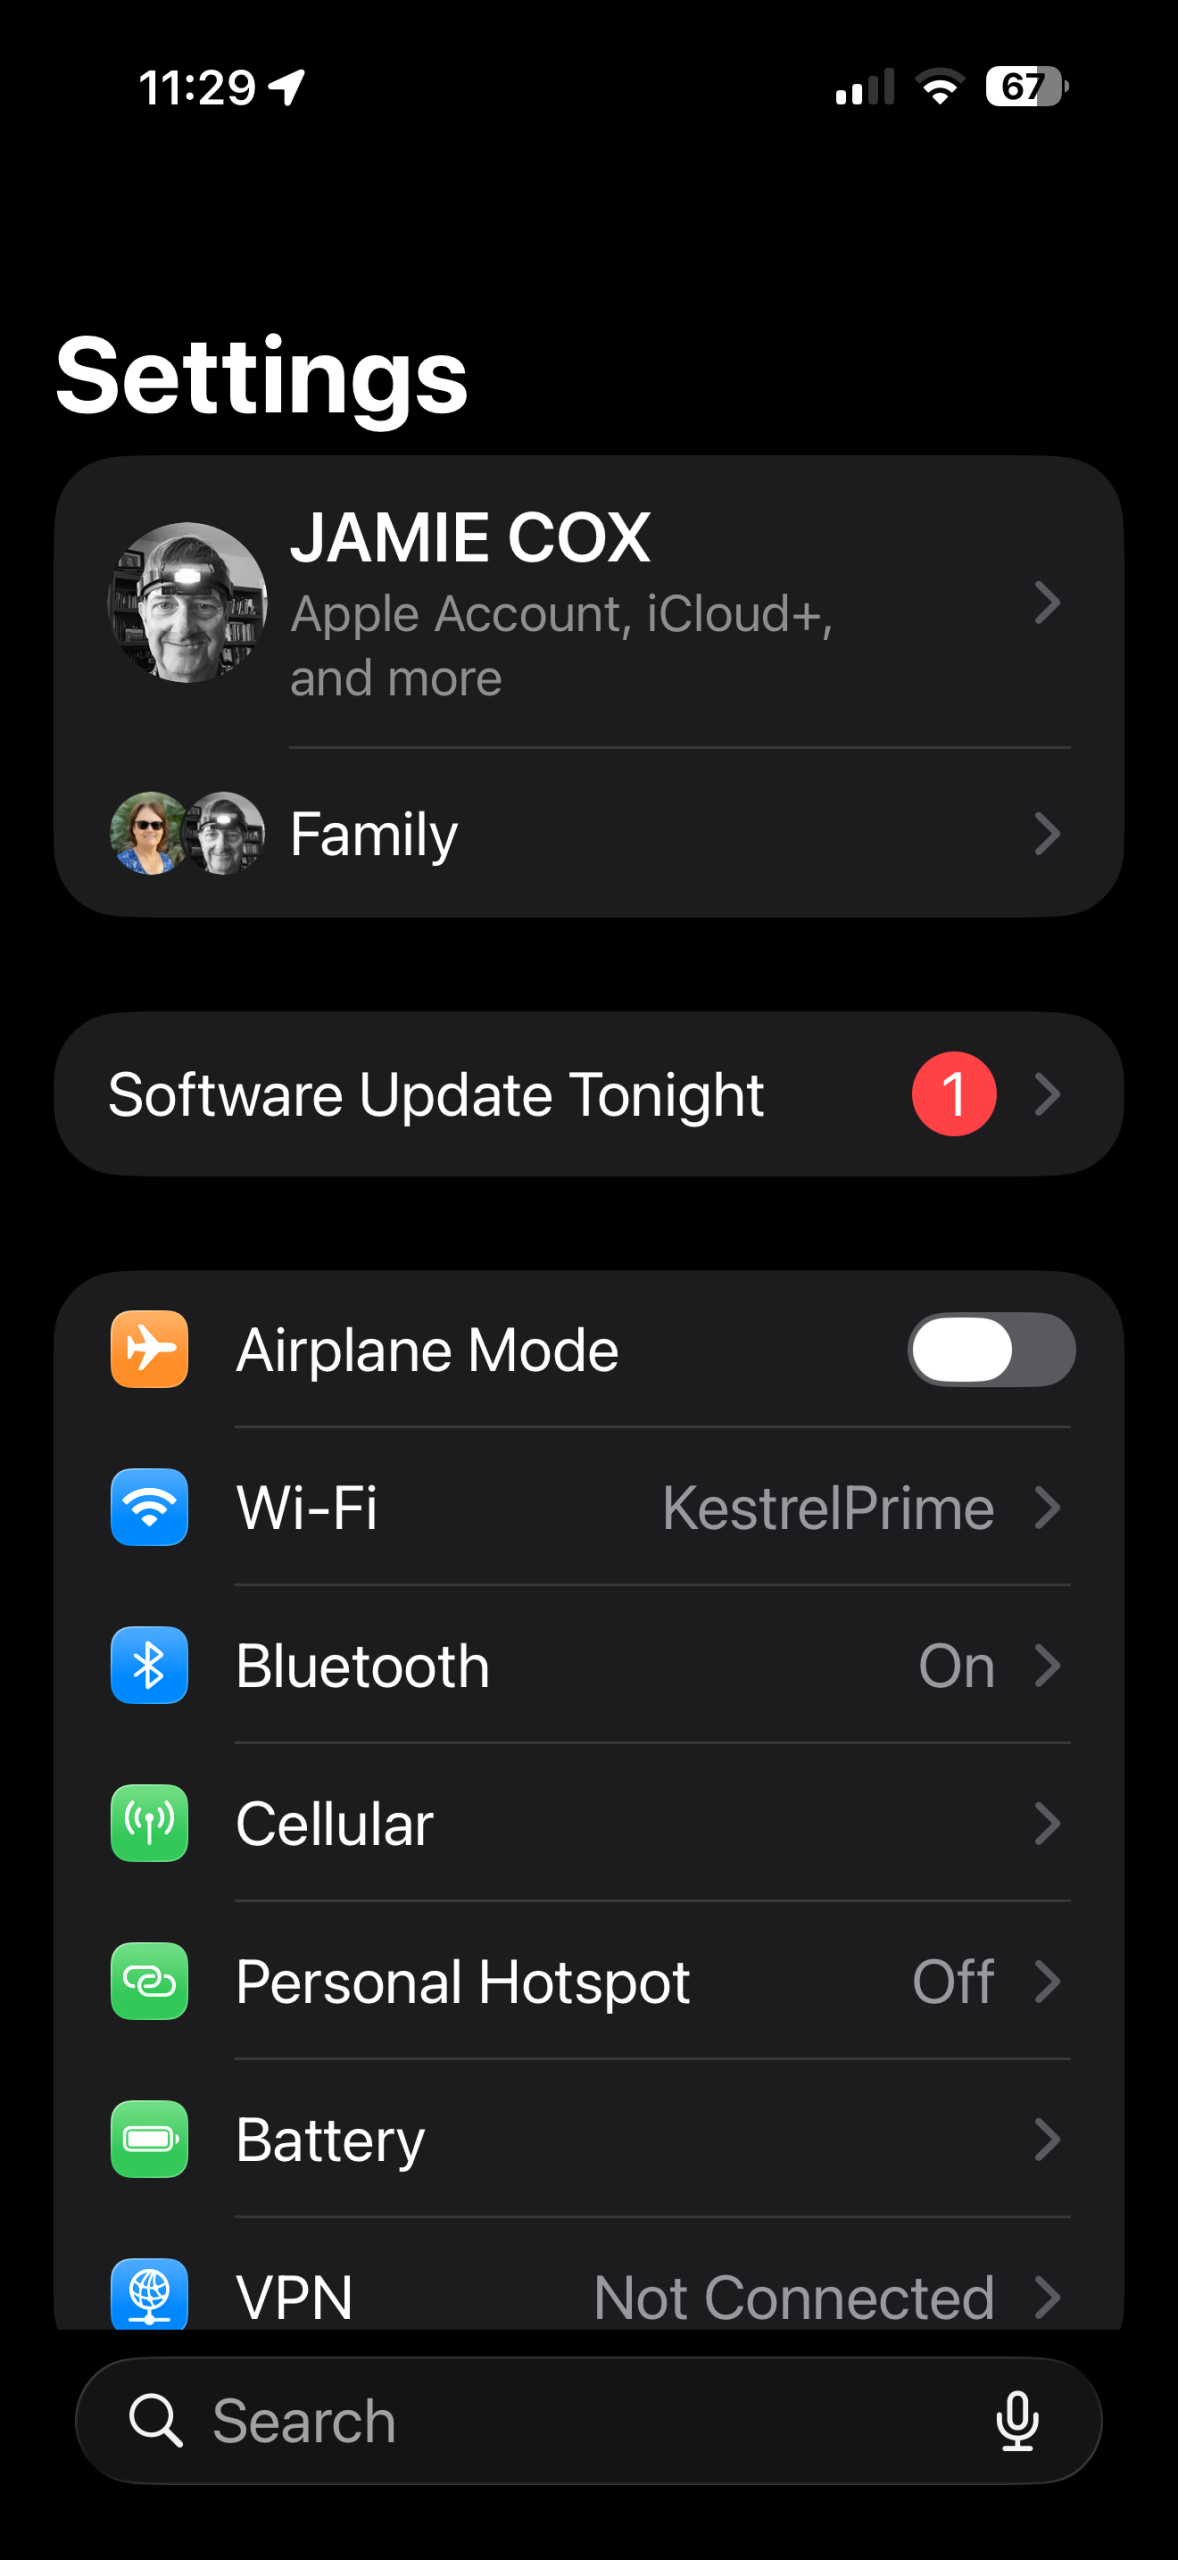
Fortunately, Apple has provided a search function to help navigate all these settings. The search field is at the bottom of the screen in recent versions.
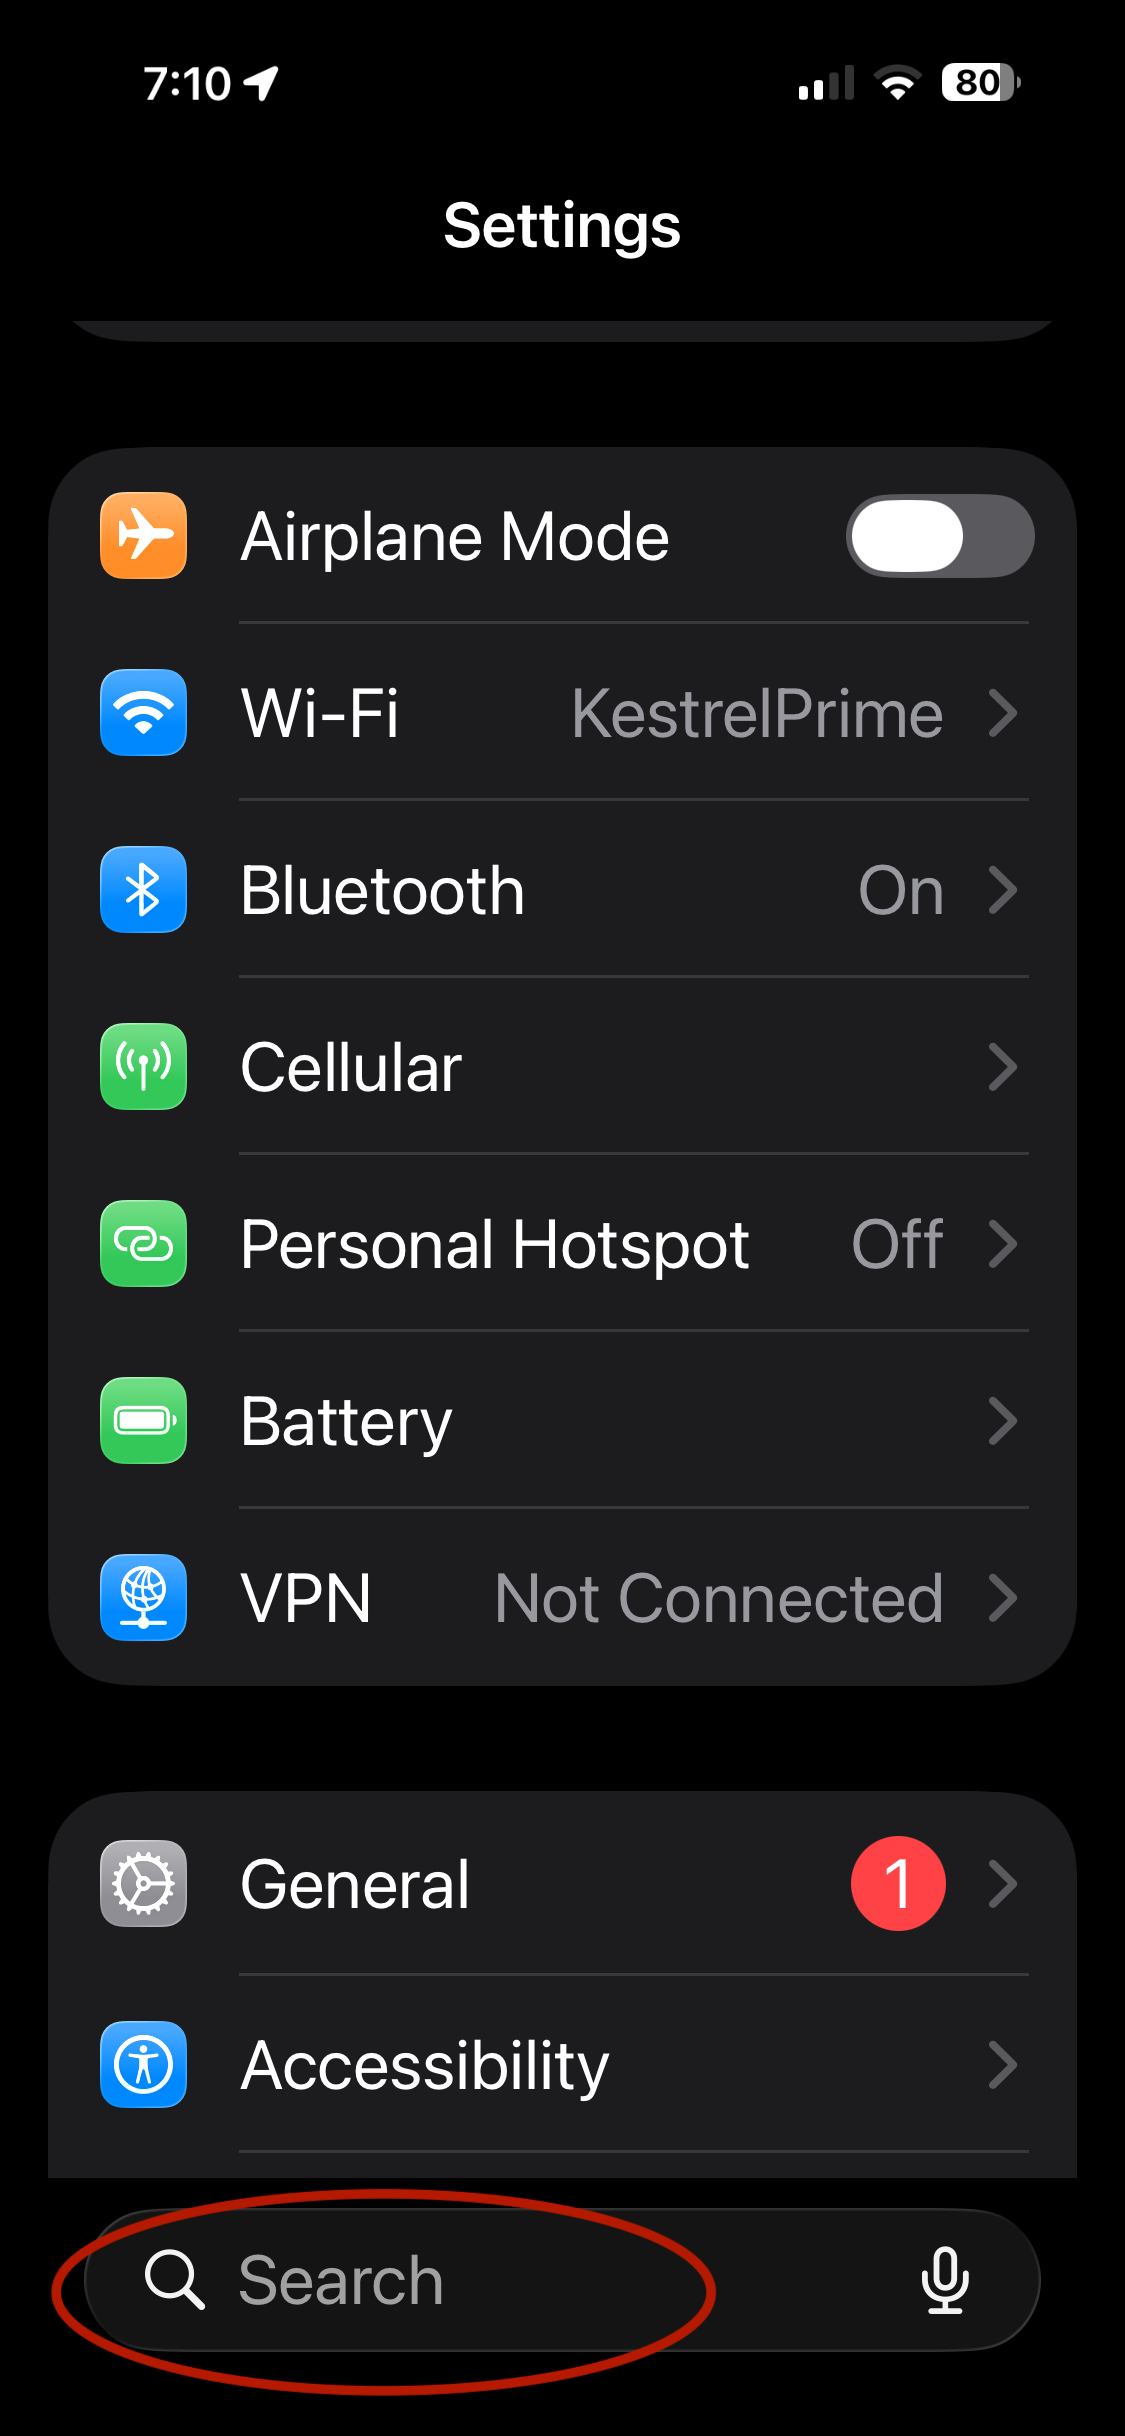
Here’s an example of searching the settings for “Assistive”.
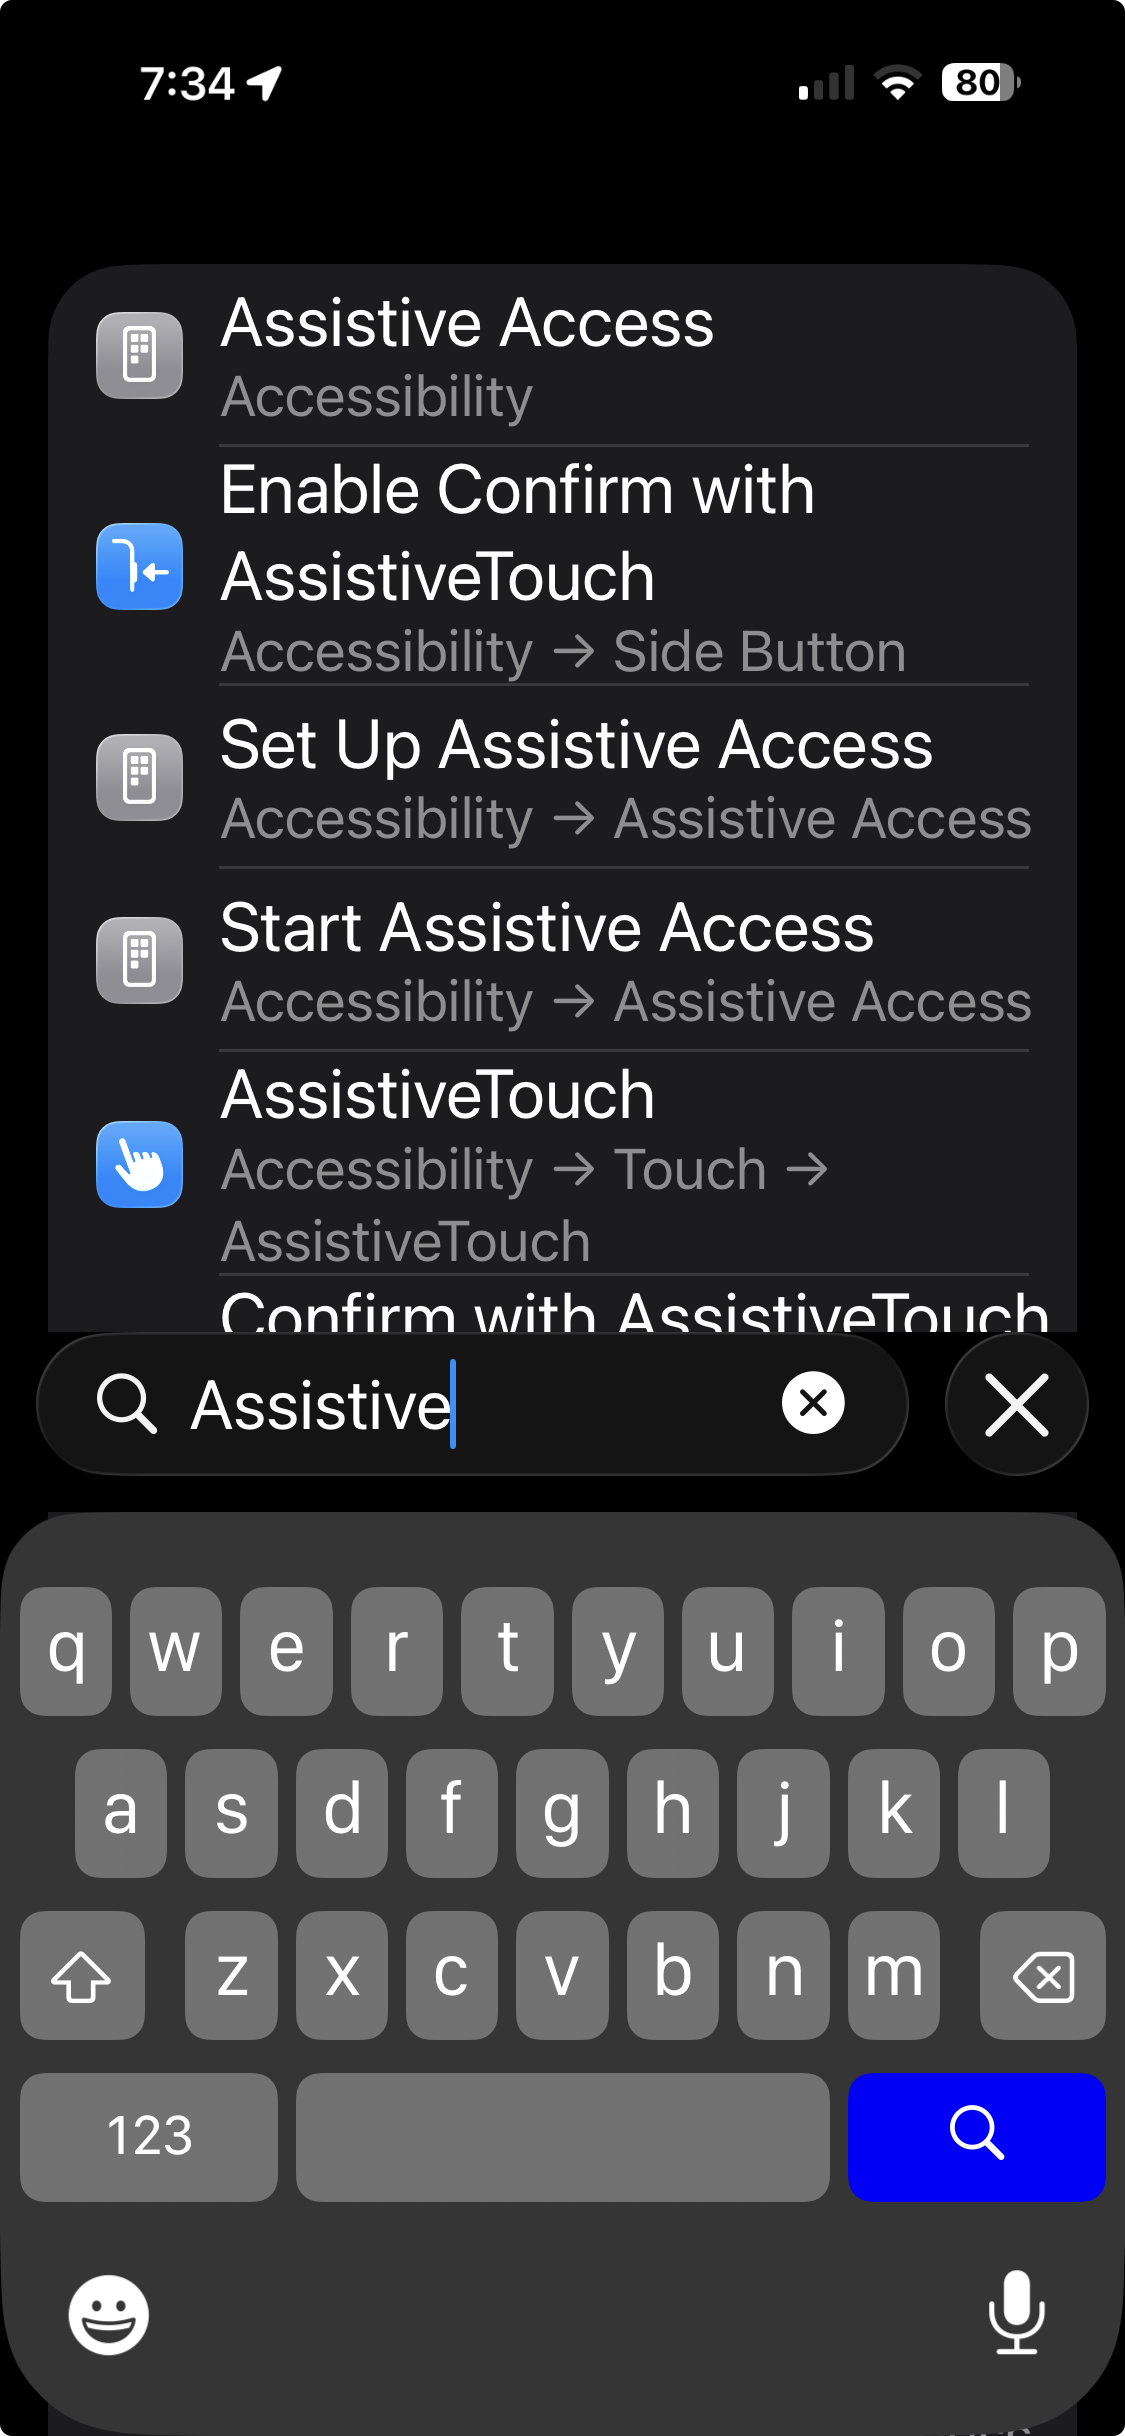
Admittedly, the hard part is knowing the exact name of the feature you are searching for.
Assistive Access
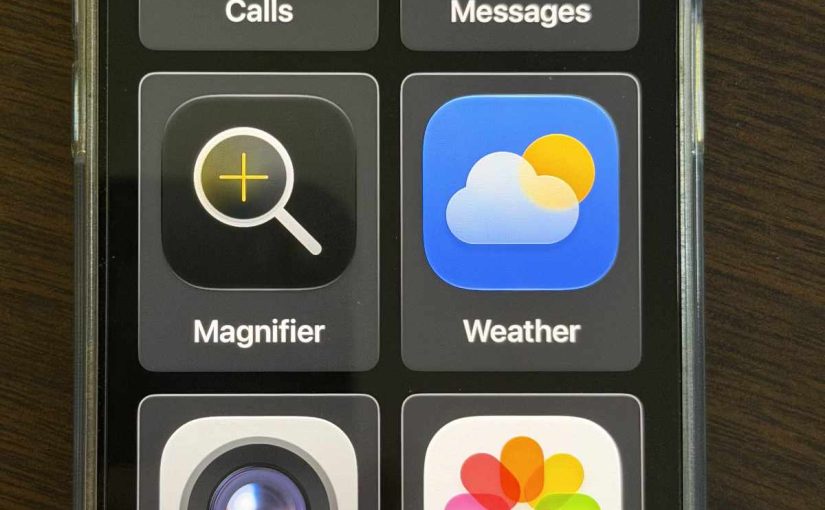
Assistive Access is for someone who needs or wants a phone but doesn’t have the desire or ability to deal with all the complexity of iOS. It reduces the user experience down to a few apps with big buttons.
Assistive Access makes iPhone or iPad extremely simple! It’s the best option for someone with cognitive impairment or someone who just doesn’t need 90% of the features. Also good for parental control scenarios. Assistive Access is intended for scenarios where there is a caregiver and a user. But, You could set it up for yourself.
It’s not real simple to set up. You need to create a new 4-digit Assistive Access passcode for entering and exiting Assistive Access. You also need to choose the Apps and features that will be available from a long list.
In my testing, I had trouble waking the iPhone in Assistive Access mode, and always had to sign in using the passcode although the phone was set up with Face ID. Your results may vary.
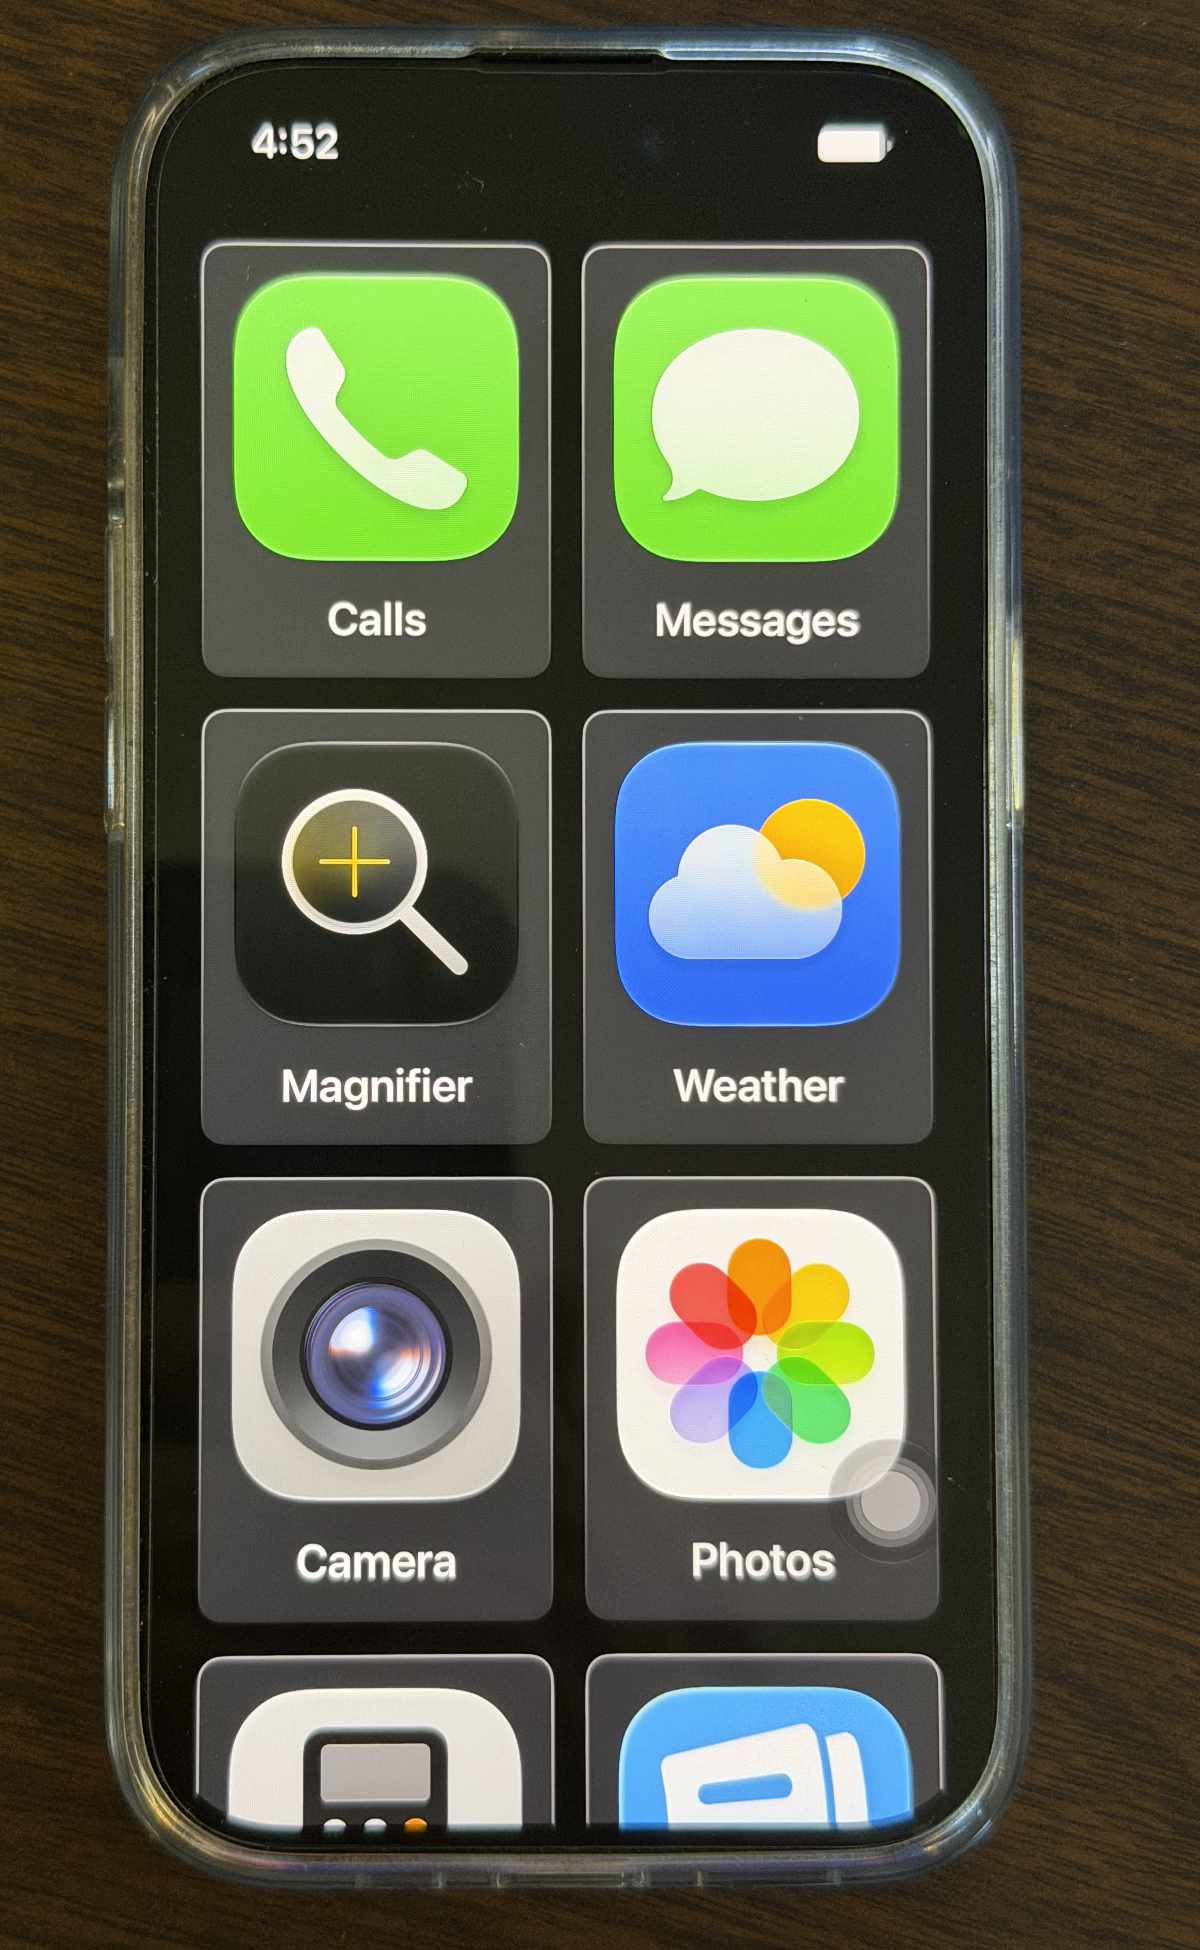
In general, the Assistive Access user can only use the Apps present on the home screen, and cannot install new apps or change the settings. Only by entering the 4-digit Assistive Access passcode can a user escape the protective environment of Assistive Access.
Assistive Touch
Assistive Touch helps iPhone and iPad users who have trouble remembering or executing the gestures defined by iOS and iPadOS. Many older users cannot reliably do the special swipes and other gestures to access the Control Center, Notifications, Siri, the App Switcher, etc.
When Assistive Touch is turned on, a gray dot appears on the edge of the screen. (The Assistive Touch control can be seen towards the lower right of the previous image of Assistive Access.) Tapping that dot reveals the special Assistive Touch menu. The Assistive Touch dot can be dragged to any edge of the screen by the user in case it is interfering with something else on screen.
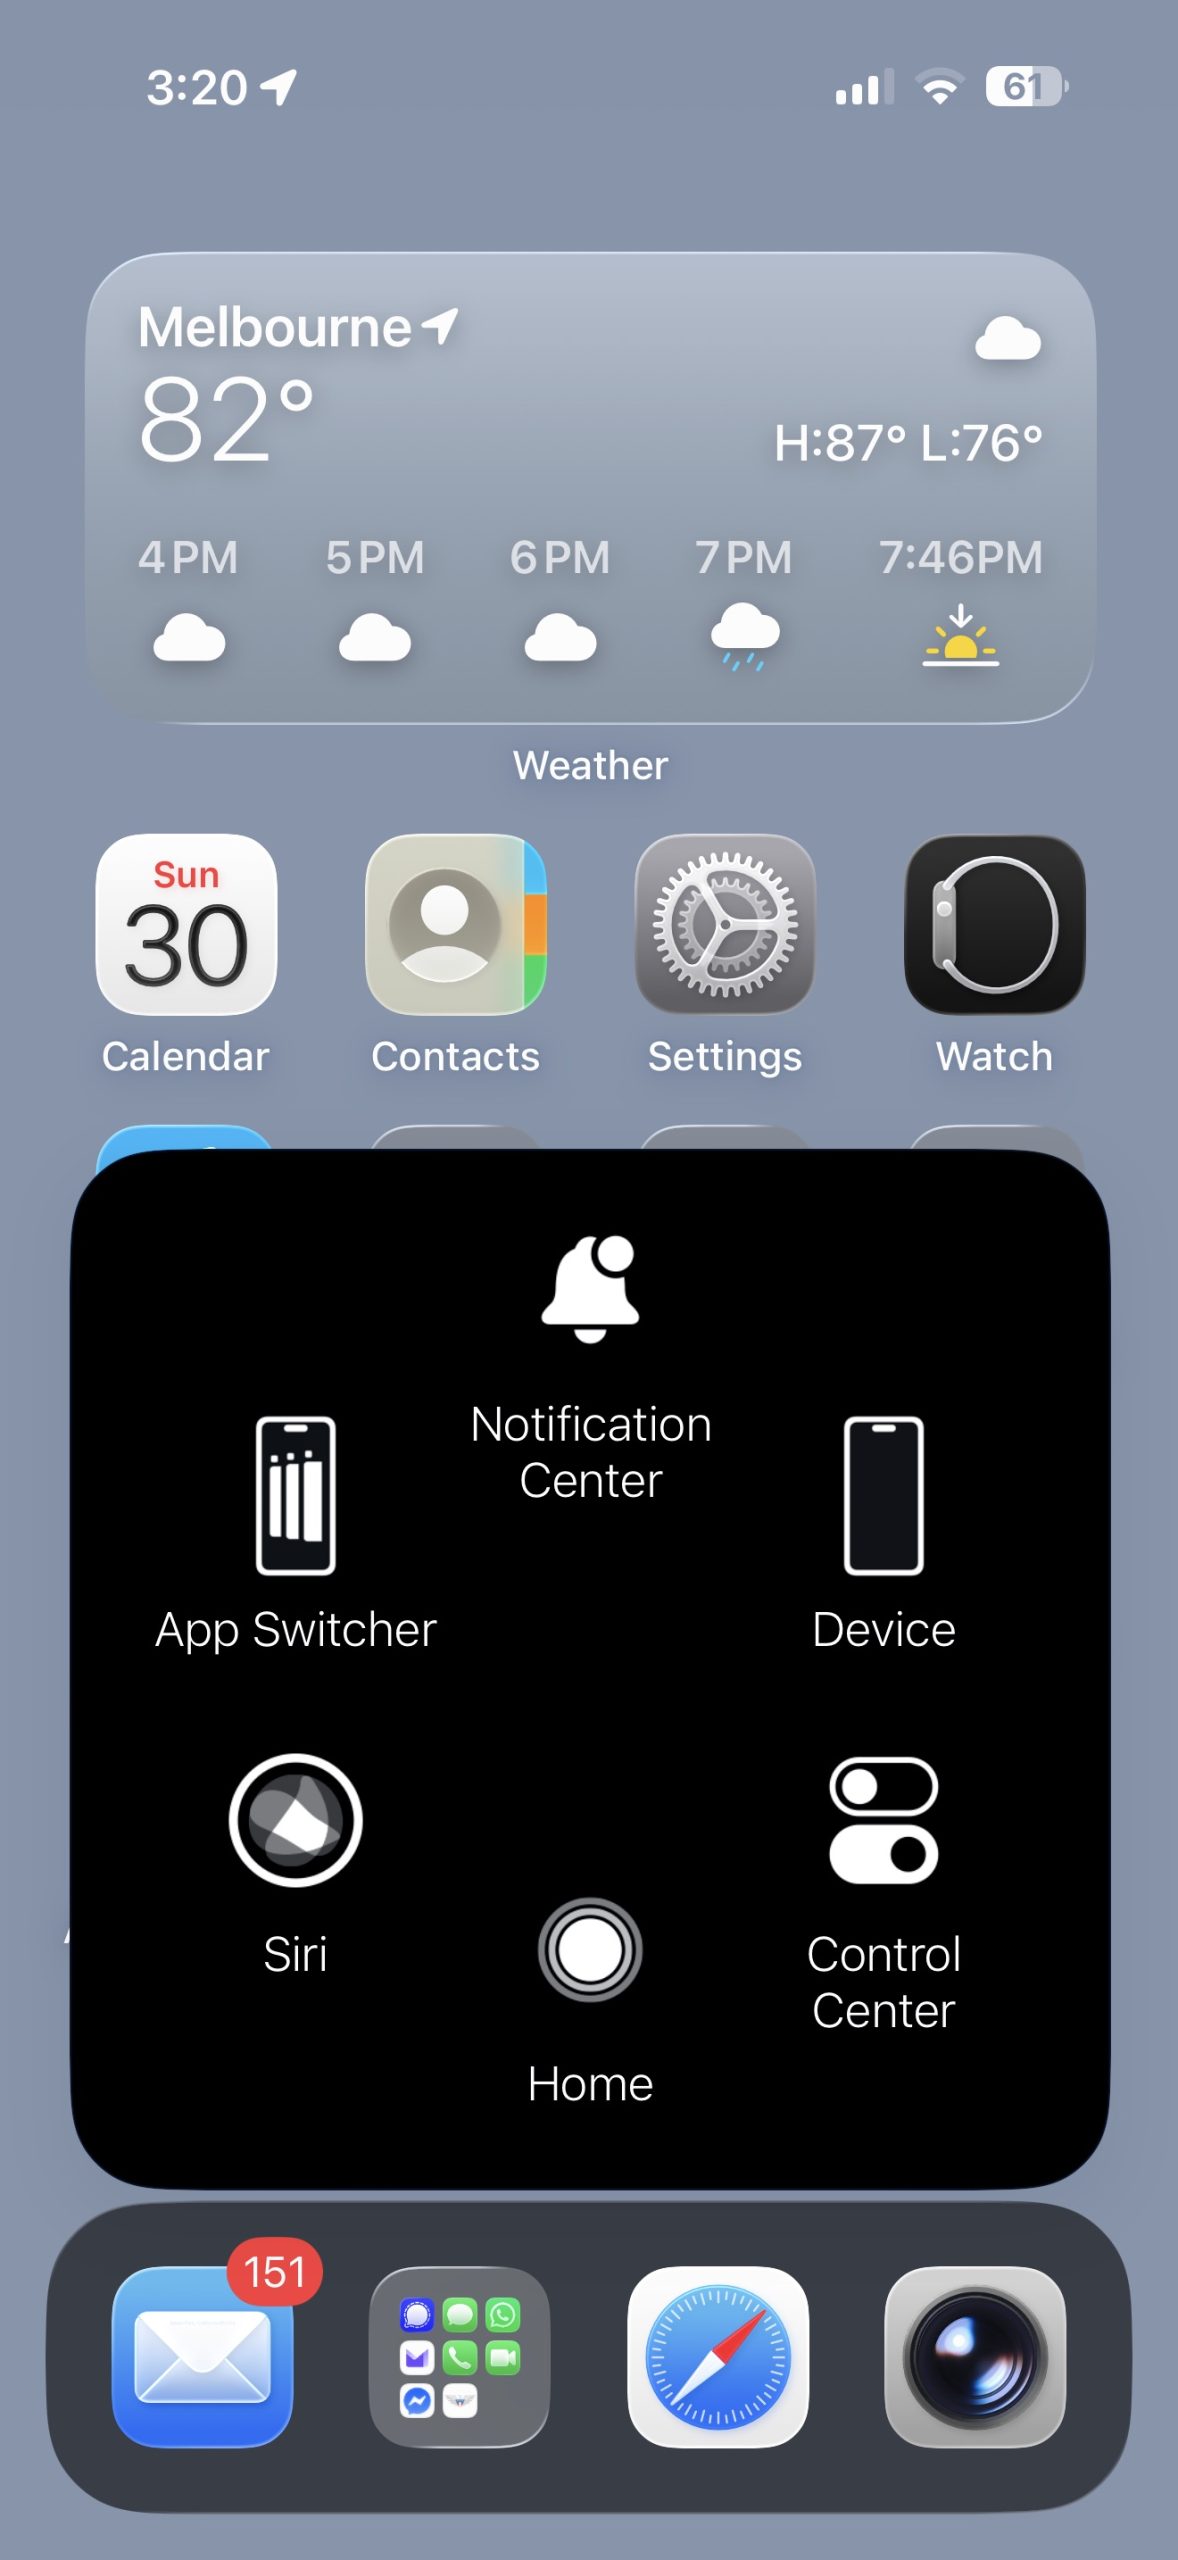
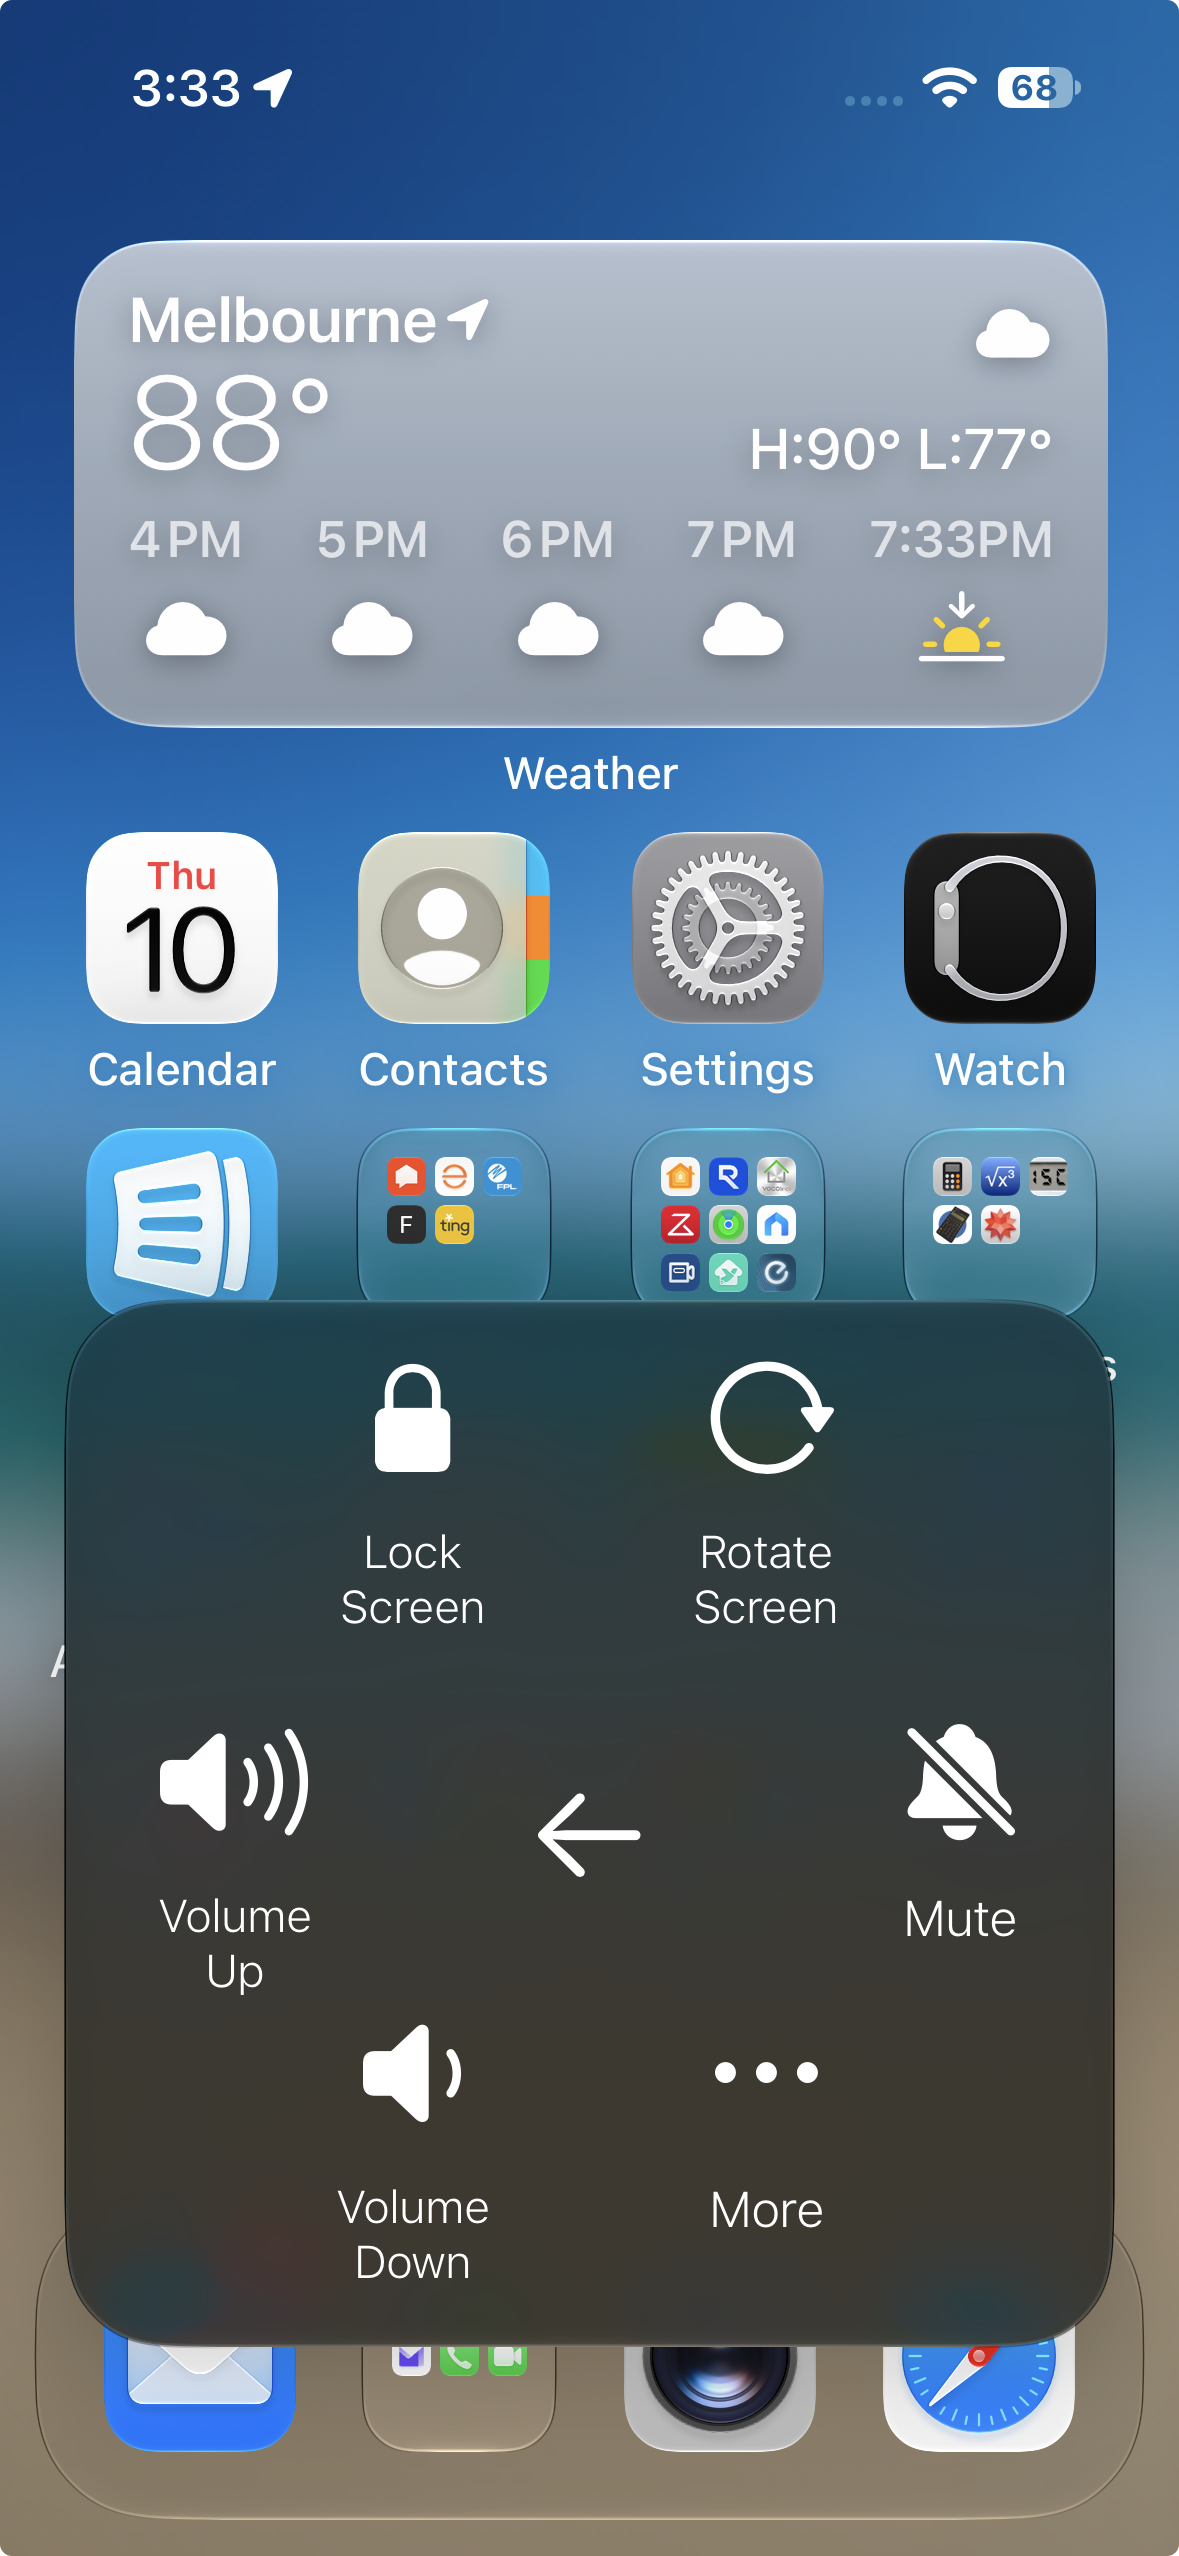
Tapping the “Device” button leads to more options shown below:
The features of Assistive Touch are customizable:
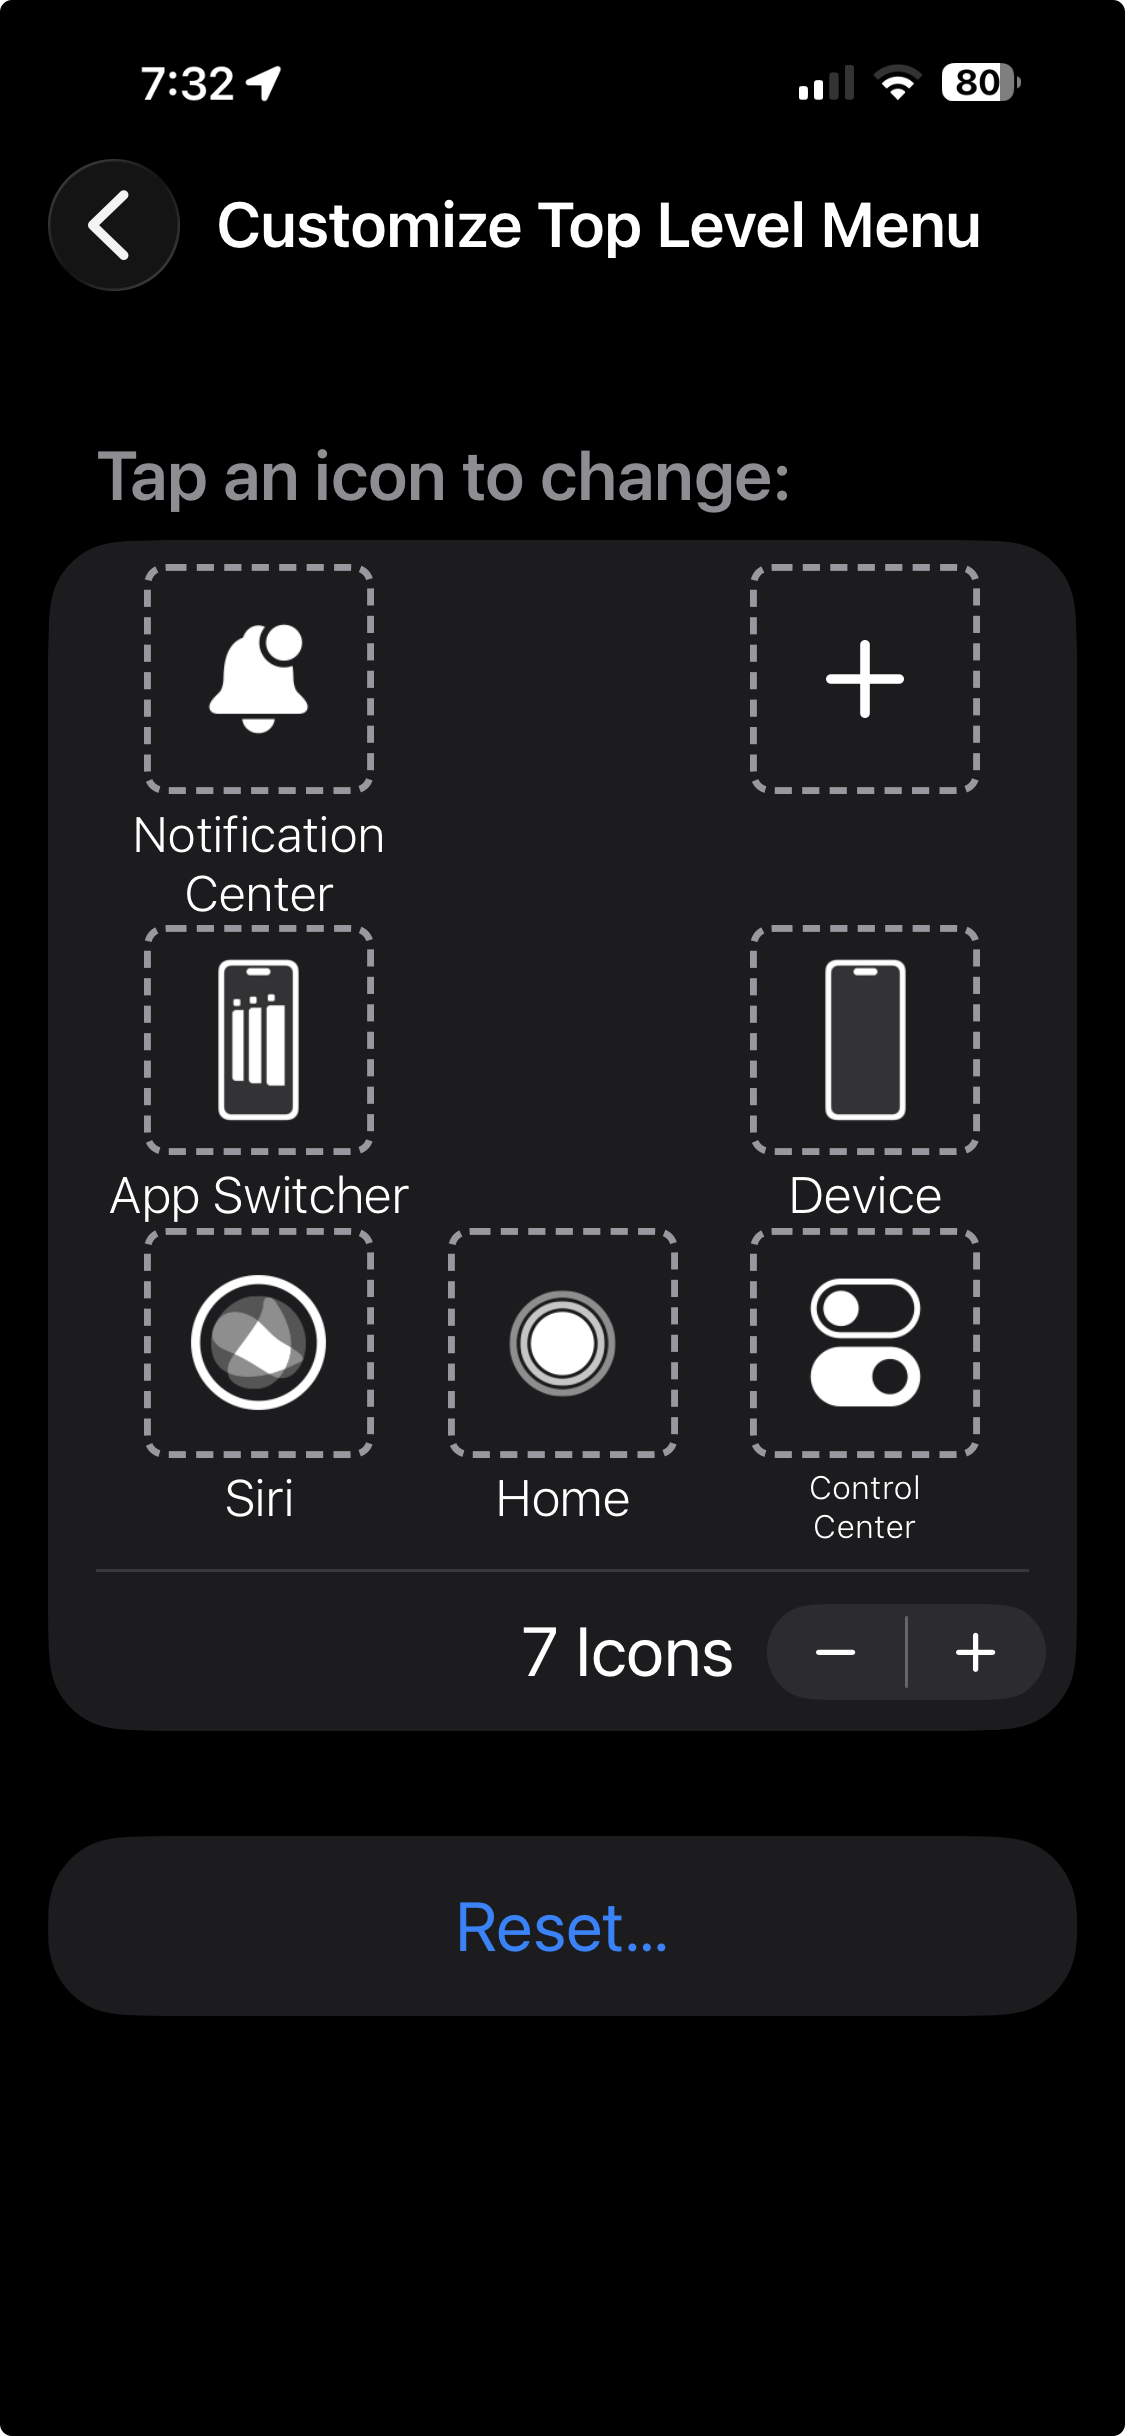
Assistive touch is a simple feature that can make your device easier to use with very little penalty. There’s no reason not to give it a try. Assistive Touch can be turned on in Settings->Accessibility->Touch->Assistive Touch.
The Magnifier
The Magnifier is not really a setting, but an App that exists in the Control Center.
The Magnifier uses your camera to magnify nearby objects. It’s great for reading the small menu print in a dark restaurant. Besides enlarging the image, it also makes it brighter, thus easier to see.
The Control Center is Customizable so the Magnifier may not appear in your Control Center unless you add it, or it may appear in a different location than shown here.
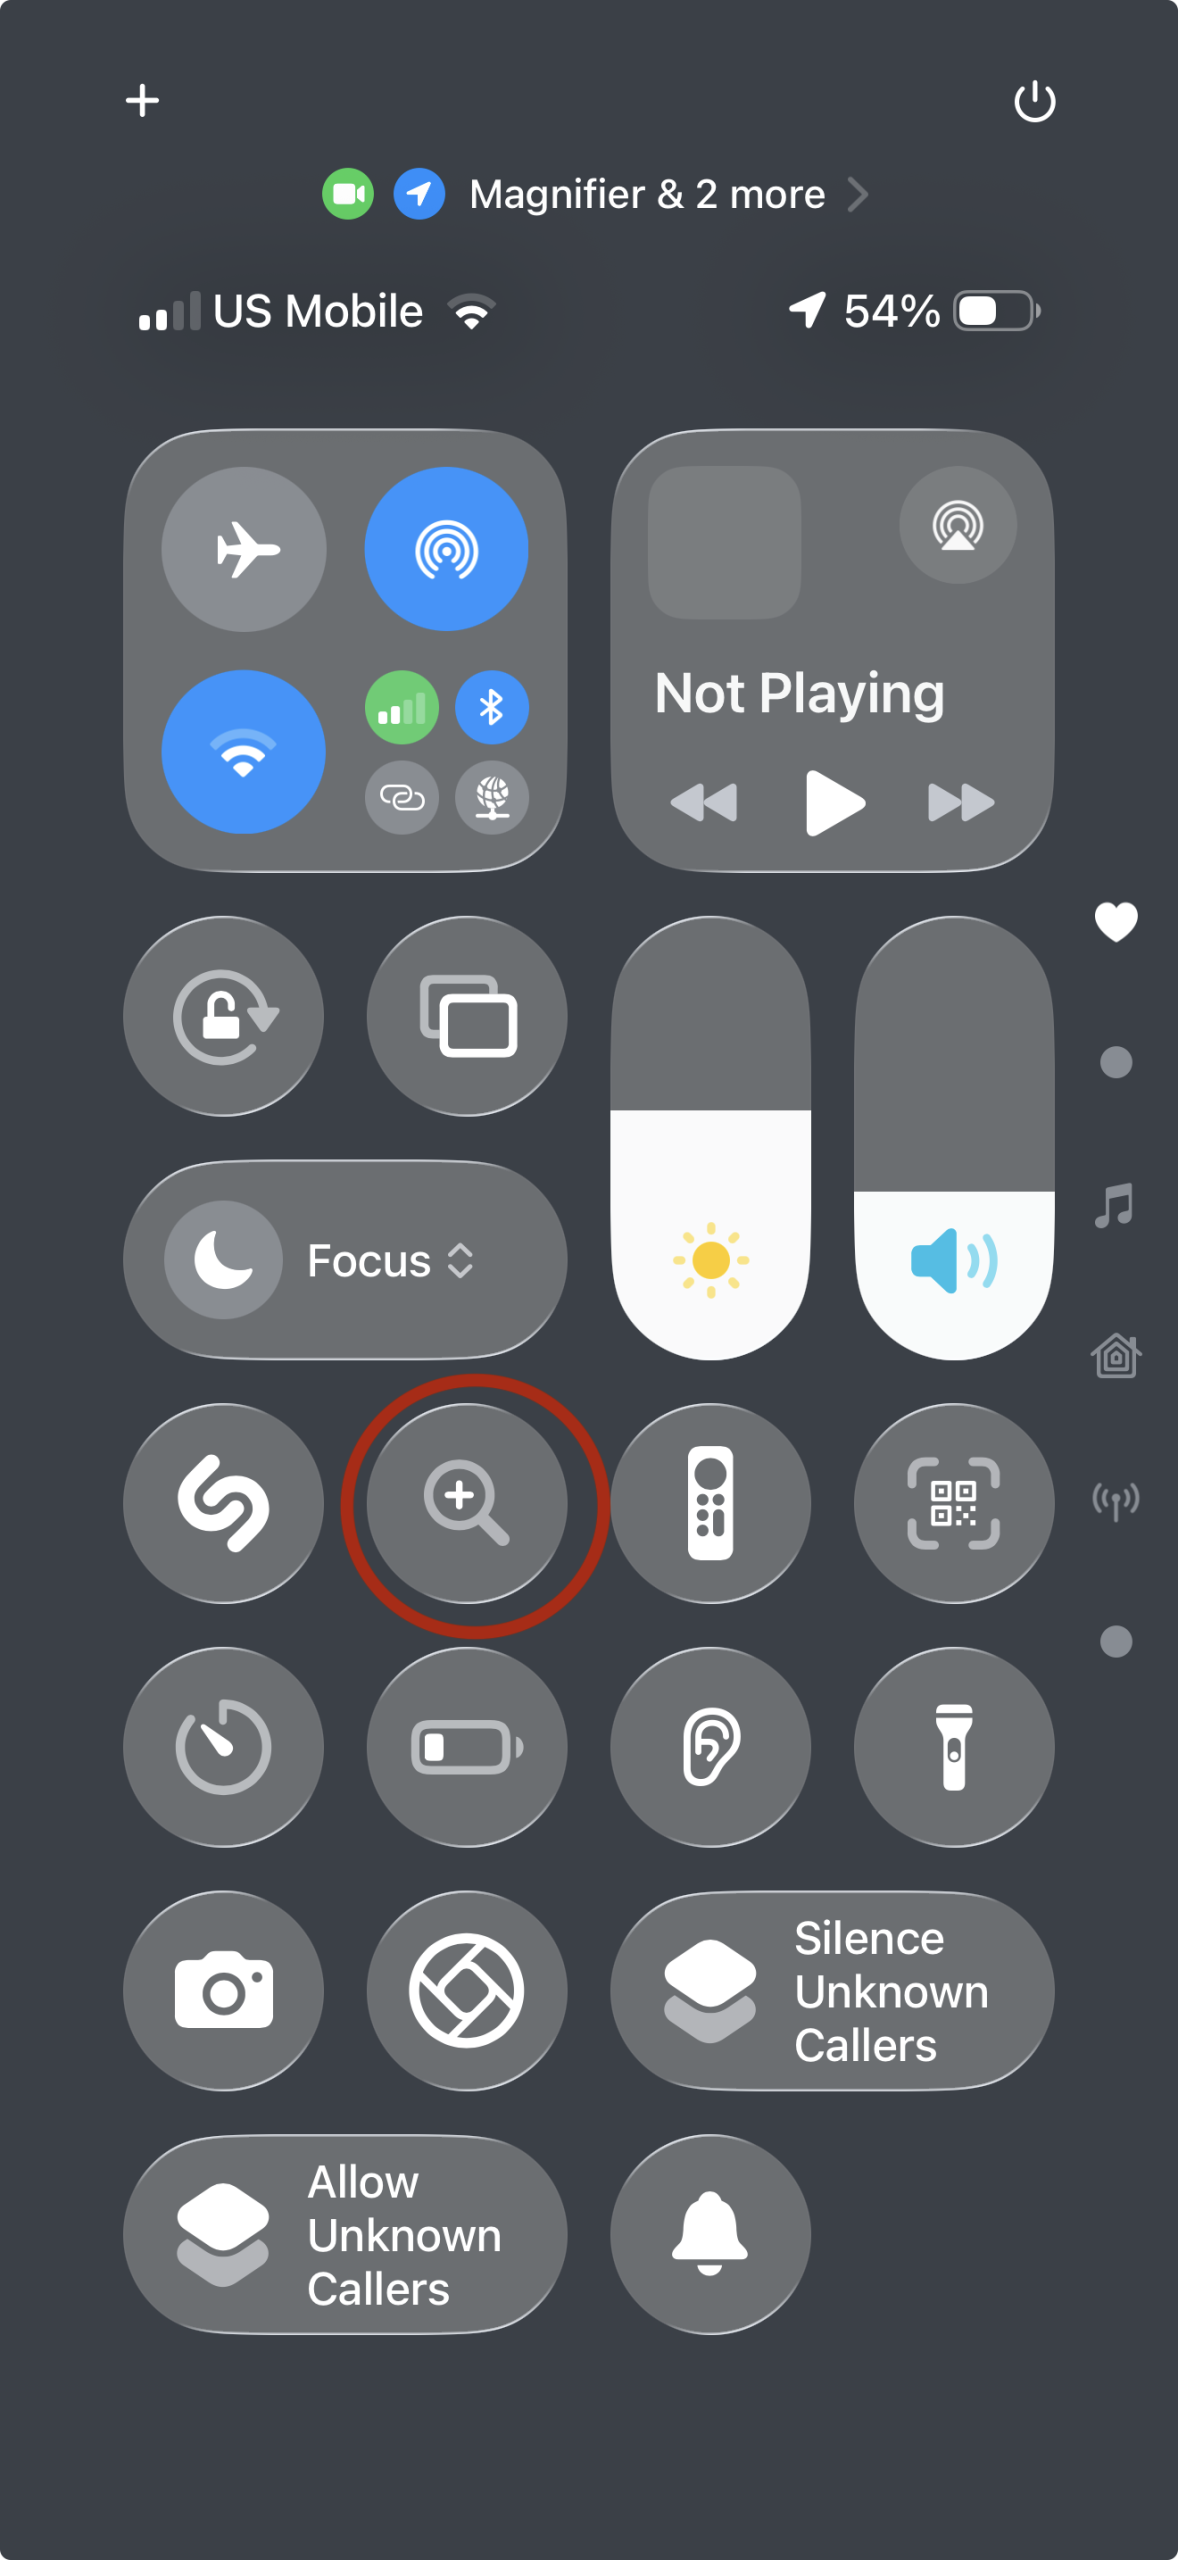
The Control Center can be accessed by swiping down from the extreme upper right of your screen (for devices with Face ID). For devices with a home button, Control Center appears when you swipe up from the very bottom of the screen.
Below is the magnifier in use shown examining some obsolete coins.

Zoom
The Zoom feature magnifies items on screen. Settings->Accessibility->Zoom, then Double Tap with three fingers to invoke or dismiss.

Text Size
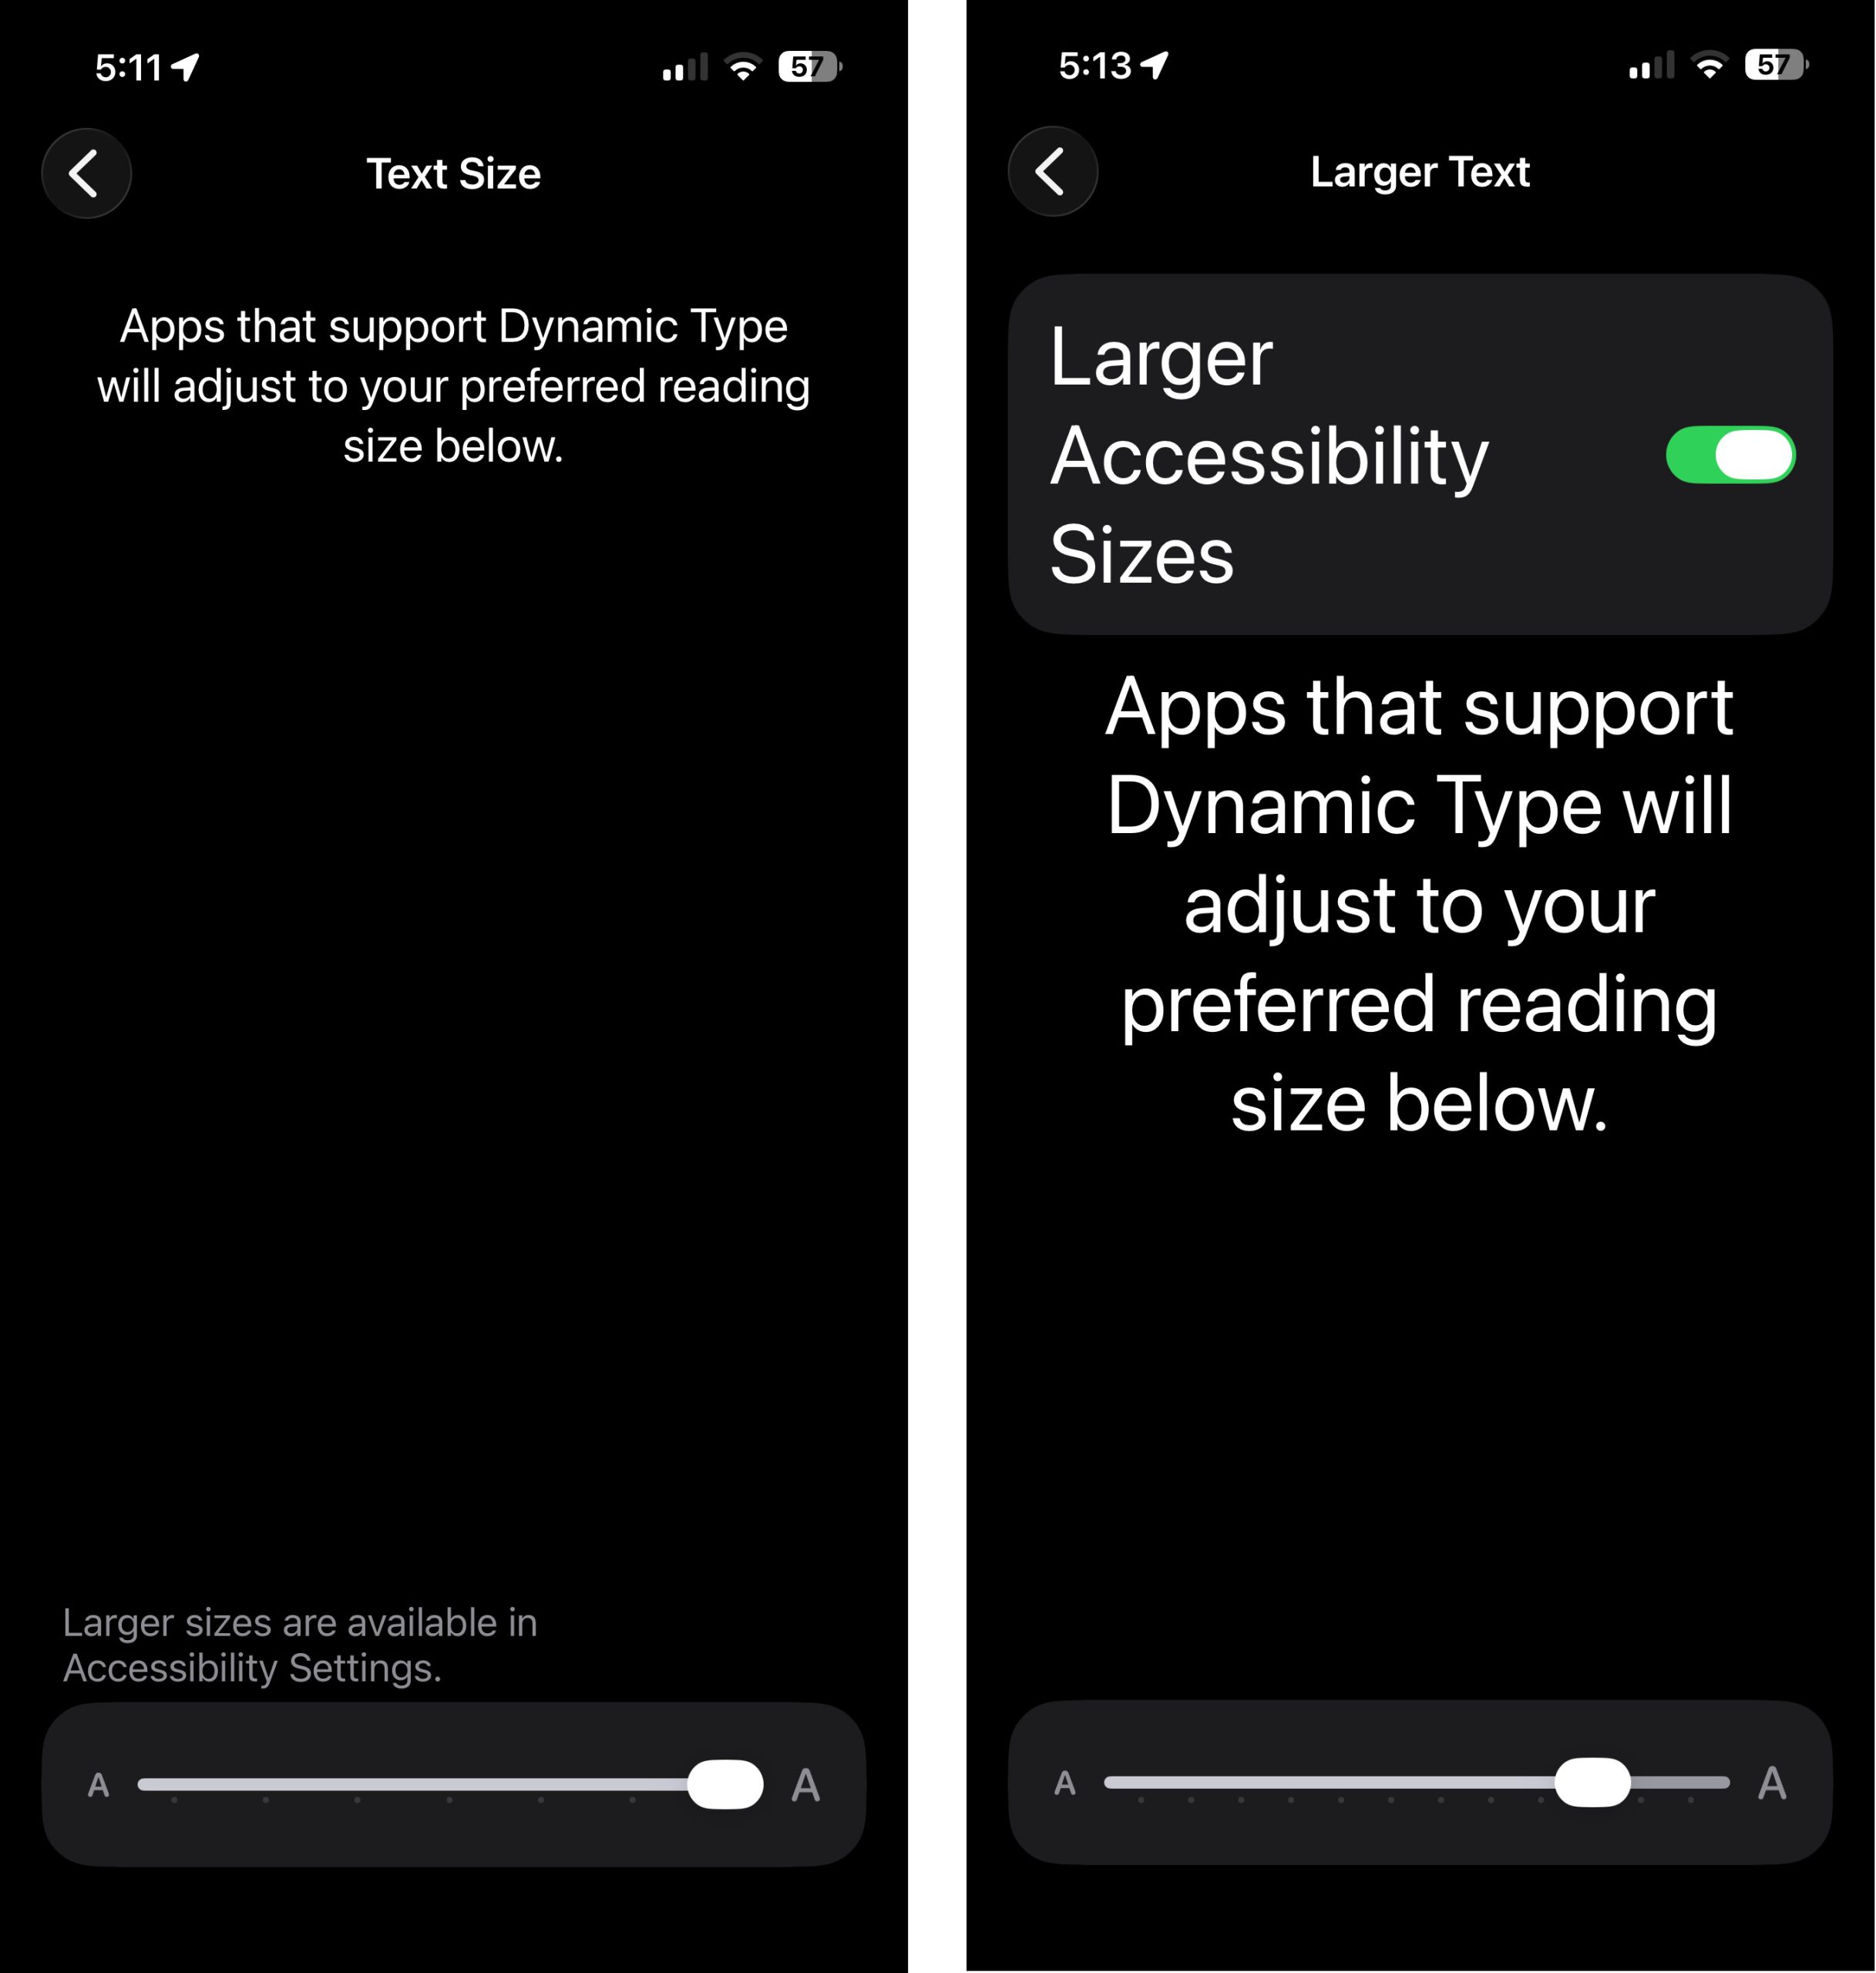
You can adjust the size of text in most Apps with Settings->Display & Brightness->Text Size. This size control is further extended to even larger text in Settings->Accessibility->Display & Text Size->Larger Text.
Display Zoom
Hey Siri, make everything bigger than everything else.
On iPhone or iPad Display Zoom has two options, Default or Larger Text. This is misleading, because it doesn’t only affect text. What Larger Text does is resize the entire screen, making most everything look bigger.
I liked the Larger Text option right away. Everything is just a bit bigger and clearer, with very little penalty. On the iPhone 17 Pro Max, the screen resolution changes from 2868 x 1125 to 2436 x 1125. That makes everything 17% larger in each dimension, while showing you 85% of the pixel count in each dimension.
This seems like a quite reasonable tradeoff and it just makes everything a little easier to see, at the expense of super fine detail, which older eyes probably can’t see anyway.
Your results will vary with the model of iPhone or iPad. The system claims that your iPhone will need to restart for this change, but in practice I didn’t see a restart — the screen just went blank for a few seconds.
Unless you have great eyesight, or great reading glasses, this will make a nice improvement for you, and you won’t notice those slightly larger pixels.
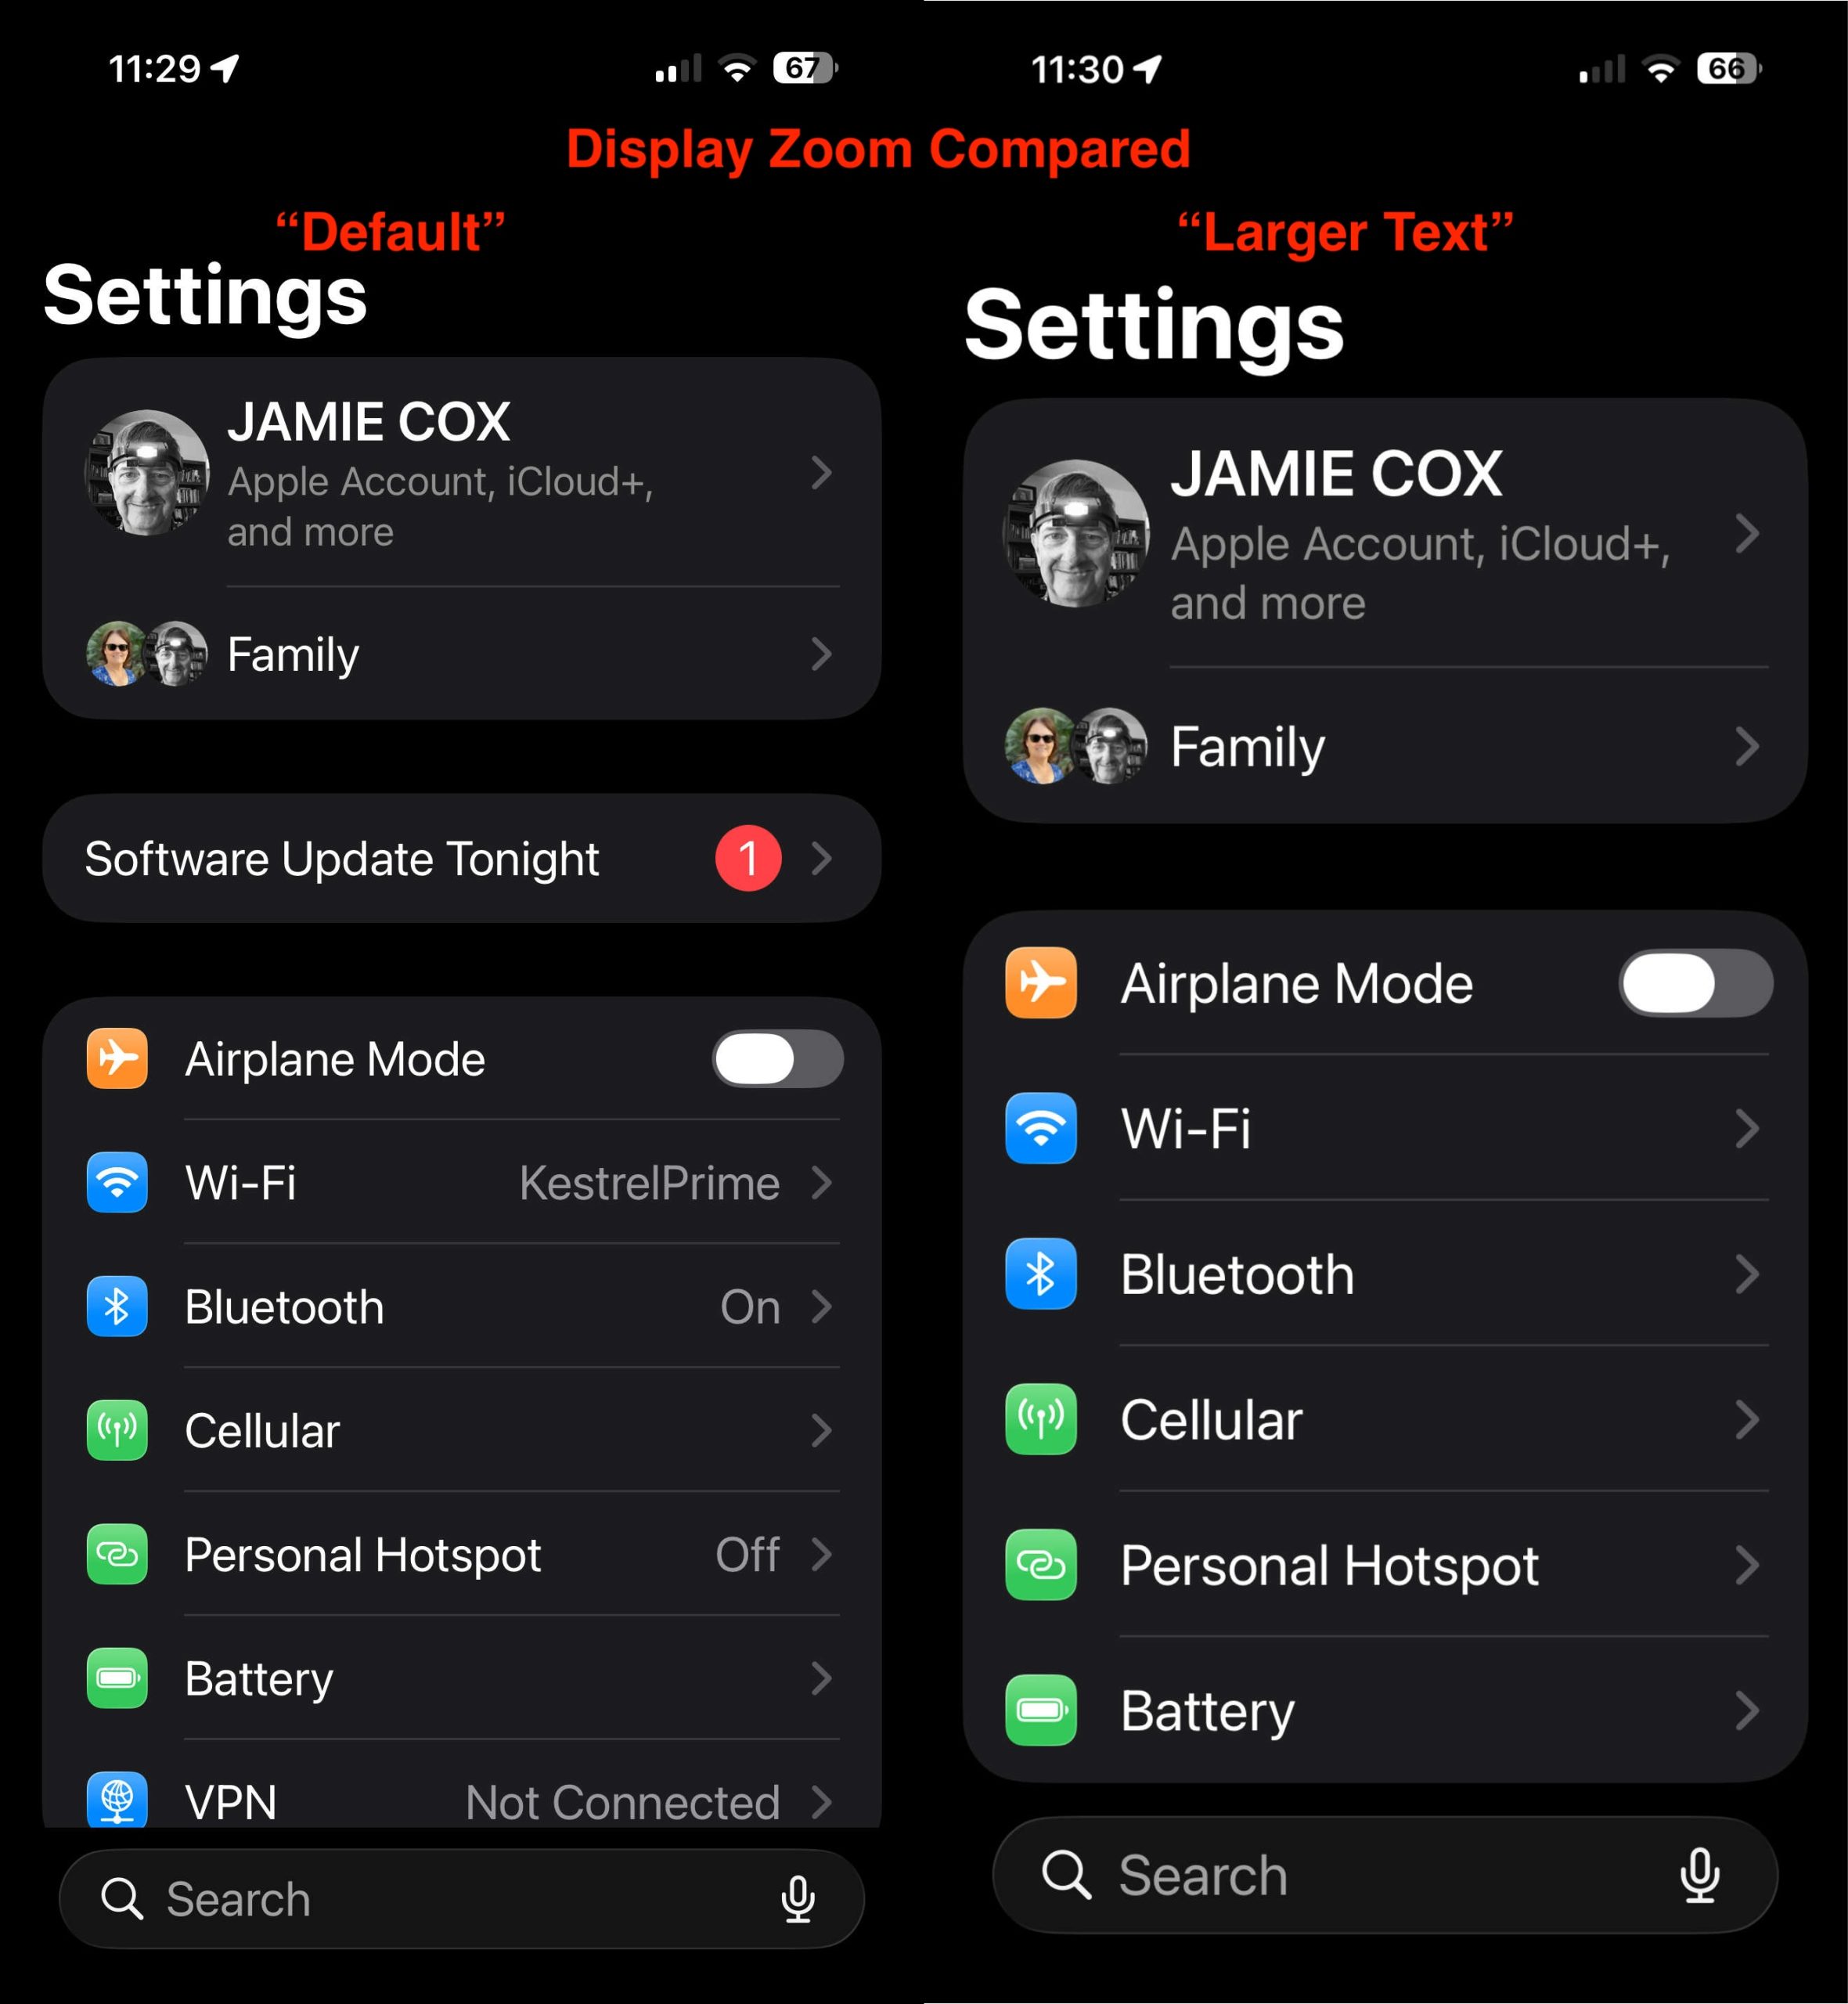
Above is a side-by-side comparison of the settings screen with Display Zoom set to “Default” text (Left), and “Larger Text” setting on the right.
MacOS Display Resolution
Display Zoom on iOS is similar to the long-standing Display Resolution setting on MacOS. Found under Settings->Displays, this option makes everything on your Mac screen larger or smaller. If you have more than one monitor, you will have to make separate adjustments for each.
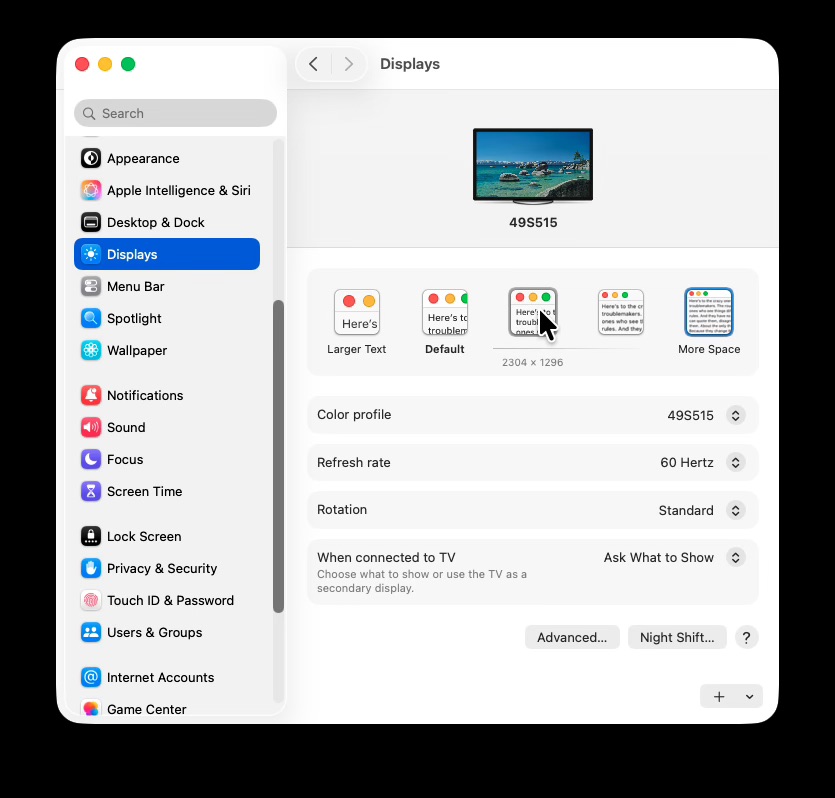
When you hover your mouse over the display size options, you will see the pixel dimensions displayed for that choice. Depending on your monitor setup, you may find some of those scaling options don’t look so great.
Again, one of the options is labelled “Larger Text”, but it make everything larger — not just text.
Bonus Tip – Use Keyboard with iPhone or iPad
Many people may have never thought of using a keyboard with their iPhone. You can connect a USB or Bluetooth keyboard to your iPhone or iPad.
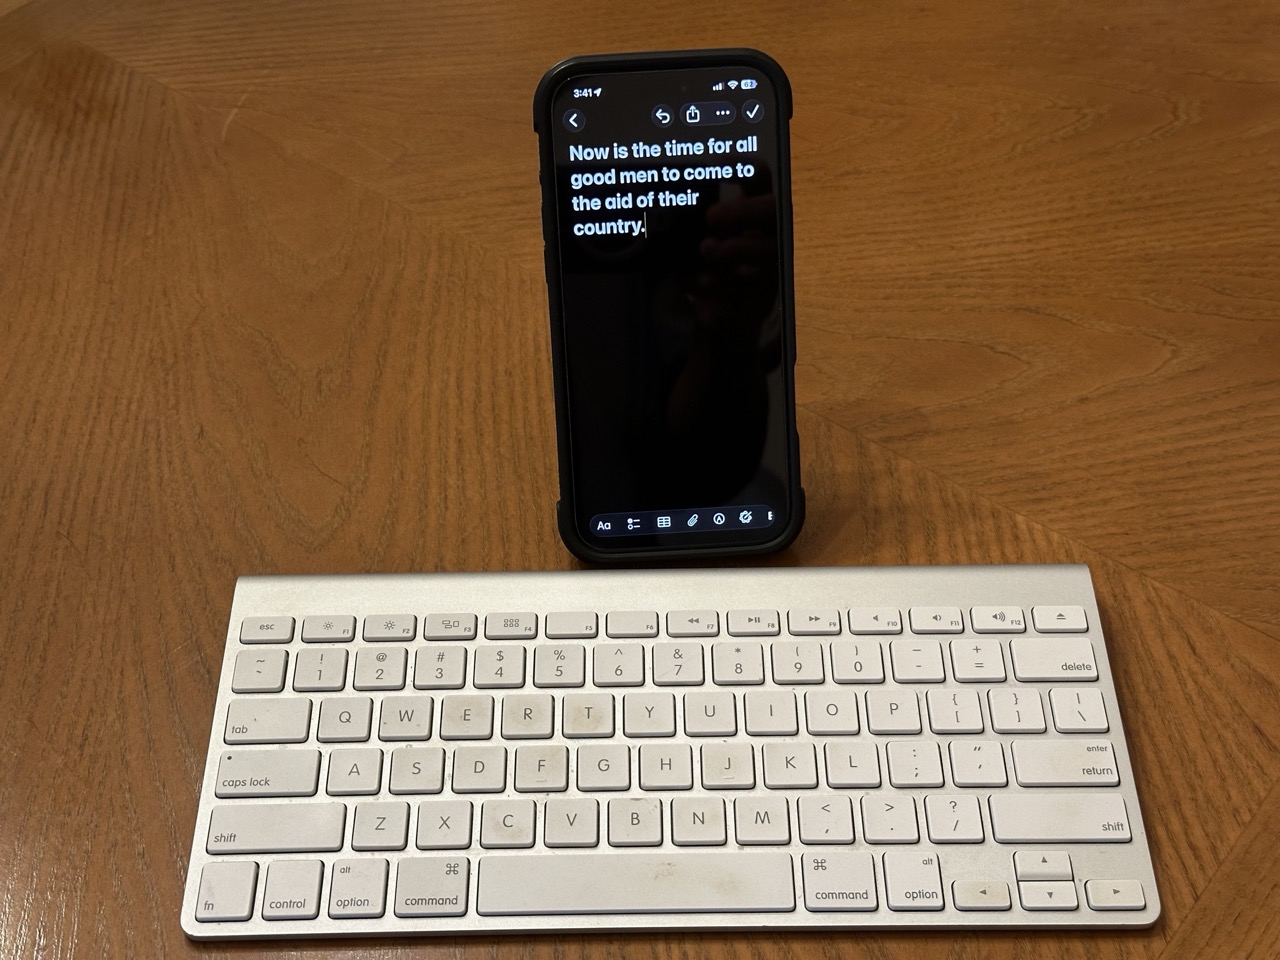
If you have a spare keyboard around, you may be able to save a lot of frustration typing on the tiny iPhone on-screen keyboard. Besides typing text, the keyboard can operate many of the functions of your iPhone. I was able to change brightness & sound volume, switch between Apps, navigate the home screen, take a screenshot and similar actions using only the keyboard.
Like many features on iPhone, you can dig deeper into Accessibility settings to find even more functionality. This article goes into extreme detail of all the buttons and functions that can be performed using a keyboard with iPhone.