Economical Printing – Brother Monochrome Laser

A couple of years ago, I ditched my problematic color laser printer and went monochrome. I bought a Brother DL-2270DW. This is a basic monochrome laser printer. The W is for wireless, so it doesn’t need to be near my network equipment to work. It doesn’t do any other fancy stuff, like print from iOS or Google Cloud Print.

Monochrome laser printers are much smaller, simpler and cheaper than the color models, primarily because you only need one cheaper cartridge instead of four expensive ones. Color is kind of nice, but I don’t really need it. I don’t feel that it was worth the hassle and expense.

I won’t even consider inkjet printers for home use any more. The ink is exorbitantly expensive, and most of it is wasted while fighting with clogged jets. If you use an ink jet printer every day, the jets tend to stay clear, but if it sits for a while, the jets are clogged by the next time you try to use it.

I had already decided not to bother with photo printing at home, since I can send photos to my corner Walgreen’s store to be printed for a few cents a copy. Their expensive photo printer does a better job than anything I could buy. I print very few photographs — maybe $10 or $20 worth a year.

My household does a medium amount of printing — more than some, less than others. We print a page or two almost every day we’re at home, and sometimes a lot more.

In two or three years, we have printed about 4000 pages with the Brother. That’s 8 reams of paper. In that time, I have replaced toner twice. The starter cartridge gave out at 580 pages, and the next cartridge went another 2,200 pages. Also in that time, I have had exactly two paper jams, one of which was definitely my fault.

I’ve been buying LINKYO cartridges. These are neither the cheapest, nor the most expensive. They are a name brand, but not not the manufacturer’s own brand. They are rated for 2,600 pages, and sell for $15-20 each.

So, I’ve spent in total :

  • $120 for the printer (with starter cartridge)
  • $35 for toner
  • $155 total
  • = $155 / 4000pages = $0.039 per page (not counting paper)

Paper expense would be about the same for any printer, adding, say, another $0.01 per page.

The cost per page continues to decline every day I can keep printing and don’t have to buy a new printer. But if I had to buy a new one and start over today, I’d still say I got a pretty good deal.

Color inkjets will cost you between $0.25 and $0.50 cents per page just for the ink alone. [Consumer Reports]� If I had printed my 4000 pages on a color inkjet, I would have paid at least $845 more to do so.

My recommendation when shopping for a printer is: Don’t shop for a printer. Shop for the cartridges or other consumables. Find a cartridge that is widely used and available for a good cost. Then find a printer that uses that cartridge.


Skins from Decal Girl

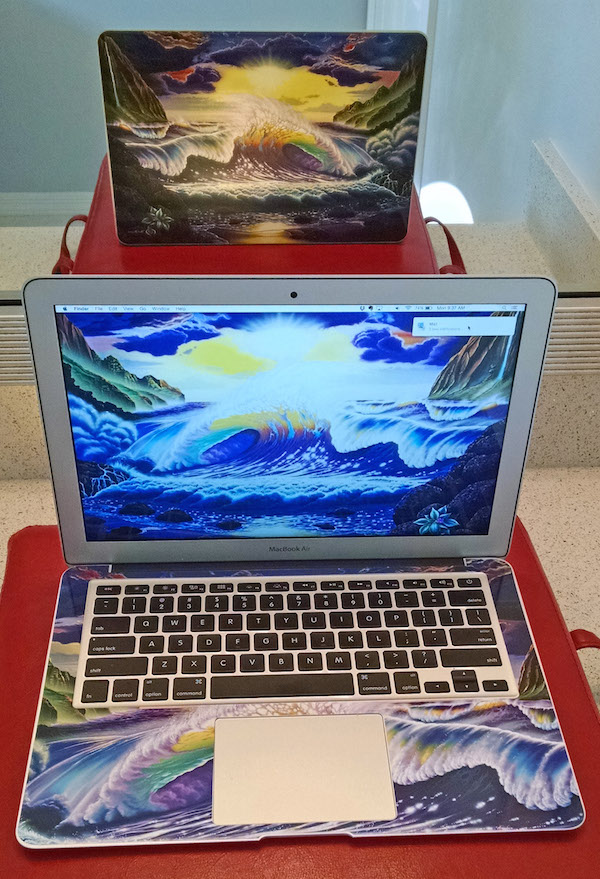
I found a nice selection of colorful skins for laptops, phones and iPads at www.decalgirl.com.

MacBook Air with Skin
MacBook Air with Skin (photo using Nova camera and flash for Android)

I got one of these for my MacBook Air, and I really like it. My wife saw mine, and instantly ordered one for her computer.

They have hundreds of designs to choose from, and sizes to fit many different devices. Your order will come with a code to download a matching desktop pattern.

The vinyl skins are primarily for decoration and personalization, not protection, although they may provide some incidental protection against scratches.

This was easier to install than I expected. If you have done this type of thing before, you will know how tricky it can be to get the decal in exactly the right place. Fortunately these are really nice in that respect, because they don’t stick tight until you press them down. You have a chance to move things around and get them just right before you lock them in place.

When ordering, you have the option to have a cutout in the design for the Apple logo, or not.

How to Turn On an iMac

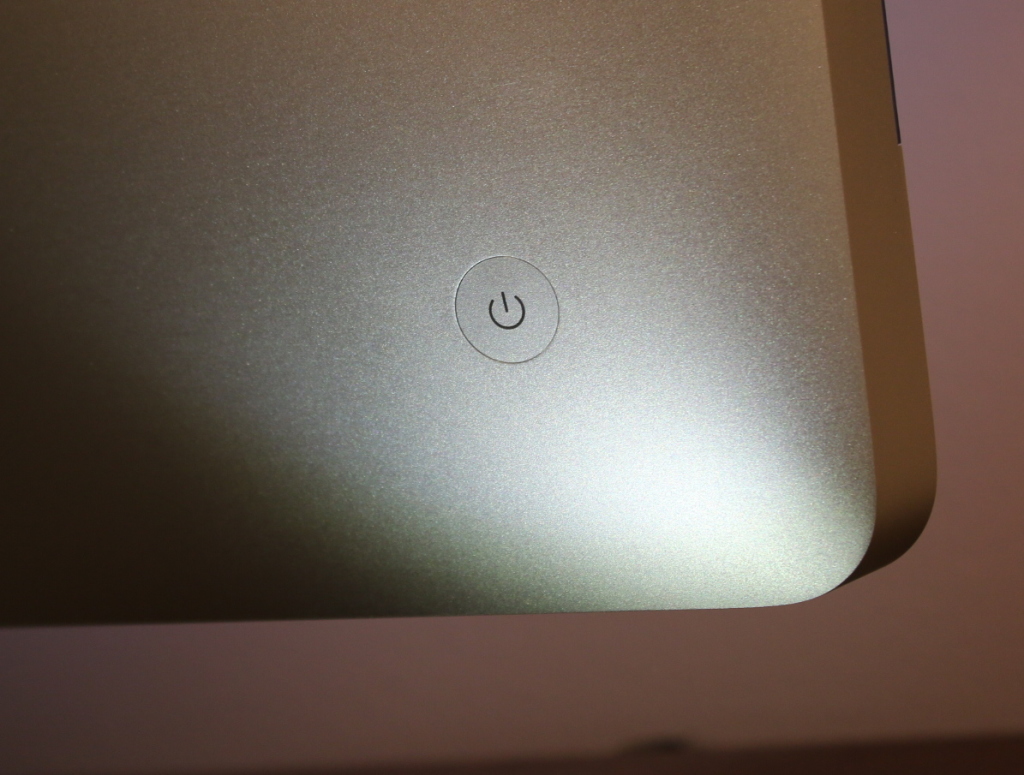
Otherwise knowledgeable users are baffled by one silly question when confronted with an iMac: How do I turn the computer on? Where’s the power switch? It’s not a stupid question. Apple has hidden the power button cleverly where you can’t possibly see it. It’s also very difficult to feel the button because it is flush with the case. If you do look back there, it’s probably hidden behind the curve of the case.

Anyway, here it is on a Mid 2011 iMac. It’s been in a similar position for several years. Glad to help, and don’t worry, we won’t tell anyone you had to look here to find out to turn on a Macintosh.

Behind lower left edge of computer.

Nova Flash Review


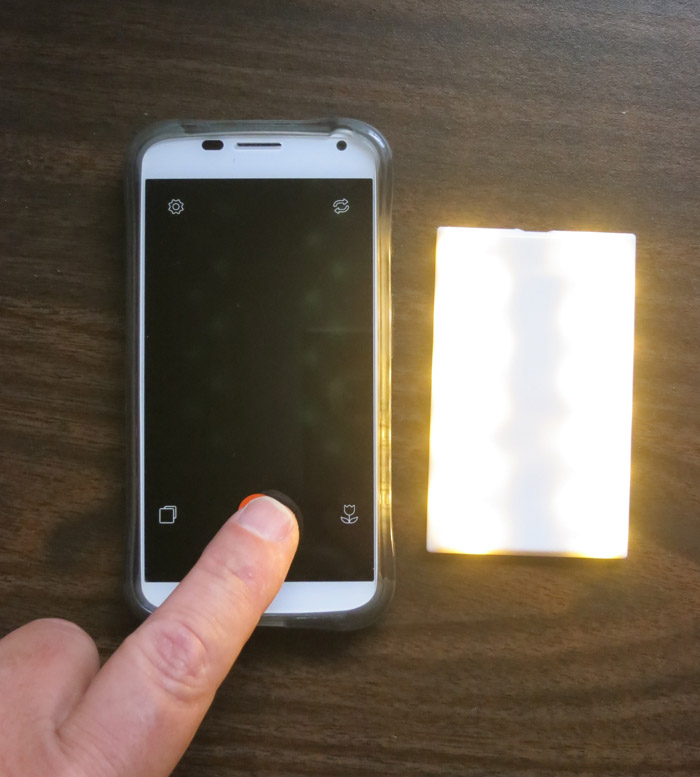
This thing is very bright -- this is not the brightest setting. I did not add any pixie dust to this photo.
The Nova Flash in action. It’s very bright�– this is not the brightest setting. I did not add any pixie dust to this photo.

I am a backer on Kickstarter for the $59 wireless Nova Flash from https://www.novaphotos.com/. The hardware recently shipped to backers, so I have had a chance to try it out.

Since I have been interested in off-camera flash in general, I backed and bought the Nova flash. The Nova brings the general advantages of off-camera flash to the iPhone and Android platforms. Off-camera flash improves your photos by moving the light source away from the lens. Your subject has more natural shadows and detail. Off-camera flash is at its best in portraits, where subjects lose that deer-in-the-headlights look and have more natural skin tones. An off-camera flash can also give your portraits a nice catch-light reflection in the eyes.

The Nova flash works with a dedicated Nova camera app which fires the flash using Bluetooth radio control.

The initial release of the Nova is oriented towards the iPhone, with a very�basic camera app for the Android. I only tested with the Android version for this review.

Nova requires iOS 7 or Android 4.3 or greater. It requires that your hardware support Bluetooth 4.0 low energy. For this reason, the Nova requires newer iOS devices:�iPhone 4S/5/5C/5S, iPad 3/4/Mini/Air or the iPod Touch 5G. �I tested on the Motorola Moto X, running Android 4.4.


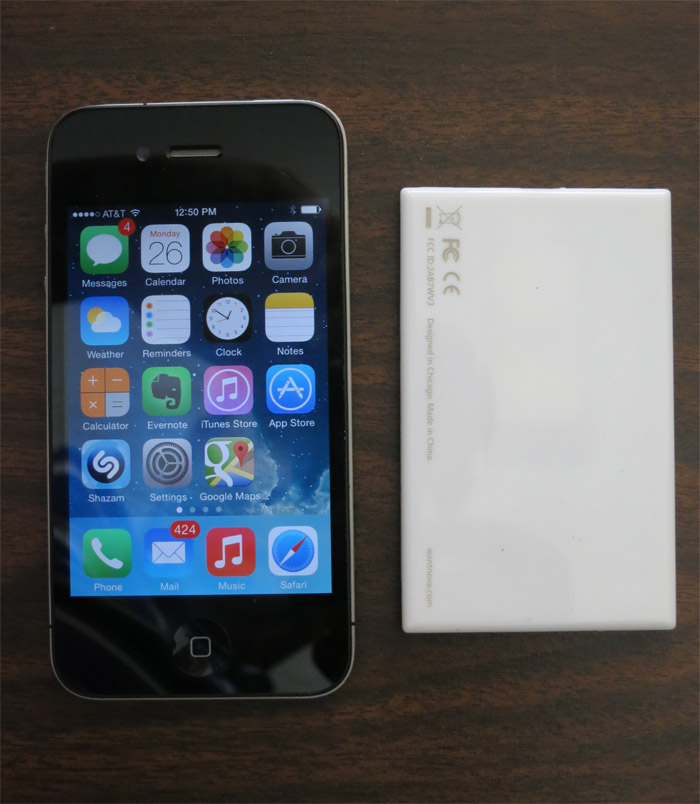
Nova Flash and iPhone
The Nova flash next to an iPhone 4. The Nova requires a newer model for Bluetooth compatibility.


The Nova hardware is super simple. It’s a thin white plastic case with�no user controls or buttons at all. It has a micro USB port which is used to charge the internal battery. It is extremely compact which should encourage you to take it along frequently. The translucent case allows the LED lights�to shine through with a nice diffuse glow.

Nova App on Android taking a photo
Taking a photo with Nova


Below are before and after photos taken with the regular Android camera app, and with Nova.


Stock Android camera, no flash
Before: Stock Android camera, no flash

The face is underexposed without flash. I took another�photo using the stock camera app, with the built-in flash, but it was a total disaster — shiny skin, closed eyes, really awful, trust me. Mercifully, I deleted it.


Nova App, Medium Flash Brightness
After: Nova App, Medium Flash Brightness

The Nova flash provided a nice fill-flash here and really made a much nicer photo.

Serious backlight problem
Before: Serious backlight problem
After: Backlighting somewhat overcome
After: Backlighting somewhat overcome by Nova Flash

The Nova acts more like a radio controlled LED flashlight than a traditional photo flash. When you take a picture, the flash comes on for a couple of seconds, during which time the photo is taken. So, you won’t be stopping any fast action with this flash. The long illumination time appears to allow the camera to adapt to the new lighting situation and take a properly exposed photo. The good thing about this is your subject has time to get over any blink reflex before the photo.

Nova Flash Summary

What’s Hot:

  • $59 price
  • Compact size, light weight
  • Bright enough to make a real difference

What’s Not:

  • Occasional trouble connecting via Bluetooth – restart App or turn�Bluetooth on/off to recover
  • No indication of battery state. This would be a nice addition to the app.

Update: June 2016 Not Recommended

The Nova Flash just went on the trash heap of otherwise nice products condemned by a bad battery. Mine sat in the drawer for 6 months. When I was ready to use it again, it wouldn’t charge up or operate. The battery is not replaceable. Since the unit doesn’t have an off switch, the battery discharges drastically when not in use.� I can’t recommend getting this, since the same thing is virtually guaranteed to happen to every unit eventually.


Bluetooth Keyboard Controls Apple TV

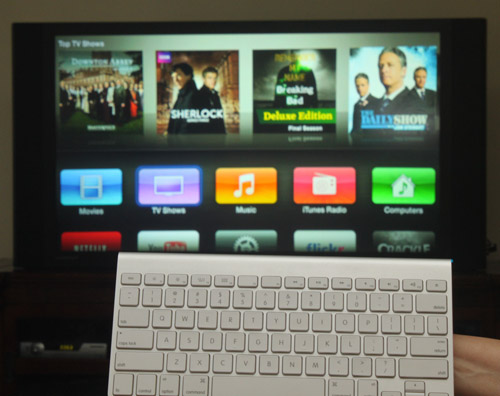
Wireless Keyboard Controls Apple TV

I have been using a Bluetooth keyboard with my Apple TV 3. With recent (2013) updates of firmware for the Apple TV, the Bluetooth keyboard feature has now become useable. The keyboard is really great when you want to search for something. You can actually type instead of using the painfully slow on-screen keyboard.

I �have been using the Apple keyboard that came with my iMac. I don’t like it for computer use, so I’m using a USB keyboard on the computer, but this keyboard is an ideal remote control for the Apple TV. It’s fairly compact and fits on the sofa table. You don’t have to use an Apple keyboard. Any Bluetooth keyboard should work.

The keyboard mappings felt so natural, I guessed them the first time, but here they are:

  • Menu button = esc key
  • Select button = enter key or space bar
  • Arrow buttons = arrow keys

My Apple TV now seems to remember the keyboard pairing indefinitely. I have to wake up the keyboard maybe once a day with a tap of the power button. Range is at least 12-15 feet – if you’re sitting back further than that, you need a smaller TV. 🙂

One problem I ran into — I don’t think it was a keyboard problem per se, but I created an account on Crackle with a gobbledegook password. When I entered this password on Apple TV, it wouldn’t accept it. I eventually changed the password, and then it was accepted on the Apple TV. I don’t think this problem is �specific to Crackle, either. I suspect that the Apple TV software just filters certain characters. Some special characters are okay, but I’d watch out for ^ and ~ (caret and tilde), as those were in the rejected password.

�Update March 26: After Apple TV software update 6.1 was installed on my Apple TV, my Bluetooth keyboard stopped working. It also wouldn’t show up as available to pair. I restarted my Apple TV (Settings/General/Restart) and tried again, and I was able to get the keyboard to pair. You should also try just turning Bluetooth off and then back on, on the Apple TV. (Click where it says Bluetooth Searching…). Pairing has always been kind of finicky on the Apple TV.

The Bluetooth controls are under Settings/General/Bluetooth.

Update May 10, 2014: One cool thing about using the�Bluetooth keyboard: it gives �your Apple TV an RF remote control that can work without direct line of sight. So, you can use your Apple TV even if it is concealed in a cabinet, or on the other side of a wall.

Using Your iPad with Bose Sound Dock

Using Your iPad with Bose Sound Dock

If you have an older Bose Sound Dock for your iPod or iPhone, you may be disappointed that it doesn�t work with newer devices. Somewhere along the way, Apple changed how iDevices get charged. If your Sound Dock uses the older FireWire charging scheme, but your i-device uses the newer USB scheme, you�ll get a curt message that charging is not supported with this accessory.

All iPads use the new USB charging scheme, but beyond that, an iPad won�t even fit in the Sound Dock.

Bose-iPad Overview
Original Bose Sound Dock cabled to iPad


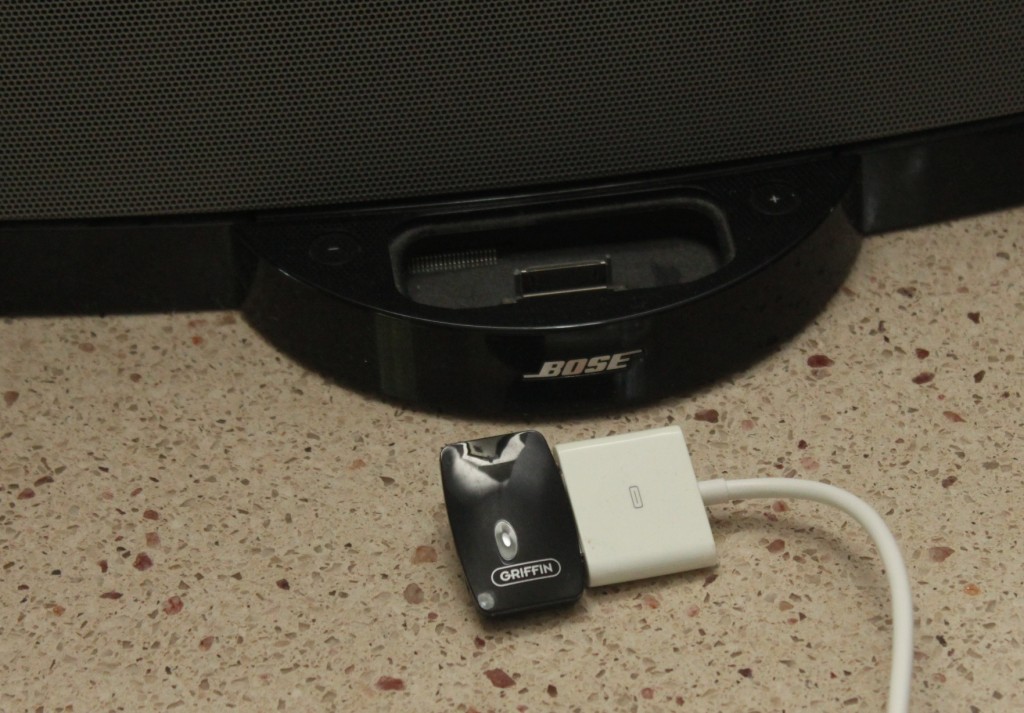
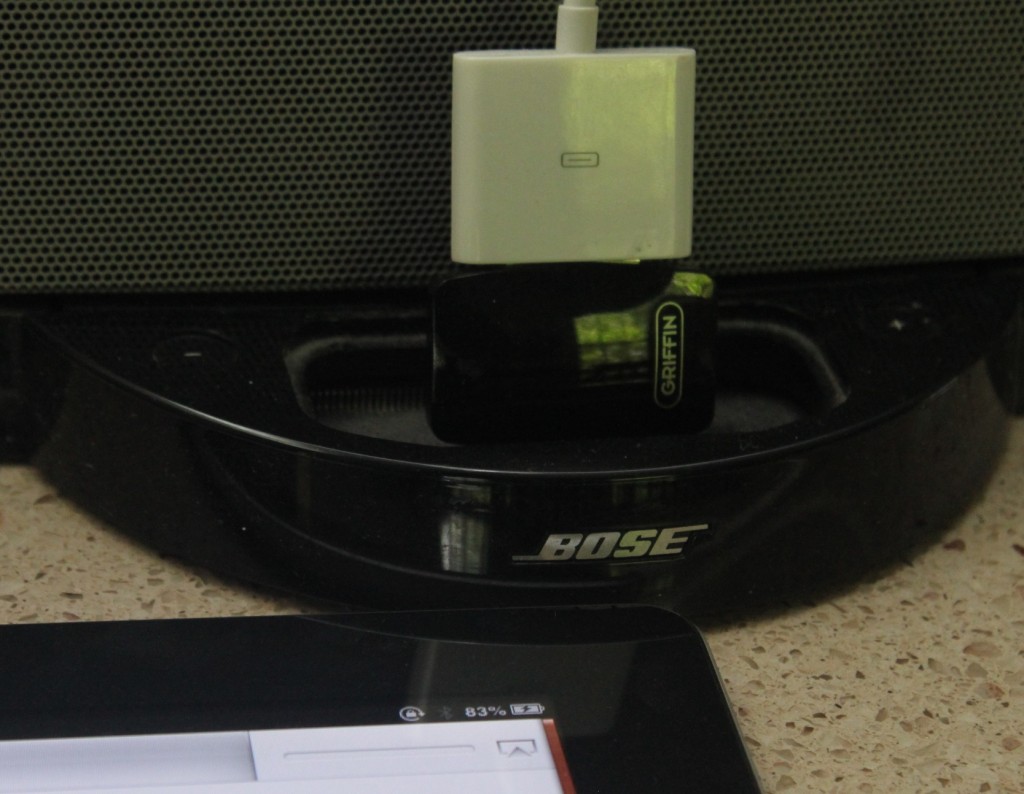
So, here�s a pair of inexpensive gadgets that will overcome these problems. I used the 3031-FWUSB Charge Converter from Griffin Technology. This is hard to find, but a similar item is this one from Scosche.

Next, you need a short cable to free your iPad from the confines of the dock. It might not be a bad idea for the iPhone also, since it gets a bit precarious balanced on top of the charge adapter. I got the RadTech Dock Extender. Unless you need a longer one for some reason, get the shortest cable available.

Hardware
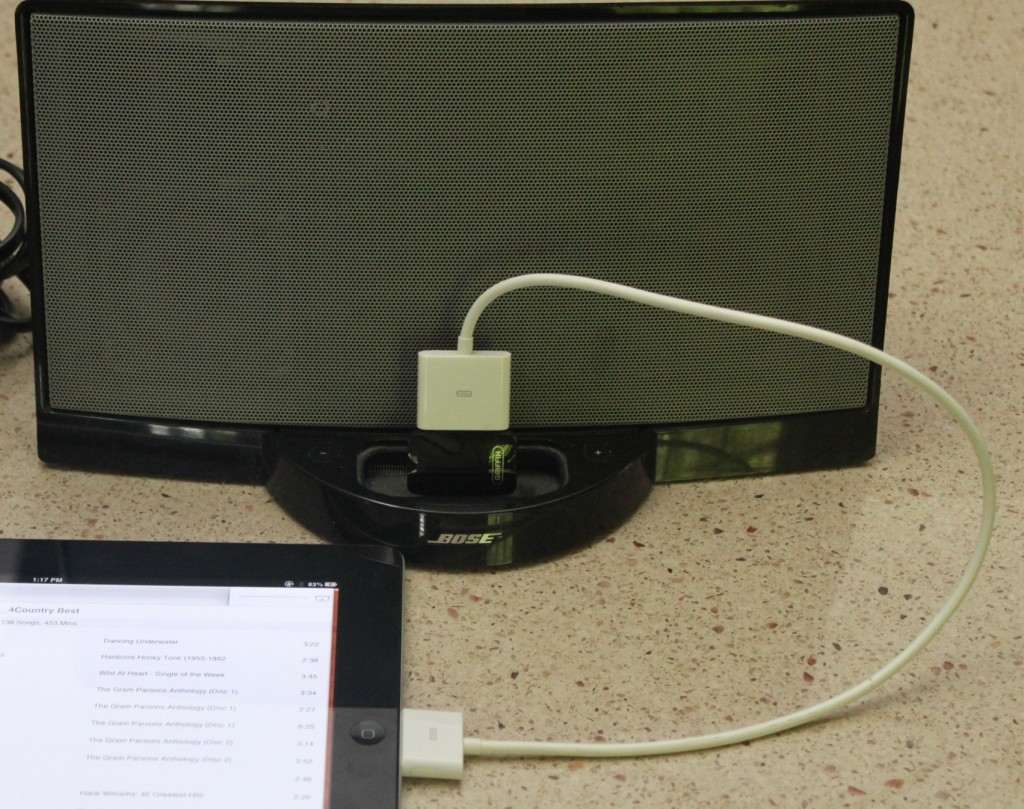
For this set-up, order matters. The charge adapter goes into the dock, followed by the cable into the charge adapter, and the other end of the cable to your iPad, etc. If you reverse the order and put the charge adapter on the other end of the cable, it won�t charge.

So, you should have something that looks like this:

It Charges
The iPad (2) Charging with the Bose Sound Dock & Adapters

The Bose Sound Dock is a great-sounding accessory. The right adapters keep it playing with your newer gadgets. The same general idea can keep some of your other accessories functioning. This might work with some older car docks or accessories as well.

I got a report that the following adapter worked with an iPhone 4S and the old Bose Sound Dock:
CableJive dockStubz Charge Converter and 30-pin Pass Through Adapter for iPhone, iPod, and iPad.

This also worked with the extender cable above, although the cable isn�t strictly necessary for the iPhone like it is for the iPad. I know that the setup pictured works with iPad versions 1 and 2.

This article is a re-post originally published in 2010, reproduced here after the blog recovered from �some Indonesian junk that was going around. (Hacked by Indonesian script kiddies.)�