I use an external drive with my Mac to supplement the internal storage. I have been using the external drive primarily to store my Photos Library and iTunes Library, but I have a lot of other files there also. (Here’s an article about putting your Photos Library on an external drive.)
I bought a new 1TB External SSD to replace the mechanical 1TB drive I had been using. I figured this would be a nice speed-up, and more in line with what my Mac is capable of.
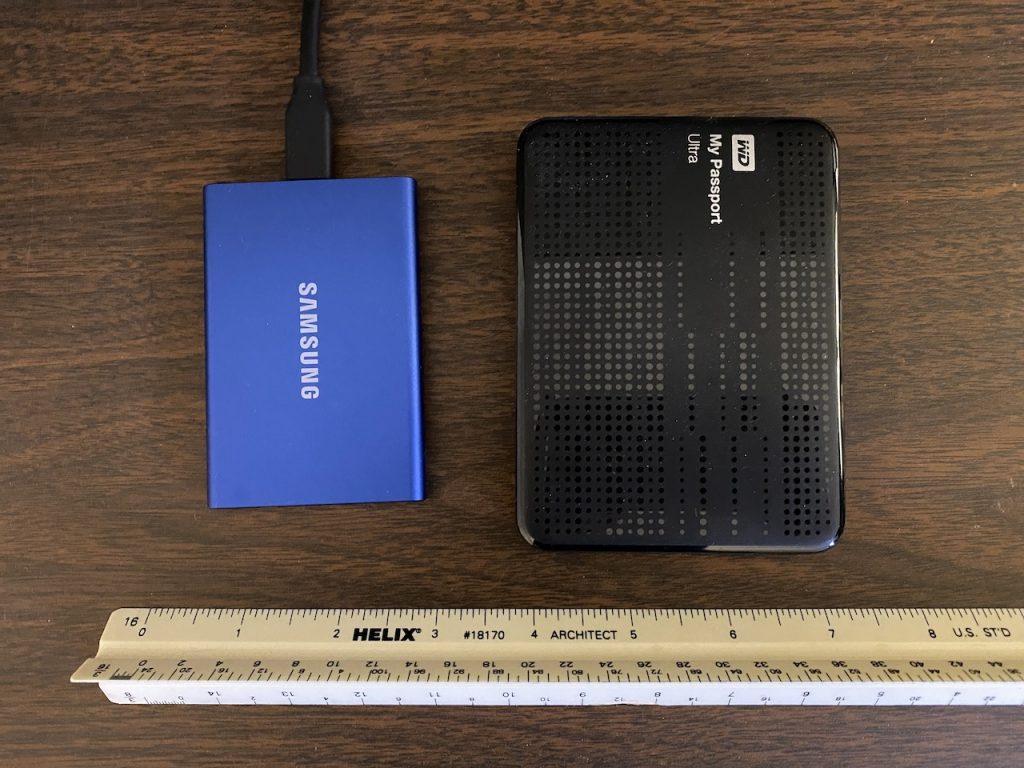
From the photos on-line when I ordered the SSD, I expected it to be larger — about the size of a regular 3.5″ external drive. It is much smaller. It’s about the size of a stack of four or five credit cards. This would be a great thing for travel.
I knew that I should format a new SSD with the newer APFS format for use with MacOS (currently 10.15 Catalina). So, after reading up on that, I fired up Disk Utility, selected APFS, and hit Format. I immediately realized my mistake. I was formatting my original external drive with my data on it, not the new one! It only took a few seconds to lose everything on that drive.
Lesson Learned: Make Very Sure Which Drive You are Formatting!
The good news is that I had a backup. (You have backups, right?)
Lesson Learned Previously: Always Have Backups
After initially trying to restore from backup using Carbon Copy Cloner, I ended up just copying the files to the new SSD using the Finder. But I didn’t have enough space on the drive and deleting big files and folders didn’t seem to make any difference in the amount of free space. I finally found that Carbon Copy Cloner had created some invisible space hogs on that drive called Snapshots.
Lesson Learned: If Deleting Files Doesn’t Increase Free Space, Look for Snapshots
Snapshots can also be created by Time Machine.
Lesson Learned: CCC Creates Snapshots which you can remove from within CCC.
Once I got rid of the snapshots, I was able to restore everything to the new drive easily.
Now I wanted to make some changes to help prevent similar accidents in the future. I give my drives unique descriptive names. I also wanted to give my hard drives unique icons. Any external drive I attach normally shows up with the same generic icon. If they all look alike, it makes mistakes like formatting the wrong drive more likely. I used icons that physically resemble the drives they represent, but you can use pictures of your cat, or whatever images you like.
I found this article explaining how to change the icon of drives. I ended up finding a lot of nice icons at Deviant Art. Often, the icons or images you find online are not in the correct format for MacOS. I used Image2Icon to convert them. You can find it on the Mac App Store, but I already had it via SetApp.
Since subscribing to SetApp, I always look in there first for any unique Apps I need. I usually find something that does what I want.
So, now my drives have unique icons like this:
Lesson Learned: You can and should give your external drives unique icons.
Besides external hard drives, you can also assign special icons to thumb drives or camera cards. Again, that seems very helpful in keeping them straight in your mind.
However, I have found that the procedure of pasting a new icon onto the icon of my hard drives does not work for some drives.
I found that for some drives, you can paste the icon file, but for other types of drives, you must copy and paste an actual image. If pasting the icon file doesn’t work, you can open the icon image using preview, make a selection, copy that, and paste that into the icon in the drives “Get Info” window. That seems to work.
I’m still finding that I can’t change the icon of partitions on an APFS partitioned drive. If anyone knows how to do this, please leave a comment. Thanks.