Here are the slides for our October 16th presentation on iOS 12. They are in Keynote format. File size is large at 933 MBytes. (contains small videos).
We hope you enjoy having the slides available like this so you do not need to take notes.
We’re going back to basics in January with Apple’s email application Mail. We’re talking about both the Mac and iOS apps.� Here are the slides from tonight’s meeting in Keynote format. No note taking required!
I have been given the opportunity to review Stellar Phoenix Mac Data Recovery Software. The Stellar Data Recovery Home page claims the software will perform safe and accurate recovery of lost documents, photos, music files, or videos that have been accidentally or intentionally deleted from Mac computer. While I did not review all the claims made by Stellar Data Recovery I did test the ability to recover deleted files.
I deleted some photo, Word, music and PDF files from my iMac and three days later tried to recover them. I was skeptical, so prior to deleting the files I copied them to a flash drive to insure they would not be lost. I ran the software, selected the appropriate drive and to my surprise all the deleted files were recovered and retained the original names.
The software comes with an online User Manual. Although the software is slightly expensive the cost is offset by the ability to recover priceless photos or documents.
Stellar Phoenix Mac Data Recovery Software is a good product and does what it claims.
I set out recently to find a shared iOS shopping list App to replace my family’s paper grocery shopping list. I had some pretty simple requirements:
Easy-to-use sharing between family members using different iCloud accounts
Ability to review the list in the store and mark items off
Ability to review and revive completed items (We’ve got milk this time, but we’ll need it again soon)
I spent some time in the App store looking at reviews and didn’t see anything I wanted to buy. Some otherwise useful apps had a bad reputation for crashing. Others were just too complex. Some needed a subscription and a sign-on for sharing to work. It’s just creepy that the vendor would be watching everything on your shopping list.
Eventually I found it. An app that was already on my phone that met all my requirements and didn’t need any additional sign-ups, plus you can use Siri to add items to the list by voice.
The app is:� Reminders — the humble Apple Reminders app that comes with iOS.
Remember the name of your lists: “Shopping List” and “Grocery List” aren’t the same to Siri.
When you invite someone to share your list, they may have to sign on to iCloud on the web the first time to accept the invitation, but after that it can be strictly iPhone-to-iPhone.
Everyone invited has equal ability to add, delete and edit items on the list.
Tap at the bottom of the reminders App screen to see your other reminder lists.
When the new version of Numbers�for the Mac came out some features were dropped. Most of them have not been added back in. Reviews of the apps have been definitely mixed. Numbers only gets a 3-star rating on the App store (both versions).
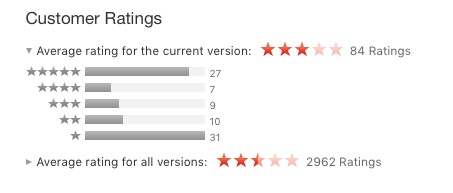
Ratings for Numbers on the Mac App Store
Two-and-a-half to three stars�is a pretty terrible rating, especially for an Apple app. As you can see, the ratings are very mixed with most reviewers giving either one star or�five-star ratings. The ratings for the iOS version are very similar.
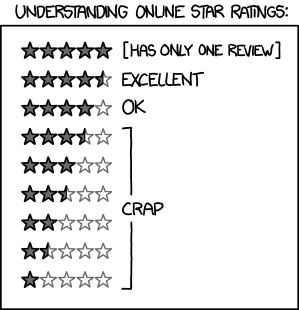
Guide to Star Ratings
The one-star reviews are mostly from people upset�about advanced features removed from the previous version. The five-star reviews tend to be�from people who have come to the application fresh, with no special expectations.
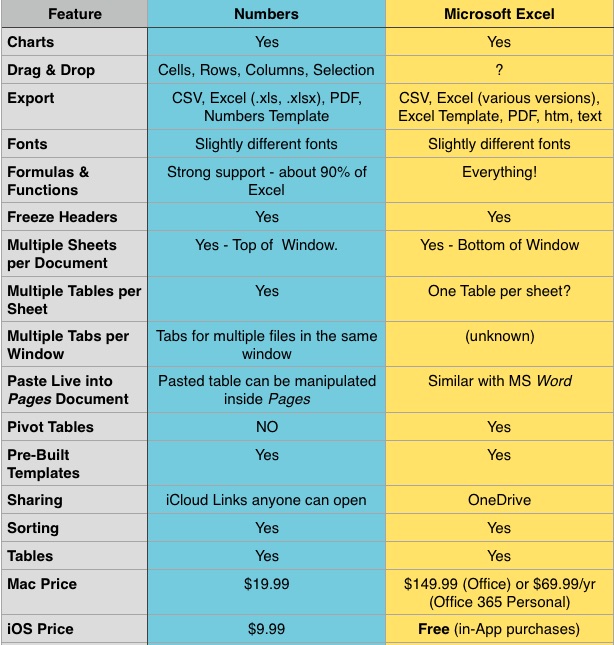
Numbers includes hundreds of distinct features. The chart below highlights just a few�of my�favorite features as compared with Microsoft Excel.
Comparison of Features Between Numbers and Microsoft Excel
Documents, Sheets and Tables
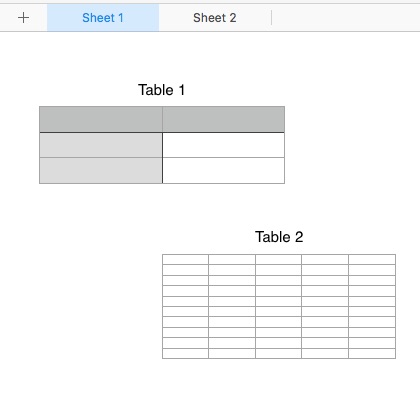
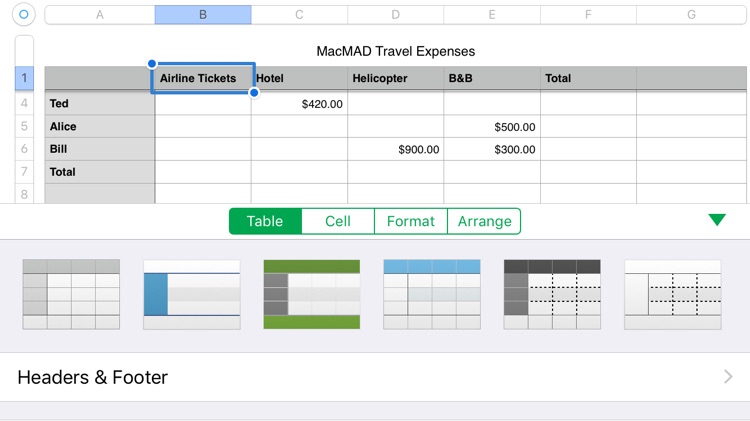
Numbers documents can have multiple sheets. Each sheet can have multiple tables. When you create a new Numbers document, it has one sheet with one table on that sheet.
If you have used Excel, having multiple sheets should be familiar. The main difference is that the sheets appear at the top of the window instead of at the bottom.
The concept of having multiple tables on a single sheet may be new to users of older spreadsheet programs. It is a very nice feature, which allows you to separate groups of data or �formulas which are of different types instead of lumping them all into the same grid of rows and columns. You can arrange the tables on the page however you like.
This document has two sheets. Sheet 1 has two tables.
Formatting Controls
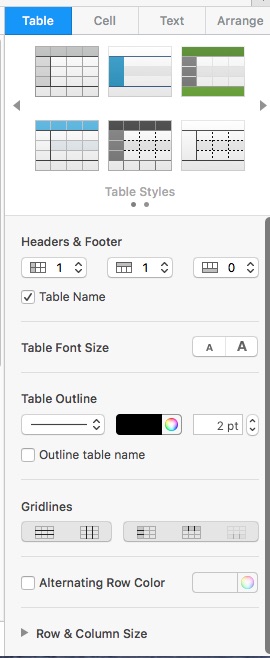
Table Style Controls
Numbers uses a consistent set of formatting controls very similar to those in the Pages word �processor we discussed last month. These are presented �in a pane on the right hand side of the window. These controls look simple, but all together, they have a lot of power. In addition to the pre-defined Table and Text styles, you can create and save your own preferred styles.
Formula Editing
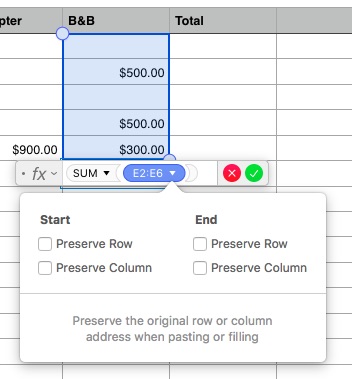
Type an equals sign to enter formula editing mode for a cell. Color coding appears showing the source cells used in your formula. This �makes it easier to understand if your formula is correct or to see the source �of errors.
When you copy or fill a formula into additional cells, Numbers automatically adjusts cell references relative to the current cell. If you want to override that to select an absolute row, �absolute �column, or absolute cell, you can use the Preserve Row/Preserve Column options.
The Numbers Formula Editor
Importing Files From Excel
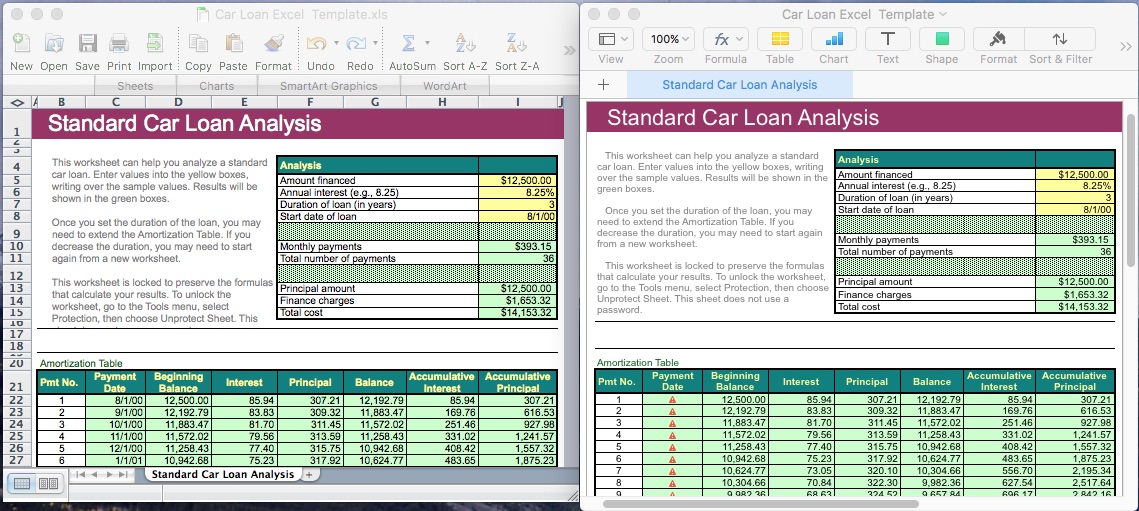
A common task in Numbers would be to open an Excel document created�by someone else. This can work fairly well, but is not completely painless.
Original Excel Template on left, Numbers Import on right
This imported okay, and the amortization calculations agreed, but the date formulas were not imported correctly and would have to be re-done in numbers.
Large Files
One of our members asked how Numbers was at handling large files imported from Excel. To test this I created a large spreadsheet in Excel with 40,000 rows and about 14 columns. The file size in Excel was 3.7 Megabytes. Numbers opened it without complaint, but it took about 30 seconds. When saved as a native Numbers document, its size increased to 6.3 Mbytes, but the native document opened in Numbers in about five seconds.
Although I didn’t get any warnings in Numbers, I did get one “Not enough memory” message in Excel while cutting, pasting and filling to create the document. Excel handled it gracefully without crashing.
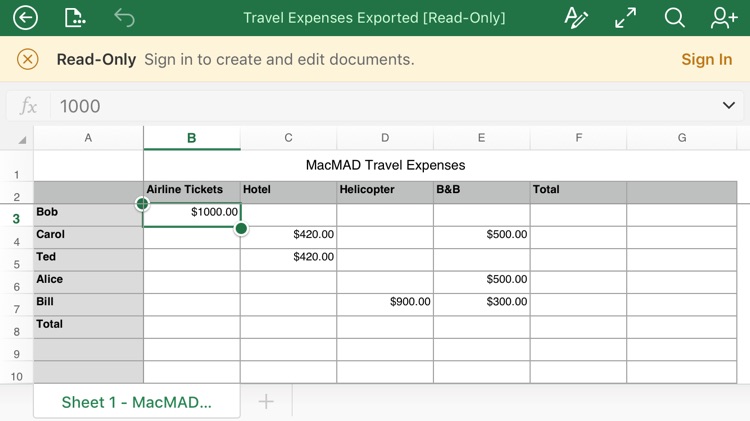
iOS Numbers App
The Numbers app on iOS is deliberately very similar to the version for �Macintosh.
Numbers App on iPhone
FYI, Excel also has an iOS app which is free in the App store. It looks like this:
Excel on the iPhone
The Excel app is apparently read-only until you register for and log in to a Microsoft Office 365�account.
�Conclusion
If you want a spreadsheet program to perform the usual tasks of calculation, sorting and organizing, and you don’t have much prior experience with spreadsheets, �you will find Numbers a very useful application. It’s especially easy to learn because of�consistent controls across Mac and iOS versions and consistency with Pages and Keynote.
If you know what a pivot table is, or have a lot of spreadsheets already in Excel format, you may be dissatisfied with the limitations of Numbers.
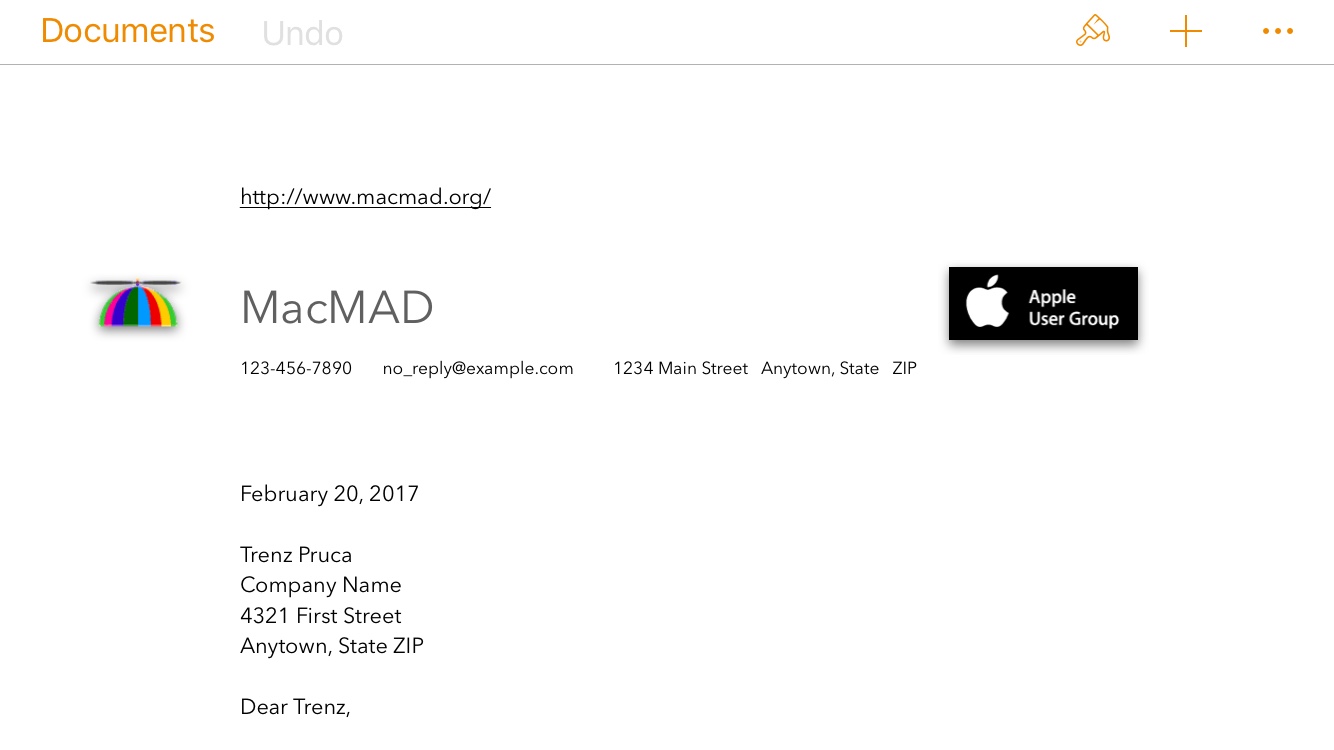
Although Pages has a deceptively clean and simple design, it does a lot of things you might have expected�to need separate applications�for. Pages includes these functions:
Word Processing (obviously)
Page Layout
Spreadsheet
Charting
Photo Editing
Publishing
Collaboration Software
Integration with iCloud
Work on your document from all your devices.
Pages Has Two Document Types
All Pages documents are either:
Word Processing Documents, or
Page Layout Documents (have no body)
Word Processing documents have body text which is a continuous flow of text within the document. It may flow around images, tables, etc.
Page Layout documents have no body. All text in a page layout document exists as part of �something else: a text box, a shape, or a table.
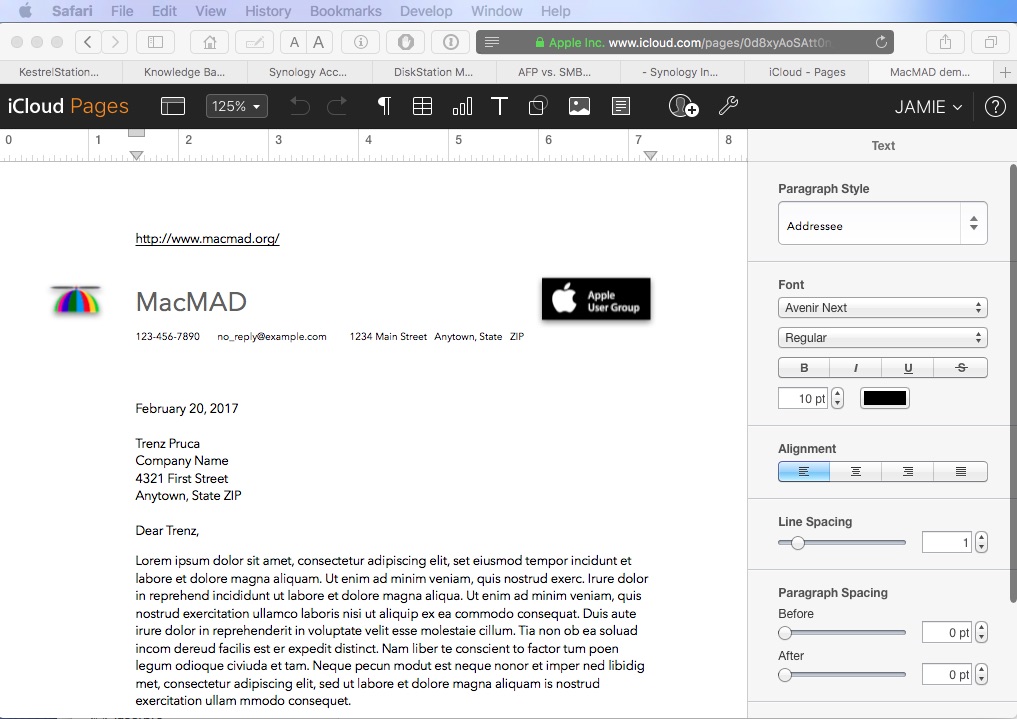
Consistent Text Operations
Text can exist in:
The document body,
Text boxes
Shapes,
Tables,
The header and footer
All are treated consistently�as far as styles and formatting.
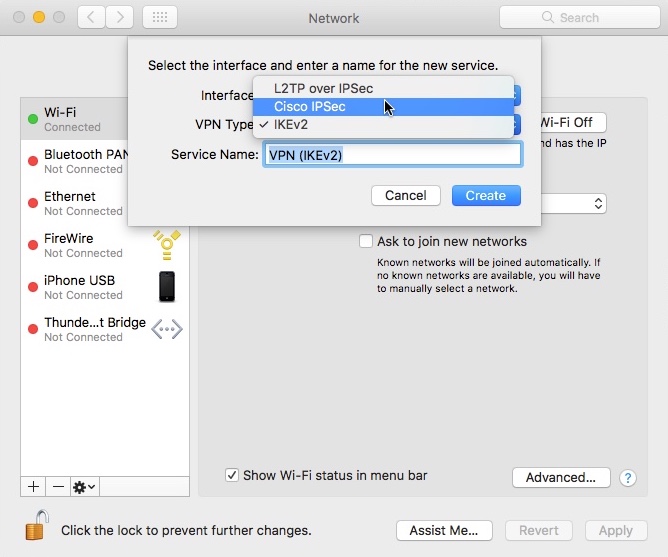
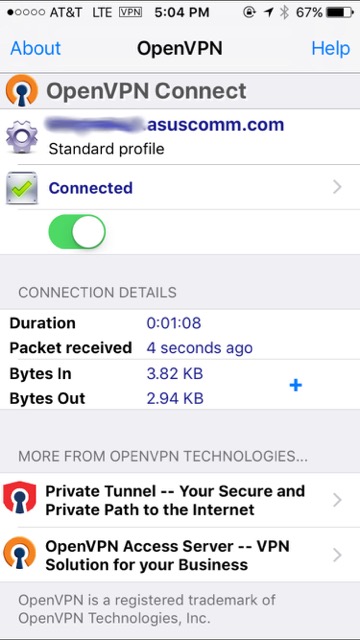
MacMAD’s October, 2016 Meeting topic is VPNs (Virtual Private Networks). Here are some accompanying links and information.
People generally use a VPN for these reasons:
Security and privacy when using a public network, such as at a coffee shop or hotel.
To allow access to online content which is subject to geographical restrictions.
To allow remote access to a private local network such as your home network or your employer’s network
Provide privacy at home (prevent your ISP from knowing what you are up to)
VPN Features to Look For
Automatic connection and reconnection – prevents accidental leakage of unencrypted data
Choice of VPN endpoint – What country would you like to be in today?
Self Installation/Configuration – Avoids lots of technical settings
Client and Server
VPNs follow a client-server model. The client app usually runs on your computer or portable device. The server can be either a commercial VPN service or you can run your own VPN server at home on your router (some models) or on another computer. There are many (hundreds) commercial VPN providers. The following list is not at all complete.
The following is a transcript of a disucssion we had with a prospective Mac user about Quicken financial software.
Sue:
Hello, I have been considering purchasing a Mac for a long time, but am reluctant to do so because I hear that Quicken does not work well on a Mac. Can you provide any information regarding this issue?
Dennis:
I have been using Quicken on a Mac for years and while they had some problems a few years ago the new release of Quicken for Mac 2016 works fine. I would not hesitate to purchase a Mac because of a perceived problem with Quicken.
Jamie:
My wife is a heavy Quicken user and she was not happy about Quicken for the Mac. It works well for a new user, or a light user, but if you are used to advanced features on the Windows version, you’ll be disappointed.� The solution we came up with is to run Quicken for Windows on the Mac using Crossover. That combination has been very faithful and reliable, and I’ve had no complaints from the wife. Crossover is an emulator. Unlike BootCamp or Parallels, you don’t need a copy of Windows, and [therefore] it will be cheaper.
Sue:
Thanks for the great input. How would you define a “heavy” Quicken user? I use it for downloading transactions, sending online payments, and sometimes for transferring funds. Also, will I be able to transfer my Quicken info from my PC to a Mac?
Jamie:
The Windows Bill Reminders feature allows you to estimate bills. The estimate can be based on your credit card balance. This feeds into the “Bills Projected” feature which shows you your upcoming cash flow. The Mac version accepts only fixed, exact estimates, therefore the bill projections can be wildly incorrect.�� The Mac version requires you to enter some amounts as Debits or Credits, which many users will not understand. The Windows version did not. � Quicken has a conversion tool program to convert data from Quicken for Windows to Quicken for Mac. Get this — it only runs on Windows! It is riddled with errors and won’t work on some older Windows systems (XP). I eventually got it to run. It spewed error messages, but eventually produced output.�
Here is direct quote from Quicken tech support: “Converting from Windows to Mac often takes a long time and can be complex. We offer a free service to help with the conversion process. If you send us your data file we will do some of the conversion for you and send you back a file ready to be used in Quicken for Mac 2015. It will save you some time and make the conversion easier for you. ”
We did NOT send them our data.
After conversion, there were many problems and issues, I think mostly with various securities and transactions(e.g. mutual funds). [Edit: These problems were realtively minor. The reason we gave up on Quicken for the Mac had more to do with day-to-day usage and relearning.]
Sue:
Ugh. That sounds way too frustrating for me, thus adding to my reluctance to purchase a Mac. Thank you for the info.
Jamie:
But, none of that was a problem using the Windows version of Quicken on the Mac in Crossover.