January 2026 Meeting Topic
Screen sharing with FaceTime can be a great tool for helping or collaborating over the Internet. It allows two-way (or multi-way) audio and/or video chats. It also allows you to view or control someone else’s screen (with permission). If you ever need to help someone who doesn’t live with you this is a great tool.
Prerequisites
FaceTime itself works on Macs, iPhones and iPads. You can do a FaceTime call to a Windows user also, but that mode doesn’t support screen sharing.
On Apple devices, both parties must have an Apple ID and be signed into that on those devices. Most Apple users do have an Apple ID, and their devices are usually signed in.
Your device must have a microphone. A camera is helpful. All iPhones, iPads, iMacs and Mac laptops have a camera and a microphone, but some desktop Macs do not have those built in. You can use FaceTime audio and screen sharing on a Mac with a microphone only but no camera. This is despite a message that says “To use FaceTime, connect a camera.“
It seems weird that to do screen sharing (in either direction), you must have a microphone, but that’s the way it works at present.
If you try a FaceTime call without having a microphone, it may appear to work at first, but when the other party answers, you’ll get “Call Failed“.
FaceTime screen sharing requires iOS 18 or newer on iPhone, and iPad OS 18 or newer on iPads.
Messages and FaceTime
You can launch a FaceTime call from within the Messages app. This is probably the most reliable way to get started with screen sharing.
By exchanging text messages with the other party, you are greasing the skids by making sure that you have their correct Apple ID contact information. You can also ask them if this is a good time for a FaceTime call, and ask them to start using their Mac instead of their iPhone, if you want to share the Mac screen. It’s usually easier to deal with screen sharing on a larger screen. But if you want to share an iPhone or iPad screen, that works too.
Once everybody is ready, and using the devices you want, you can start a FaceTime Audio or Video call from the Conversation menu in the Messages App.
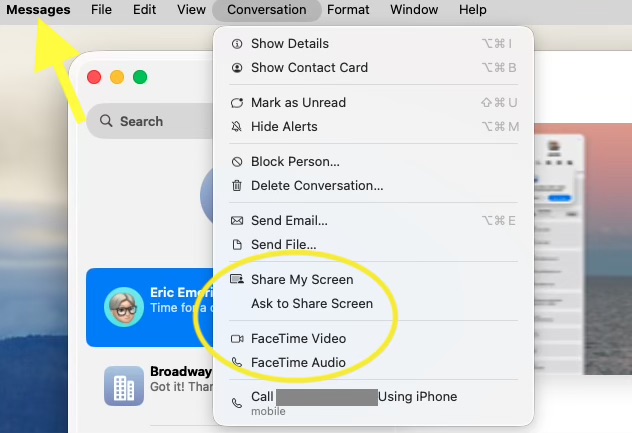
When you screen share from Messages, it actually begins a FaceTime call. The recipient than has to answer that call before the system will ask for screen sharing permission. If asked to share your screen, you can accept, decline, or choose to share only a particular window.
In the example below, screen sharing is in progress. You see a FaceTime window above, and a shared Safari window below. The local user is sharing their screen with the remote user. Screen Sharing controls are visible at the top of the screen, and at the top of the shared window.
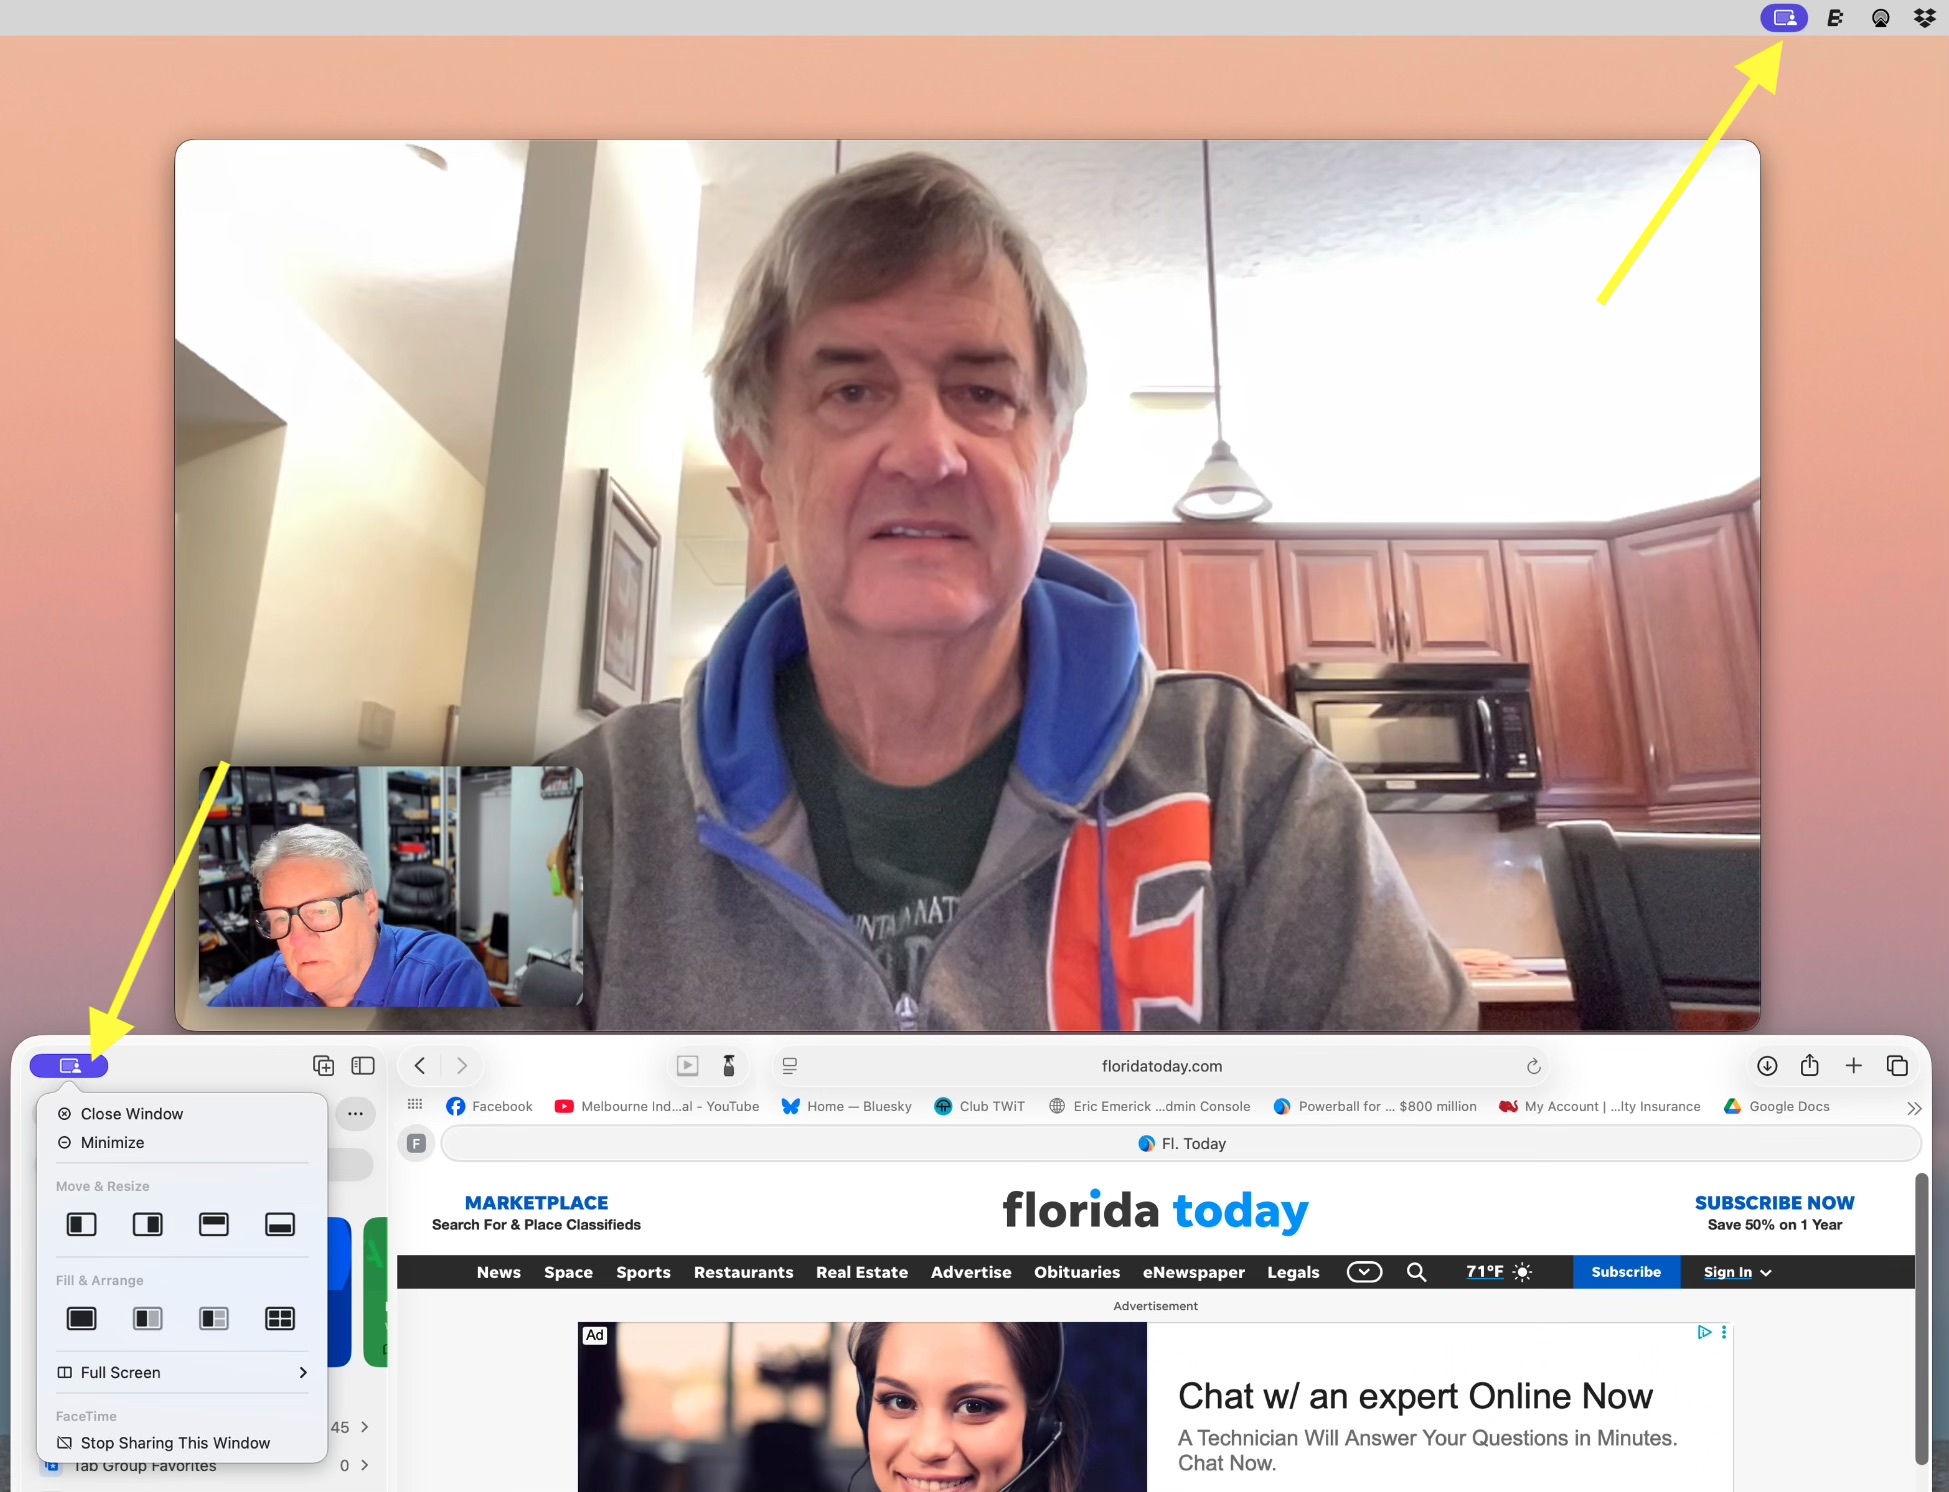
When screen sharing on the Mac, you can choose to share your entire screen or a specific window. Sharing only a specific window is good for privacy, but also as a practical matter, reduces the screen real estate occupied on the receivers screen, showing only the relevant information. This is especially important when the sending system has a larger screen than the receiving system. There’s little point sharing your 4K Mac screen to an iPhone. It would appear tiny.
FaceTime on iPad/iPhone
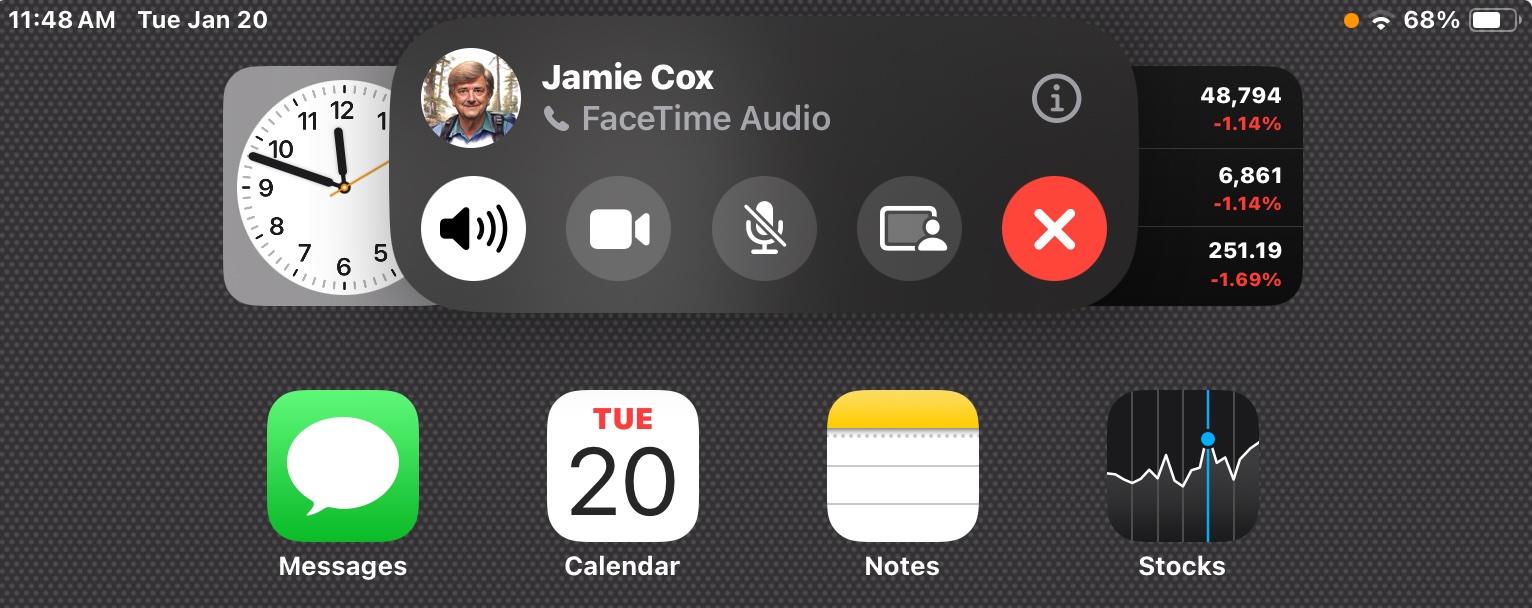
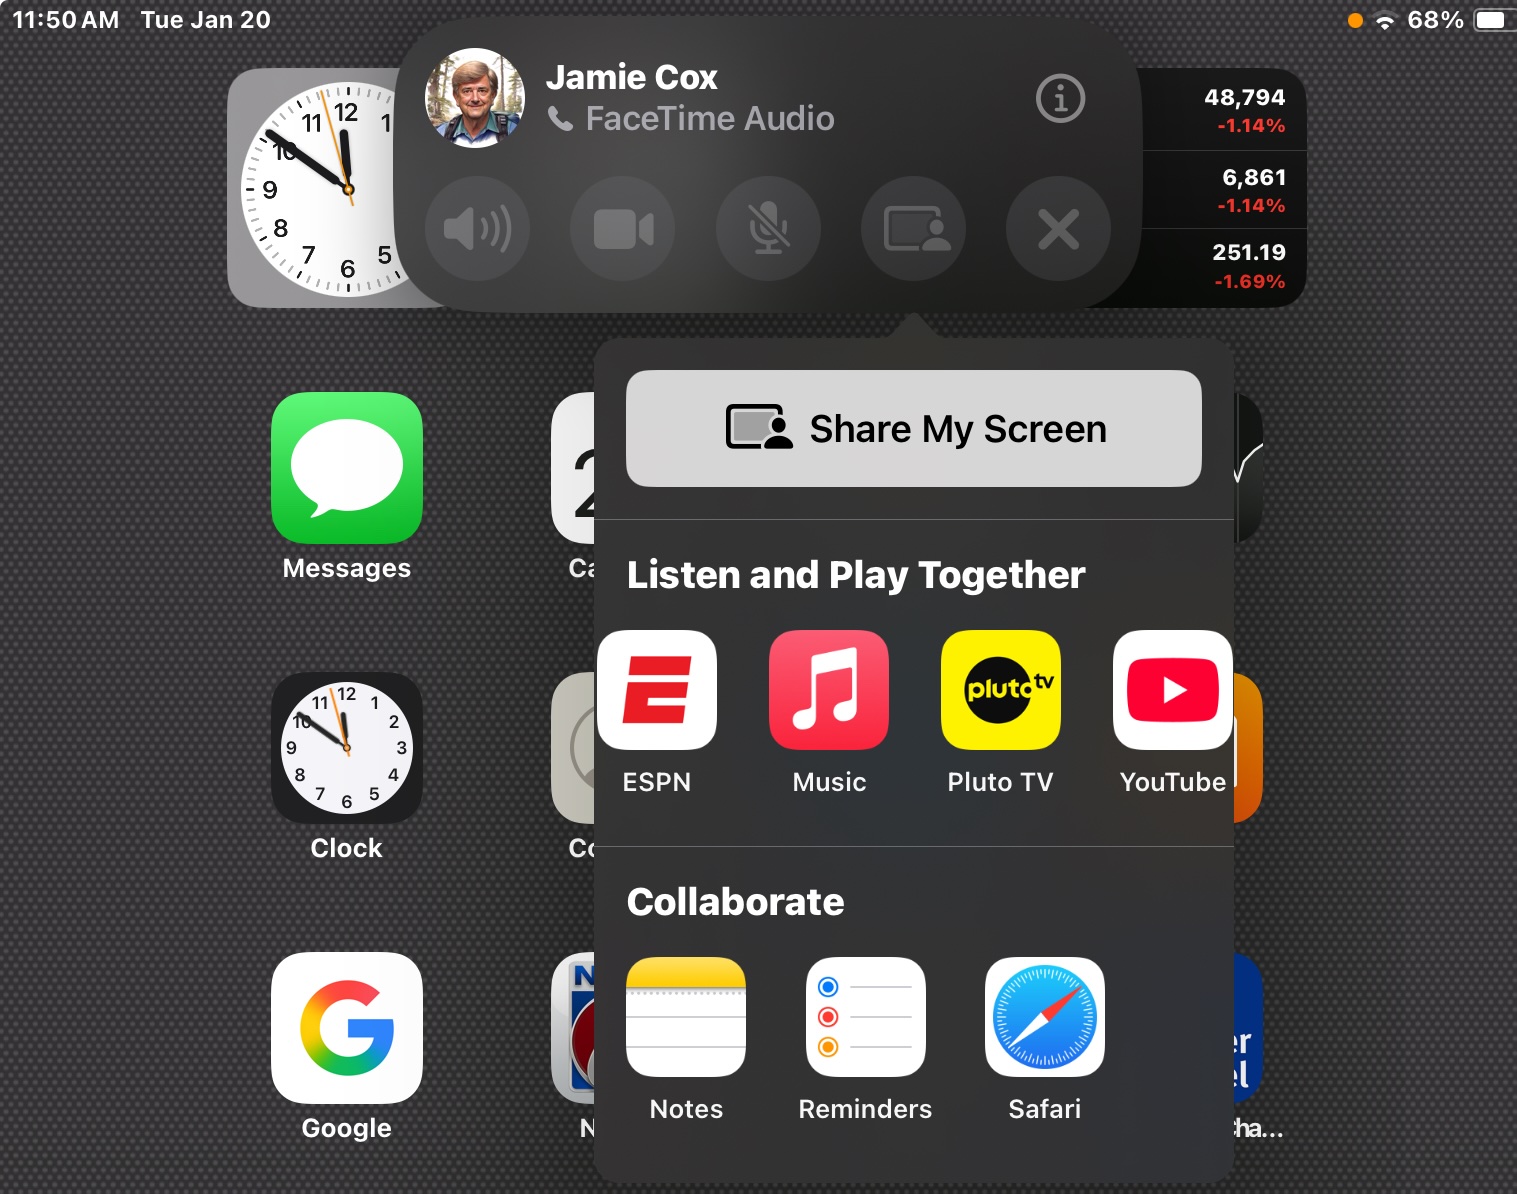
Here’s the FaceTime controls on an iPad. The red X hangs up the call. To the left of that is the screen sharing icon. Pressing that brings up the menu below, where you will want to press Share My Screen.
If you don’t see the screen sharing icon, try switching to a video call, even if both parties don’t have cameras. This sometimes makes the sharing icon appear.
Here’s what a FaceTime Video call looks like on an iPad. In this case, the other device did not have a camera. Note the small green dot at upper right. This is the universal indicator that some App is using your camera. If it appears yellow, that means an App is using your microphone. The region at lower right contains your own camera feed. (from this iPad)

Note that for iOS/iPadOS version 17, Screen Sharing is supported, but not remote control.
Microphones for Macs
If your Mac doesn’t have a microphone, you can use just about any USB microphone. Many are available. If you have a Mac Mini, be aware that it does have built-in speakers, although they are pretty weak. You will want your microphone cord long enough to get it away from the speakers and closer to you.
A great substitute for a USB microphone is a Bluetooth headset or Air Pods. That is recognized as a microphone for FaceTime purposes, and works really well, providing noise isolation.
Air Pods are a great choice for a video or audio call even if your device has a built-in microphone.
Share Your Screen
So, now you are happily sharing your screen, or your caller’s screen. You can converse back and forth discussing and explaining what you both see on screen. This is what you came for. Enjoy!